

Until just two days before SHOT Show 2025, I had never owned a pickup. Before pulling the trigger on the truck I already knew I would be installing a DECKED drawer system to keep “belongings” secure inside the bed, and that has proven to be a fantastic choice. A truck cap / topper was absolutely on the wish list as well, but I found most of them to be cost-prohibitive.
Sure, there are fiberglass and plastic ones, but even those were generally priced higher than I could afford or wanted to spend on something that didn’t look or feel quite right for my use. There are a couple of soft caps — canvas over a metal frame — but even those hit $2k pretty quickly and weren’t my jam. I wanted locking. I wanted metal.
While looking yet again at the truck topper products from a South African company and trying to figure out how to find a used one or sell some plasma to come up with the over $4000 asking price, I found OPENROAD 4WD. OPENROAD’s truck caps checked all of my boxes, but came in at a beyond-competitive price (especially when I was shopping around last Labor Day), and here we are today after over six months of ownership.
In case you’re an extreme impulse buyer I’ll put this right up top: when I informed OPENROAD of the YouTube video and soon-to-come SNW review they provided a coupon code for our viewers/readers. Use code SNW10 on their website for 10% off (I believe it works on all OPENROAD products, from camp chairs to battery-powered coolers to winches to truck caps).
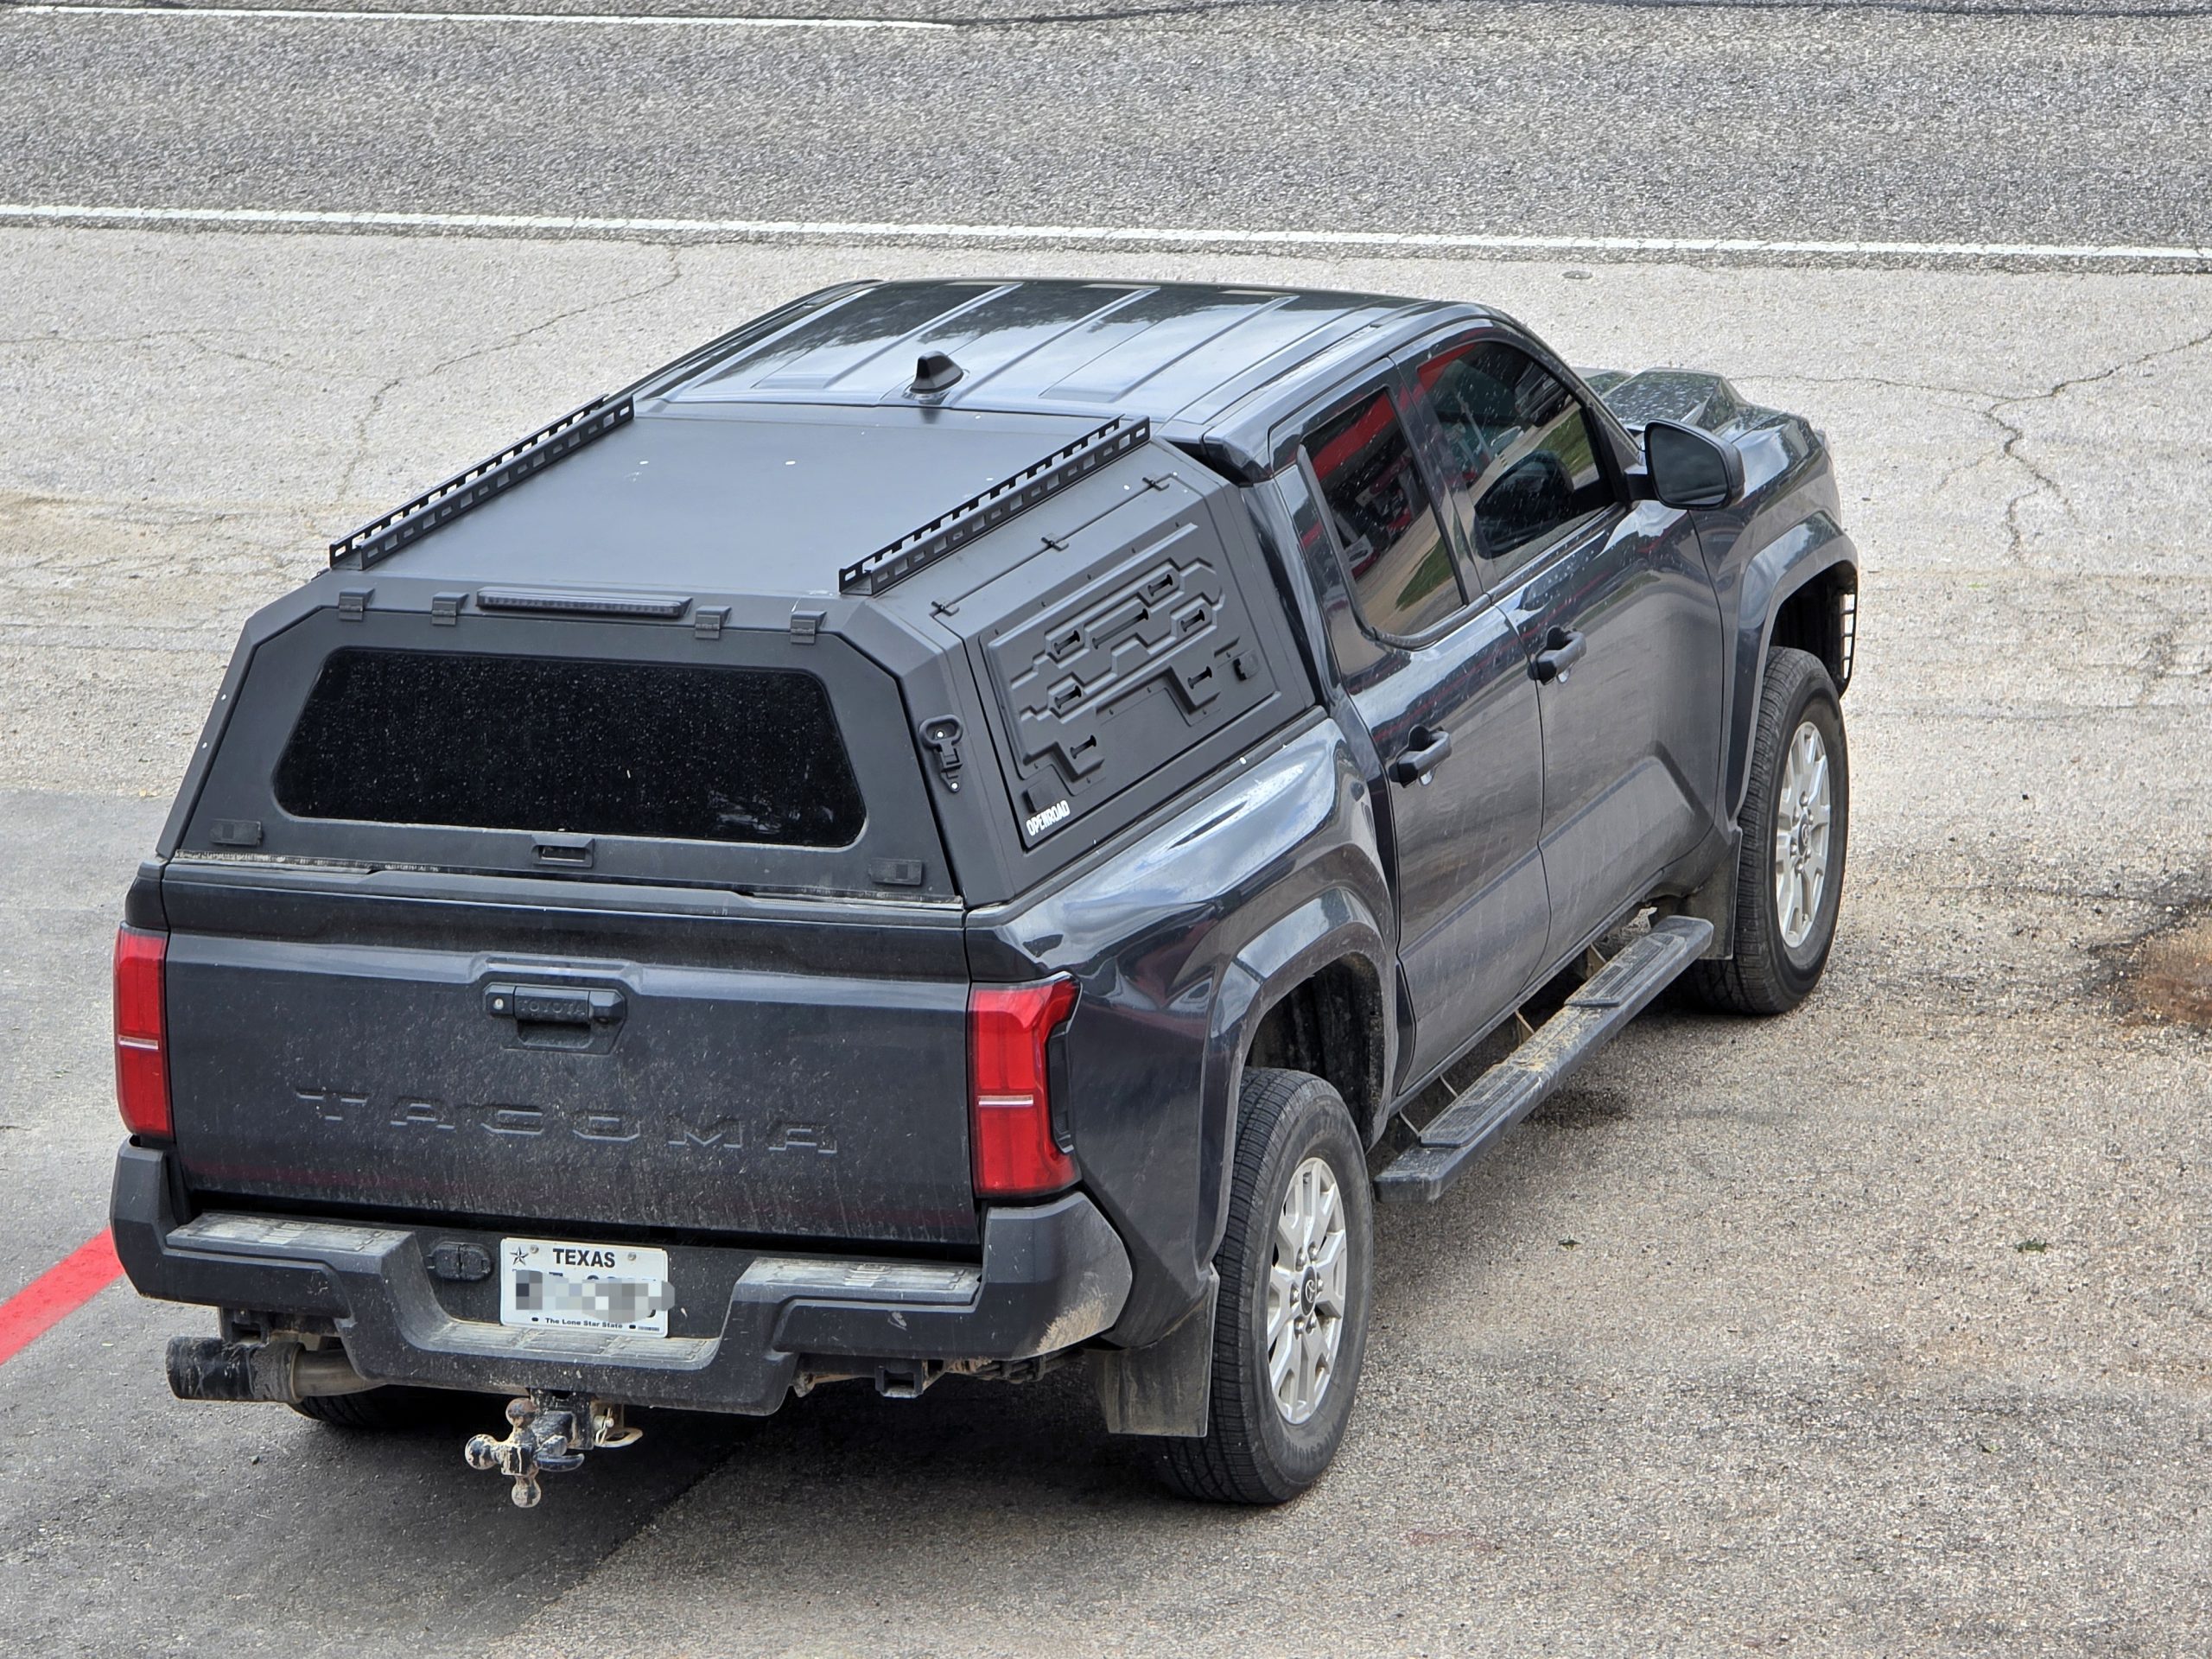
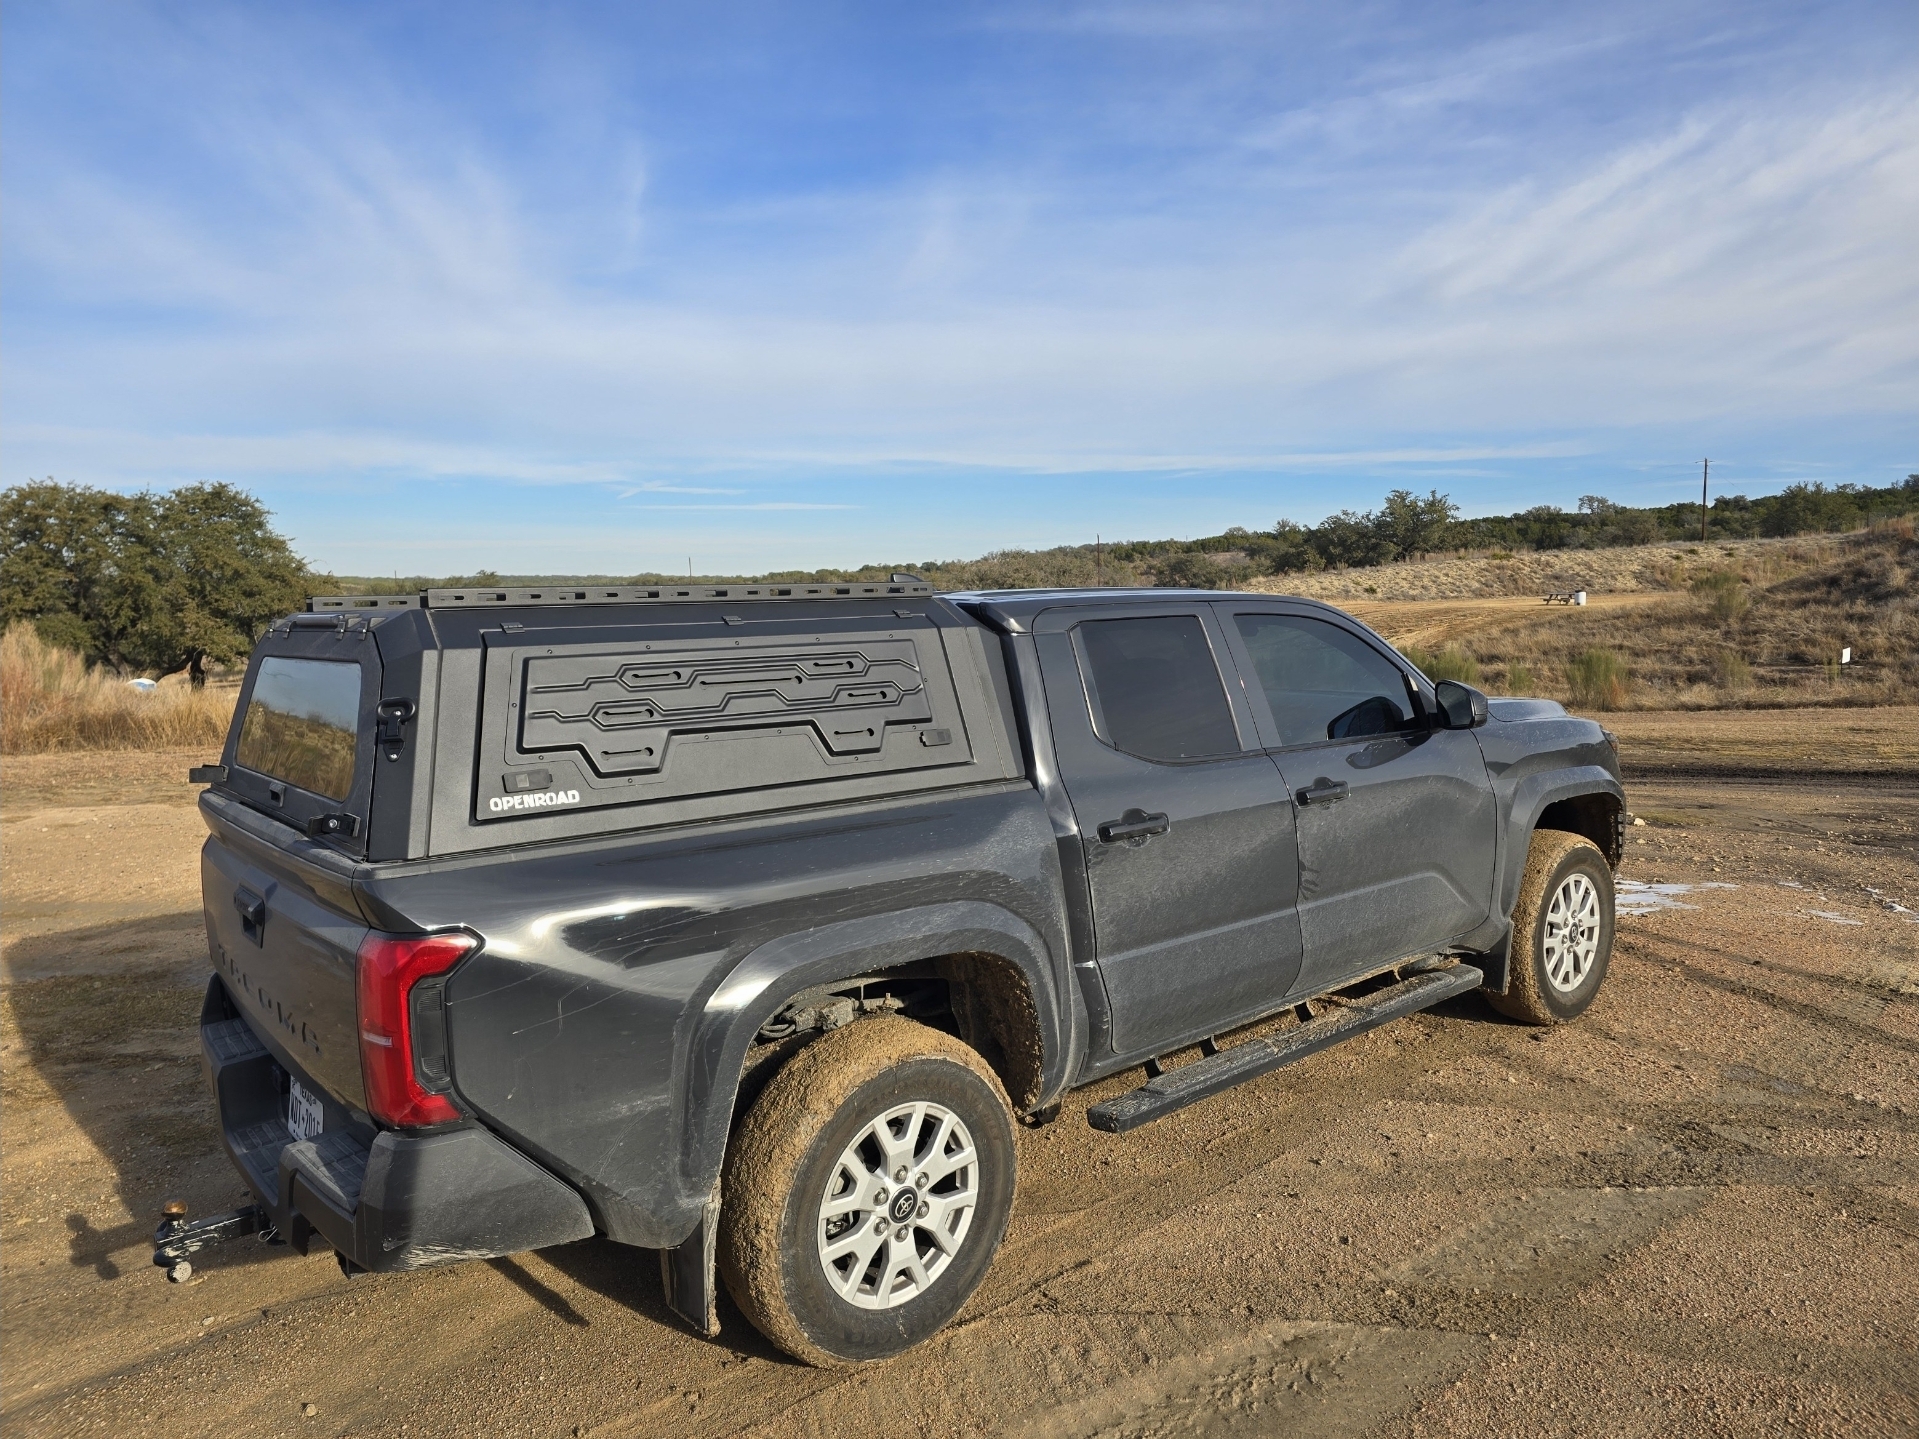
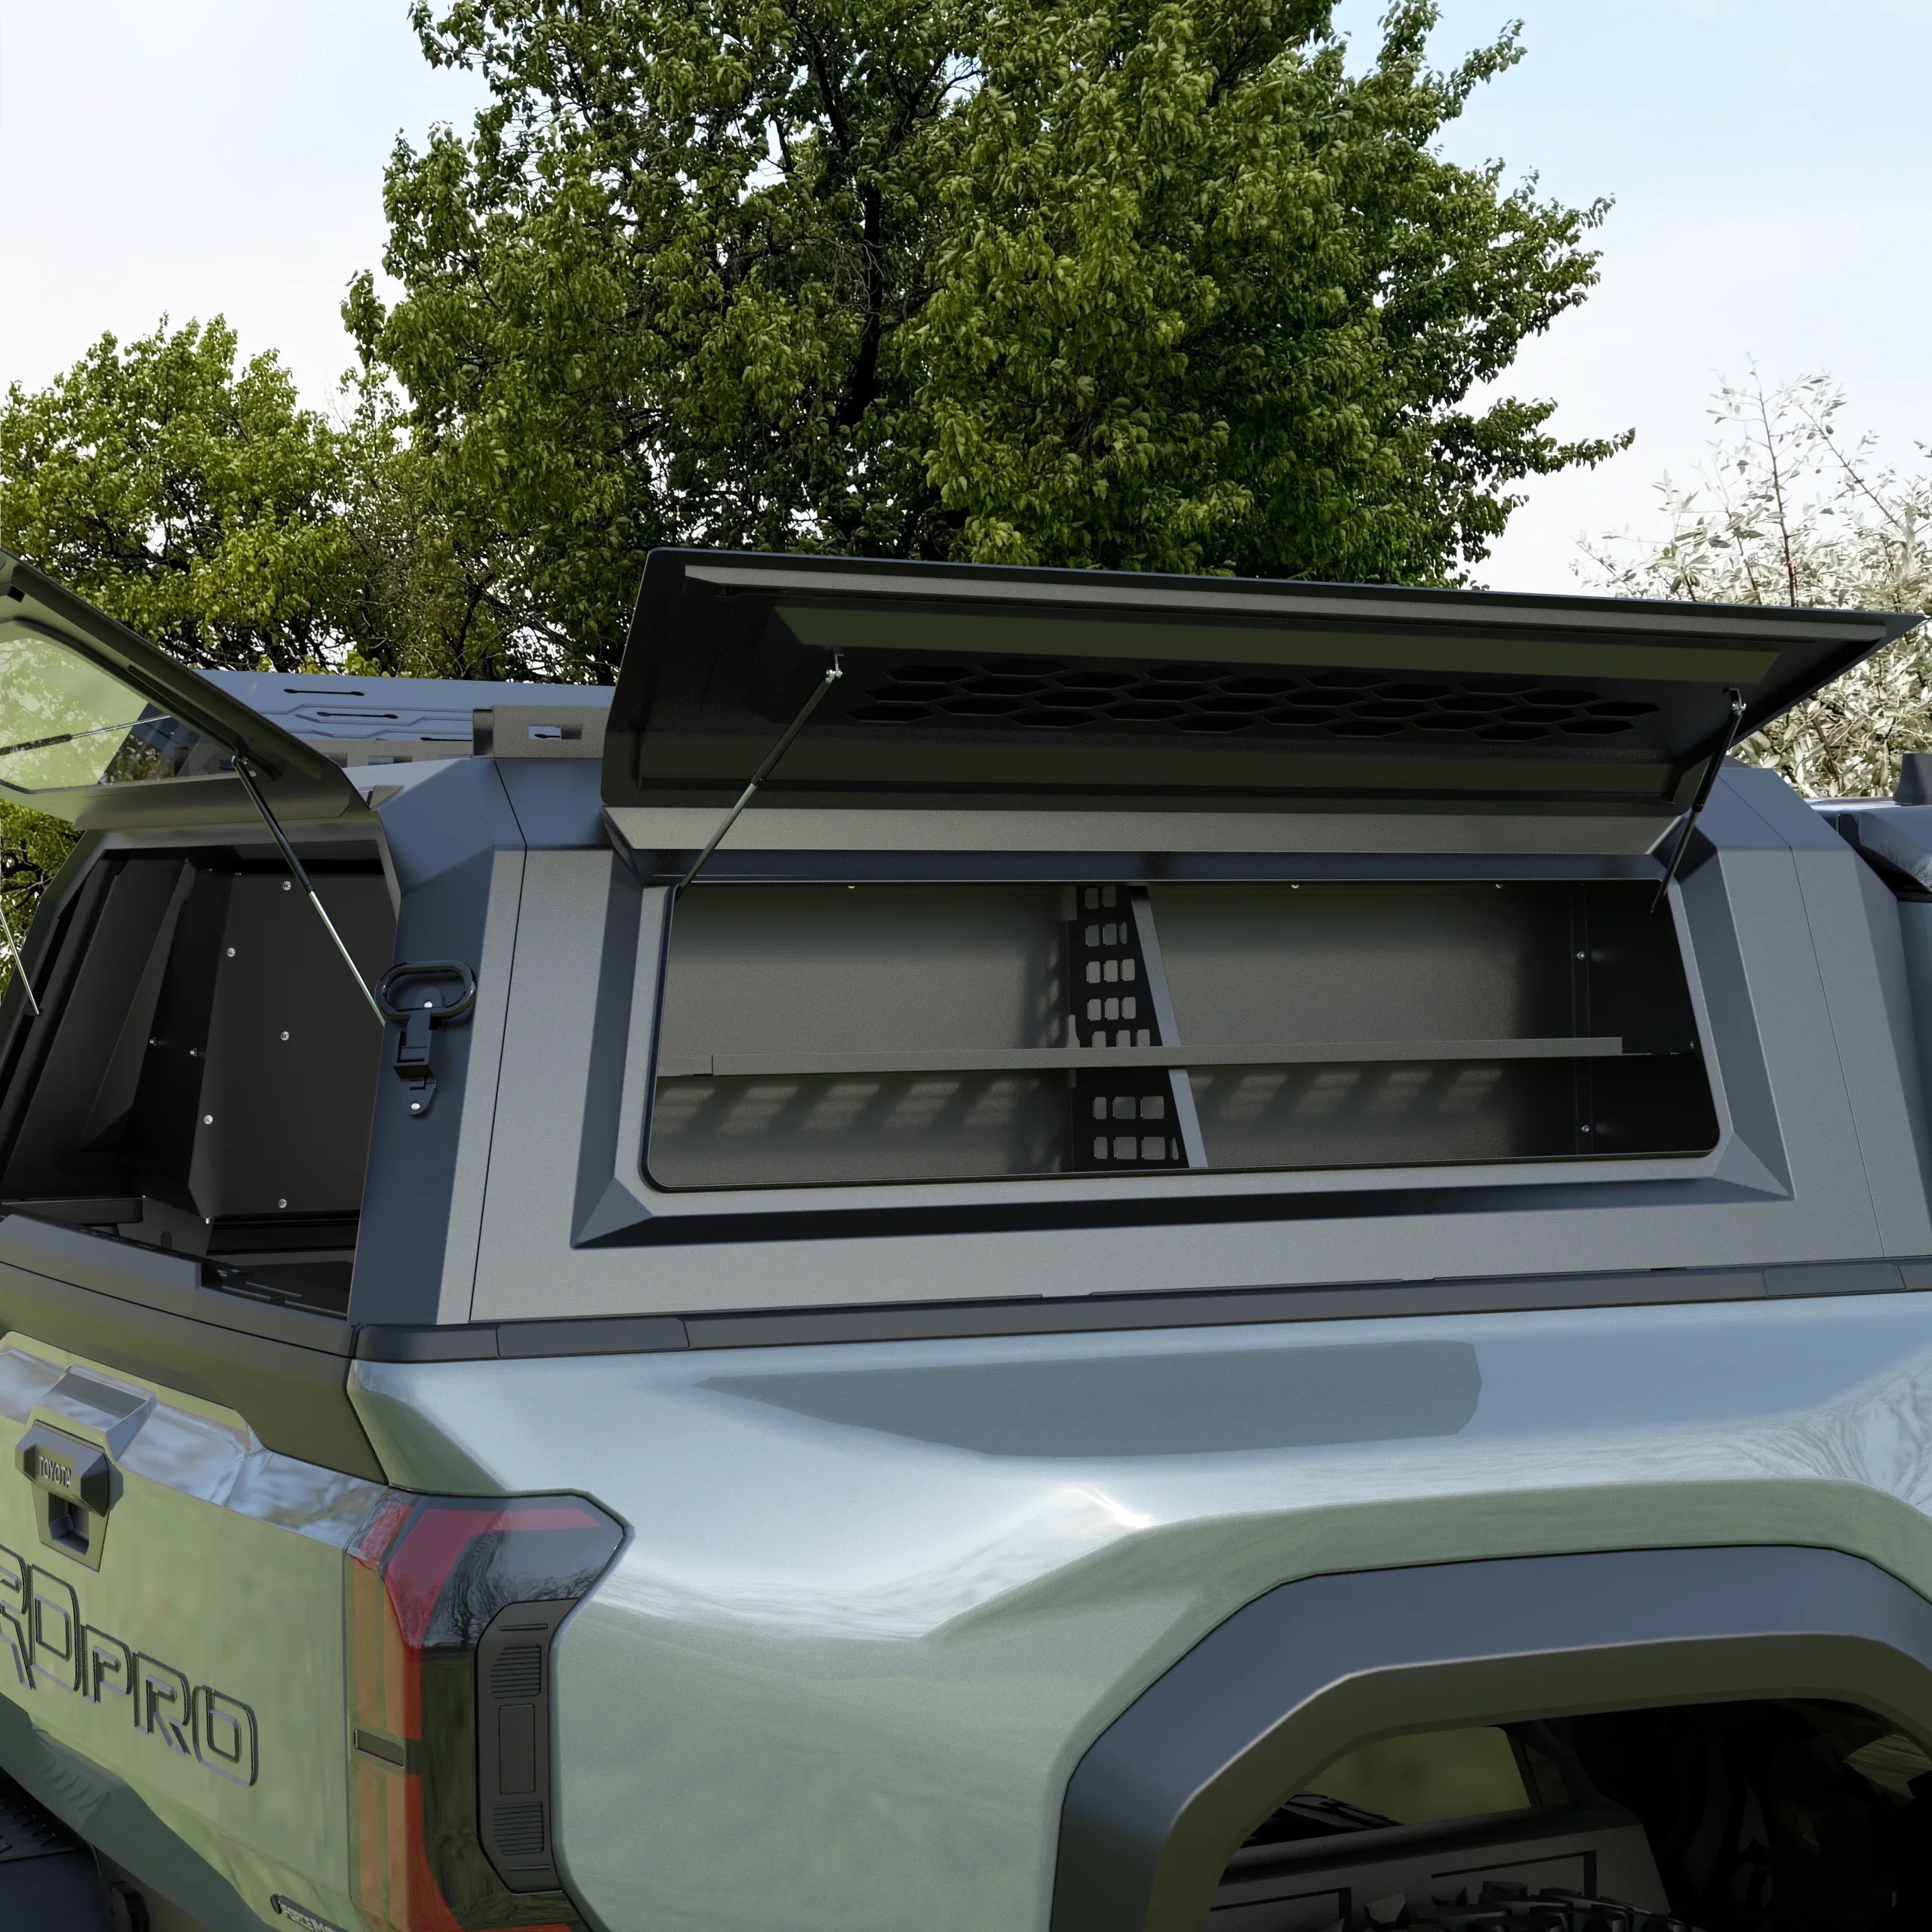
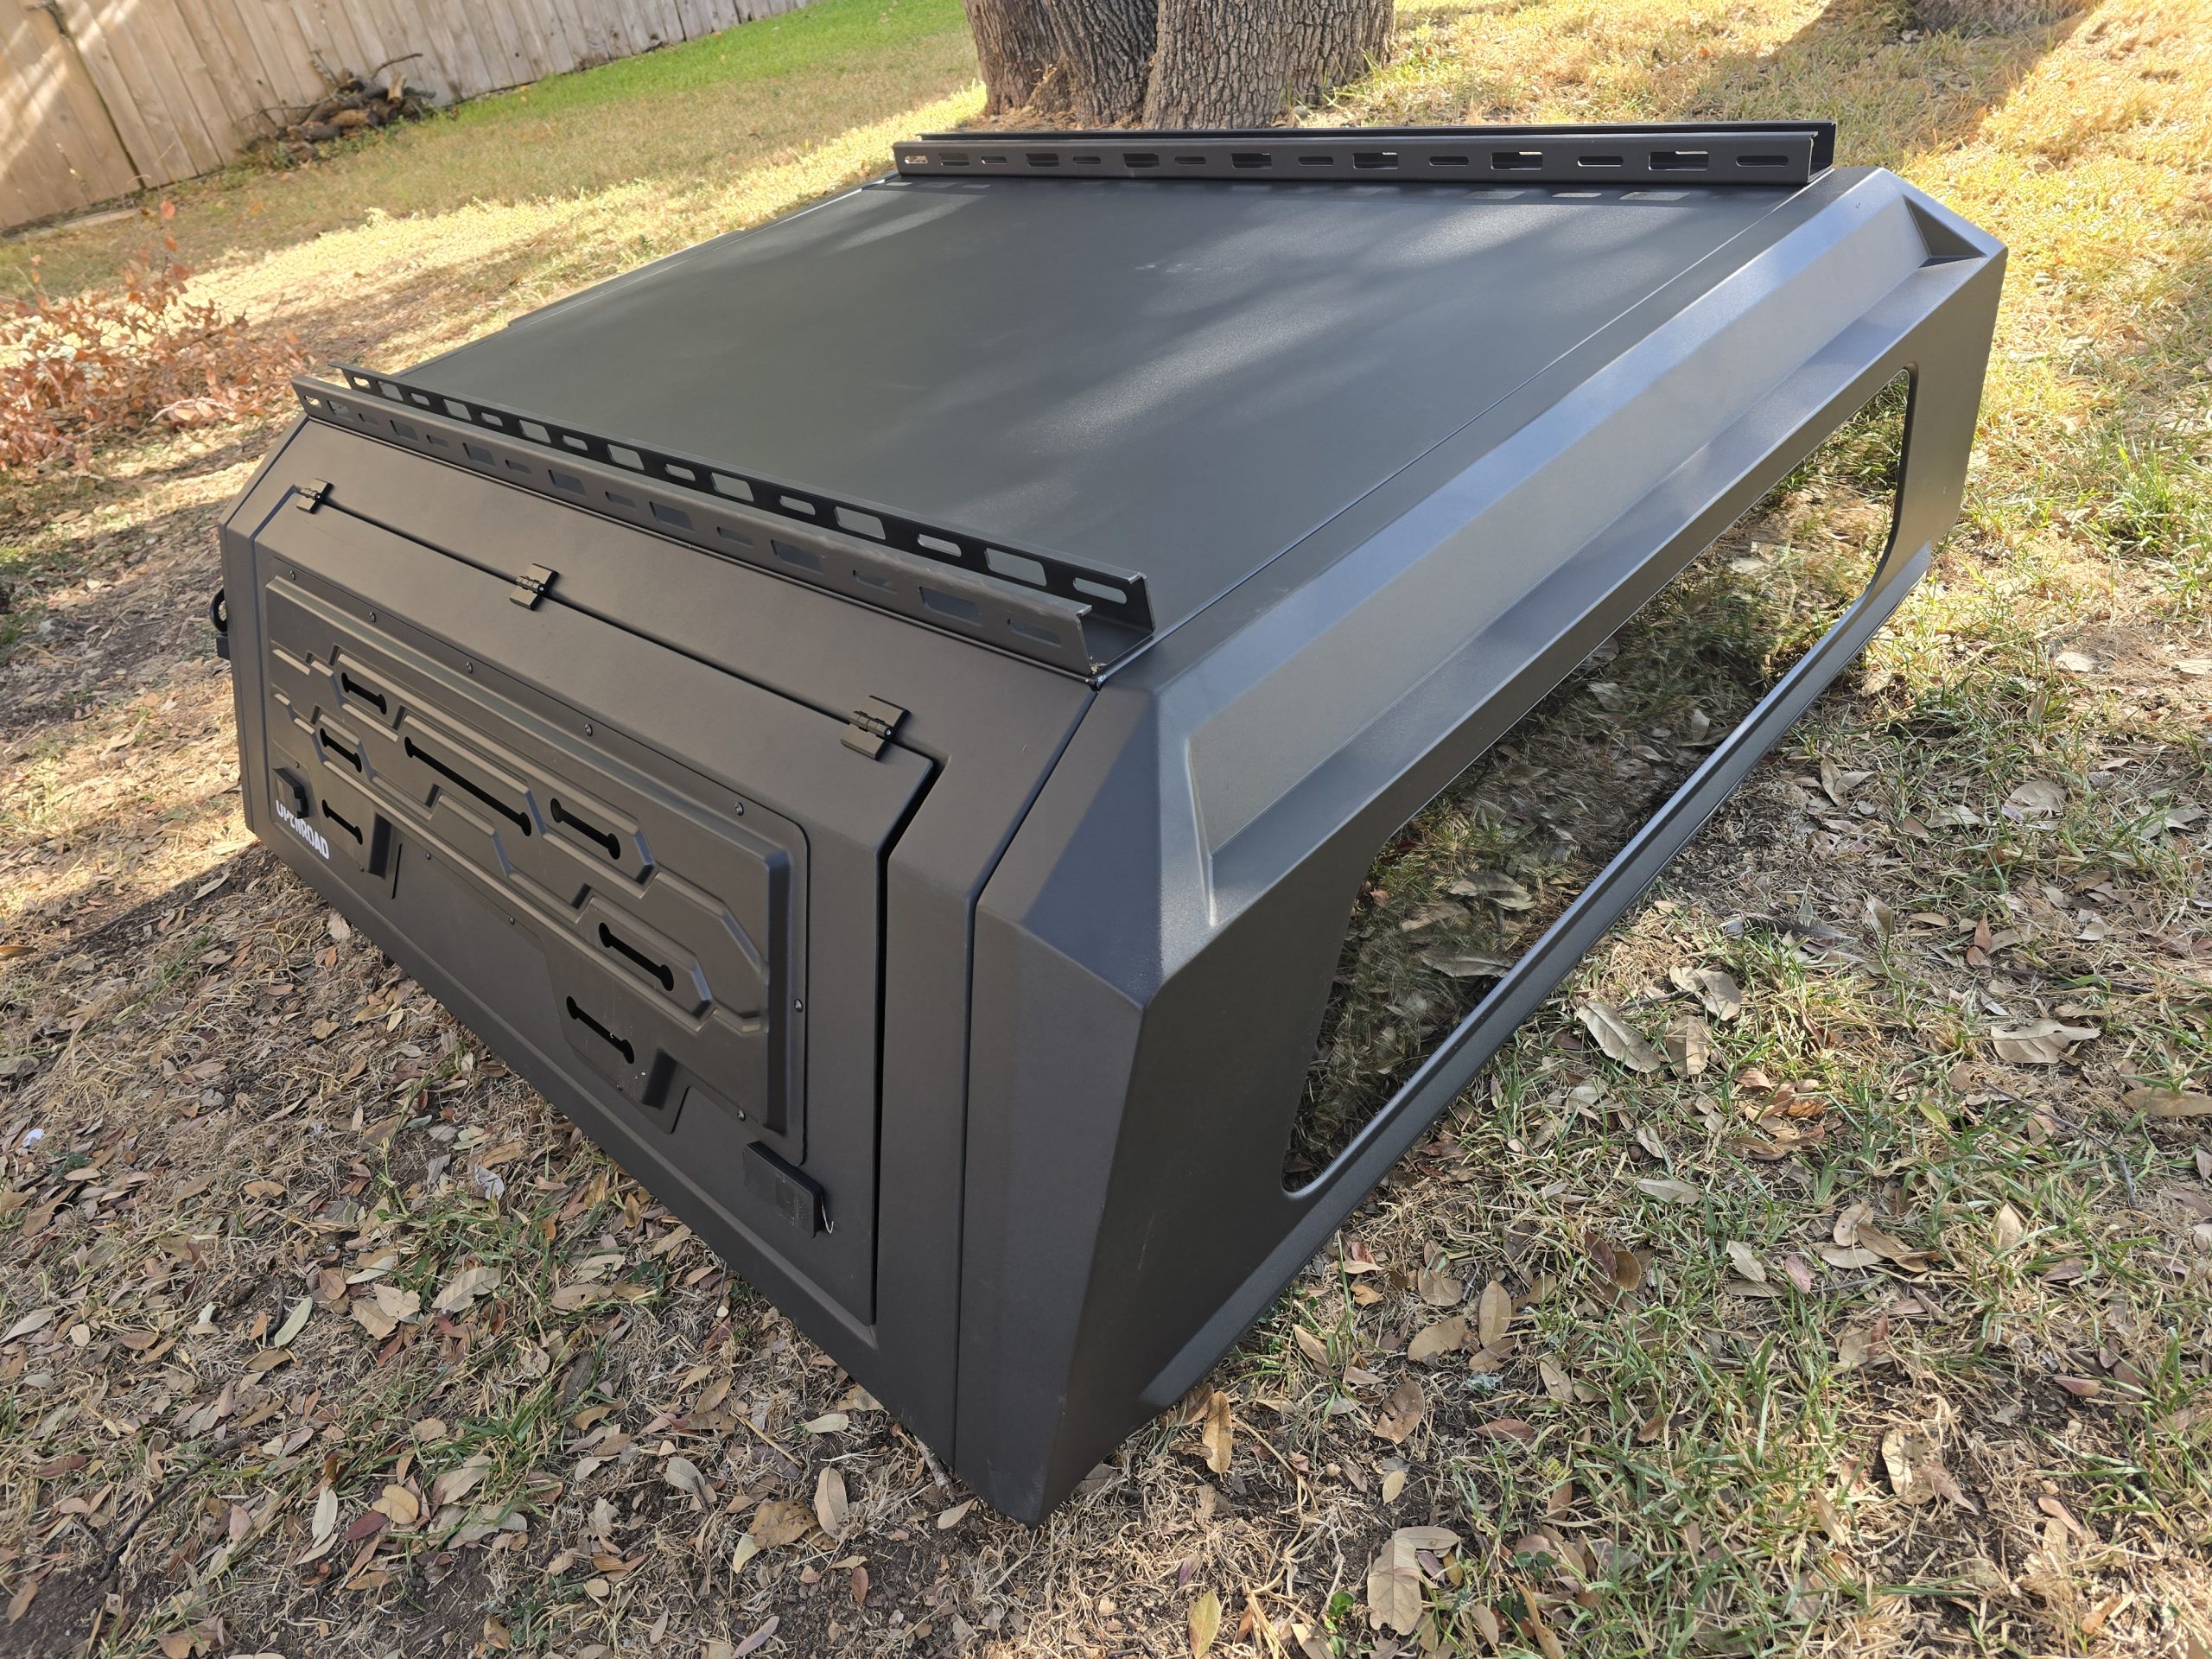
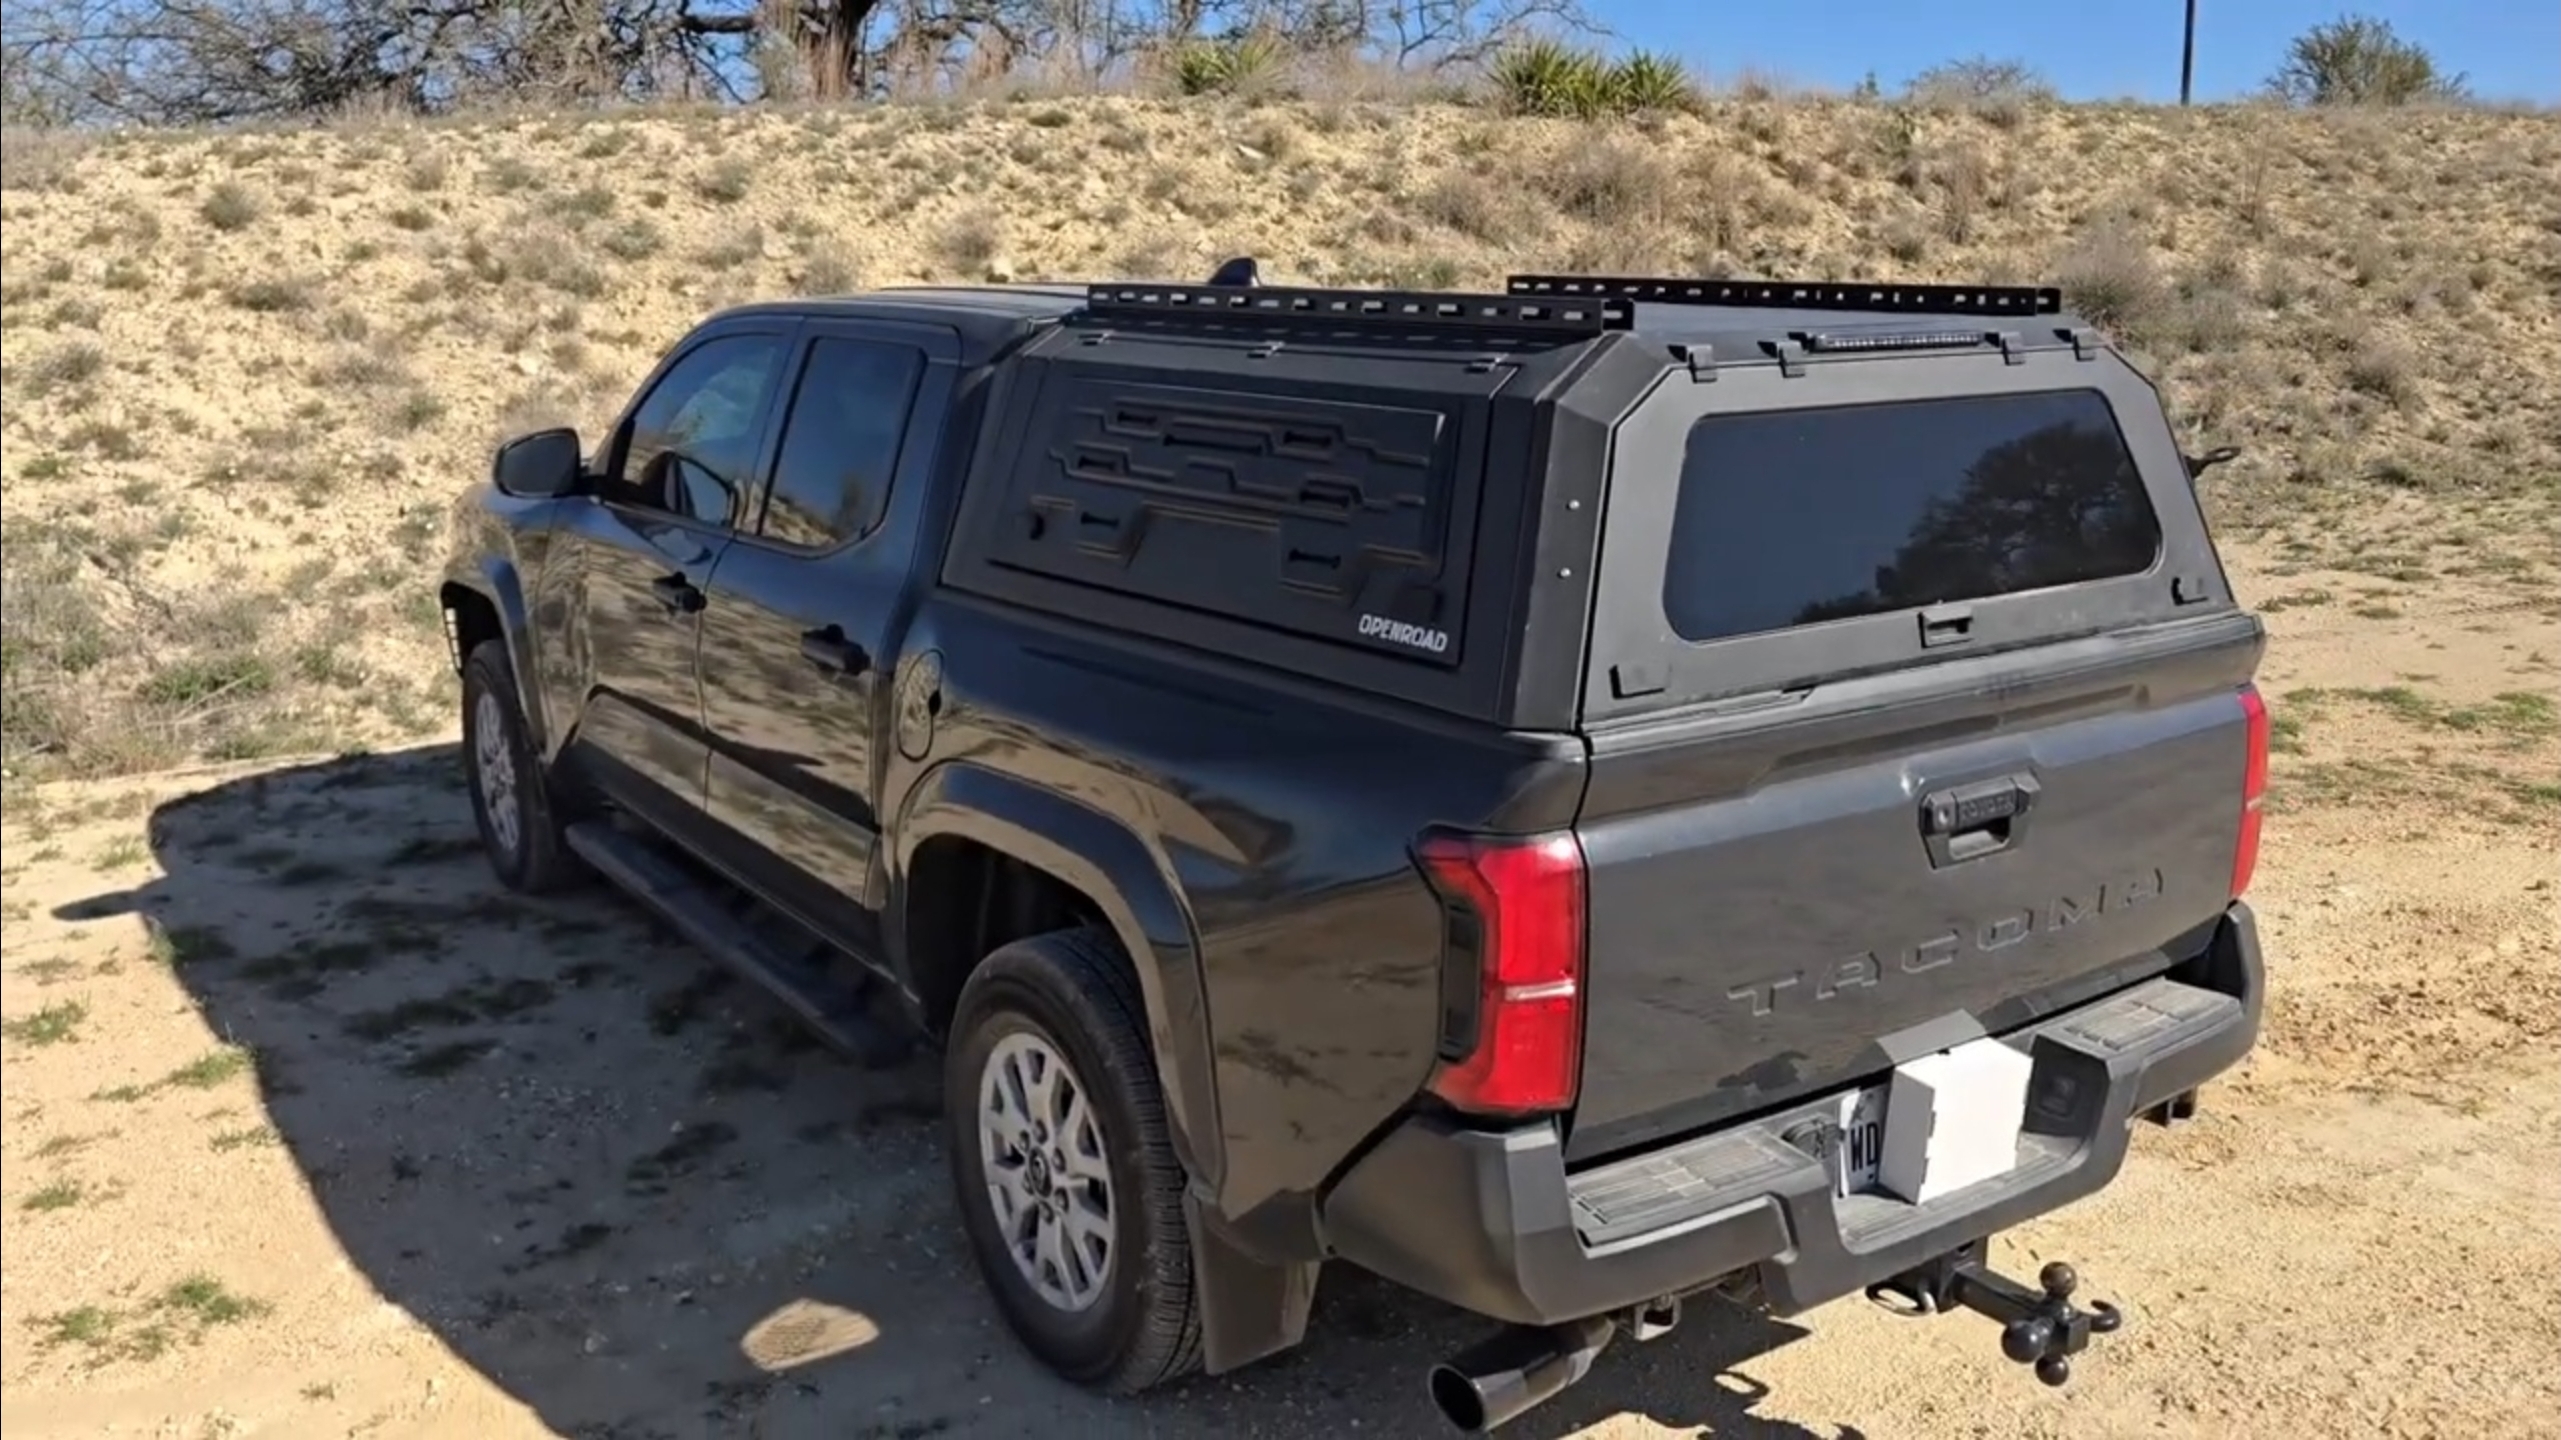
Made from powder coated aluminum with tempered glass windows front and rear — the rear is security tinted — the cap is both strong and lightweight.
In fact, its 440-pound dynamic and 1,100-pound static load ratings are comparatively very high, though its 123-pound total weight is quite low. Most of the steel ones I was originally lusting after weigh 200-300 pounds, and I don’t recall seeing one with higher load ratings.
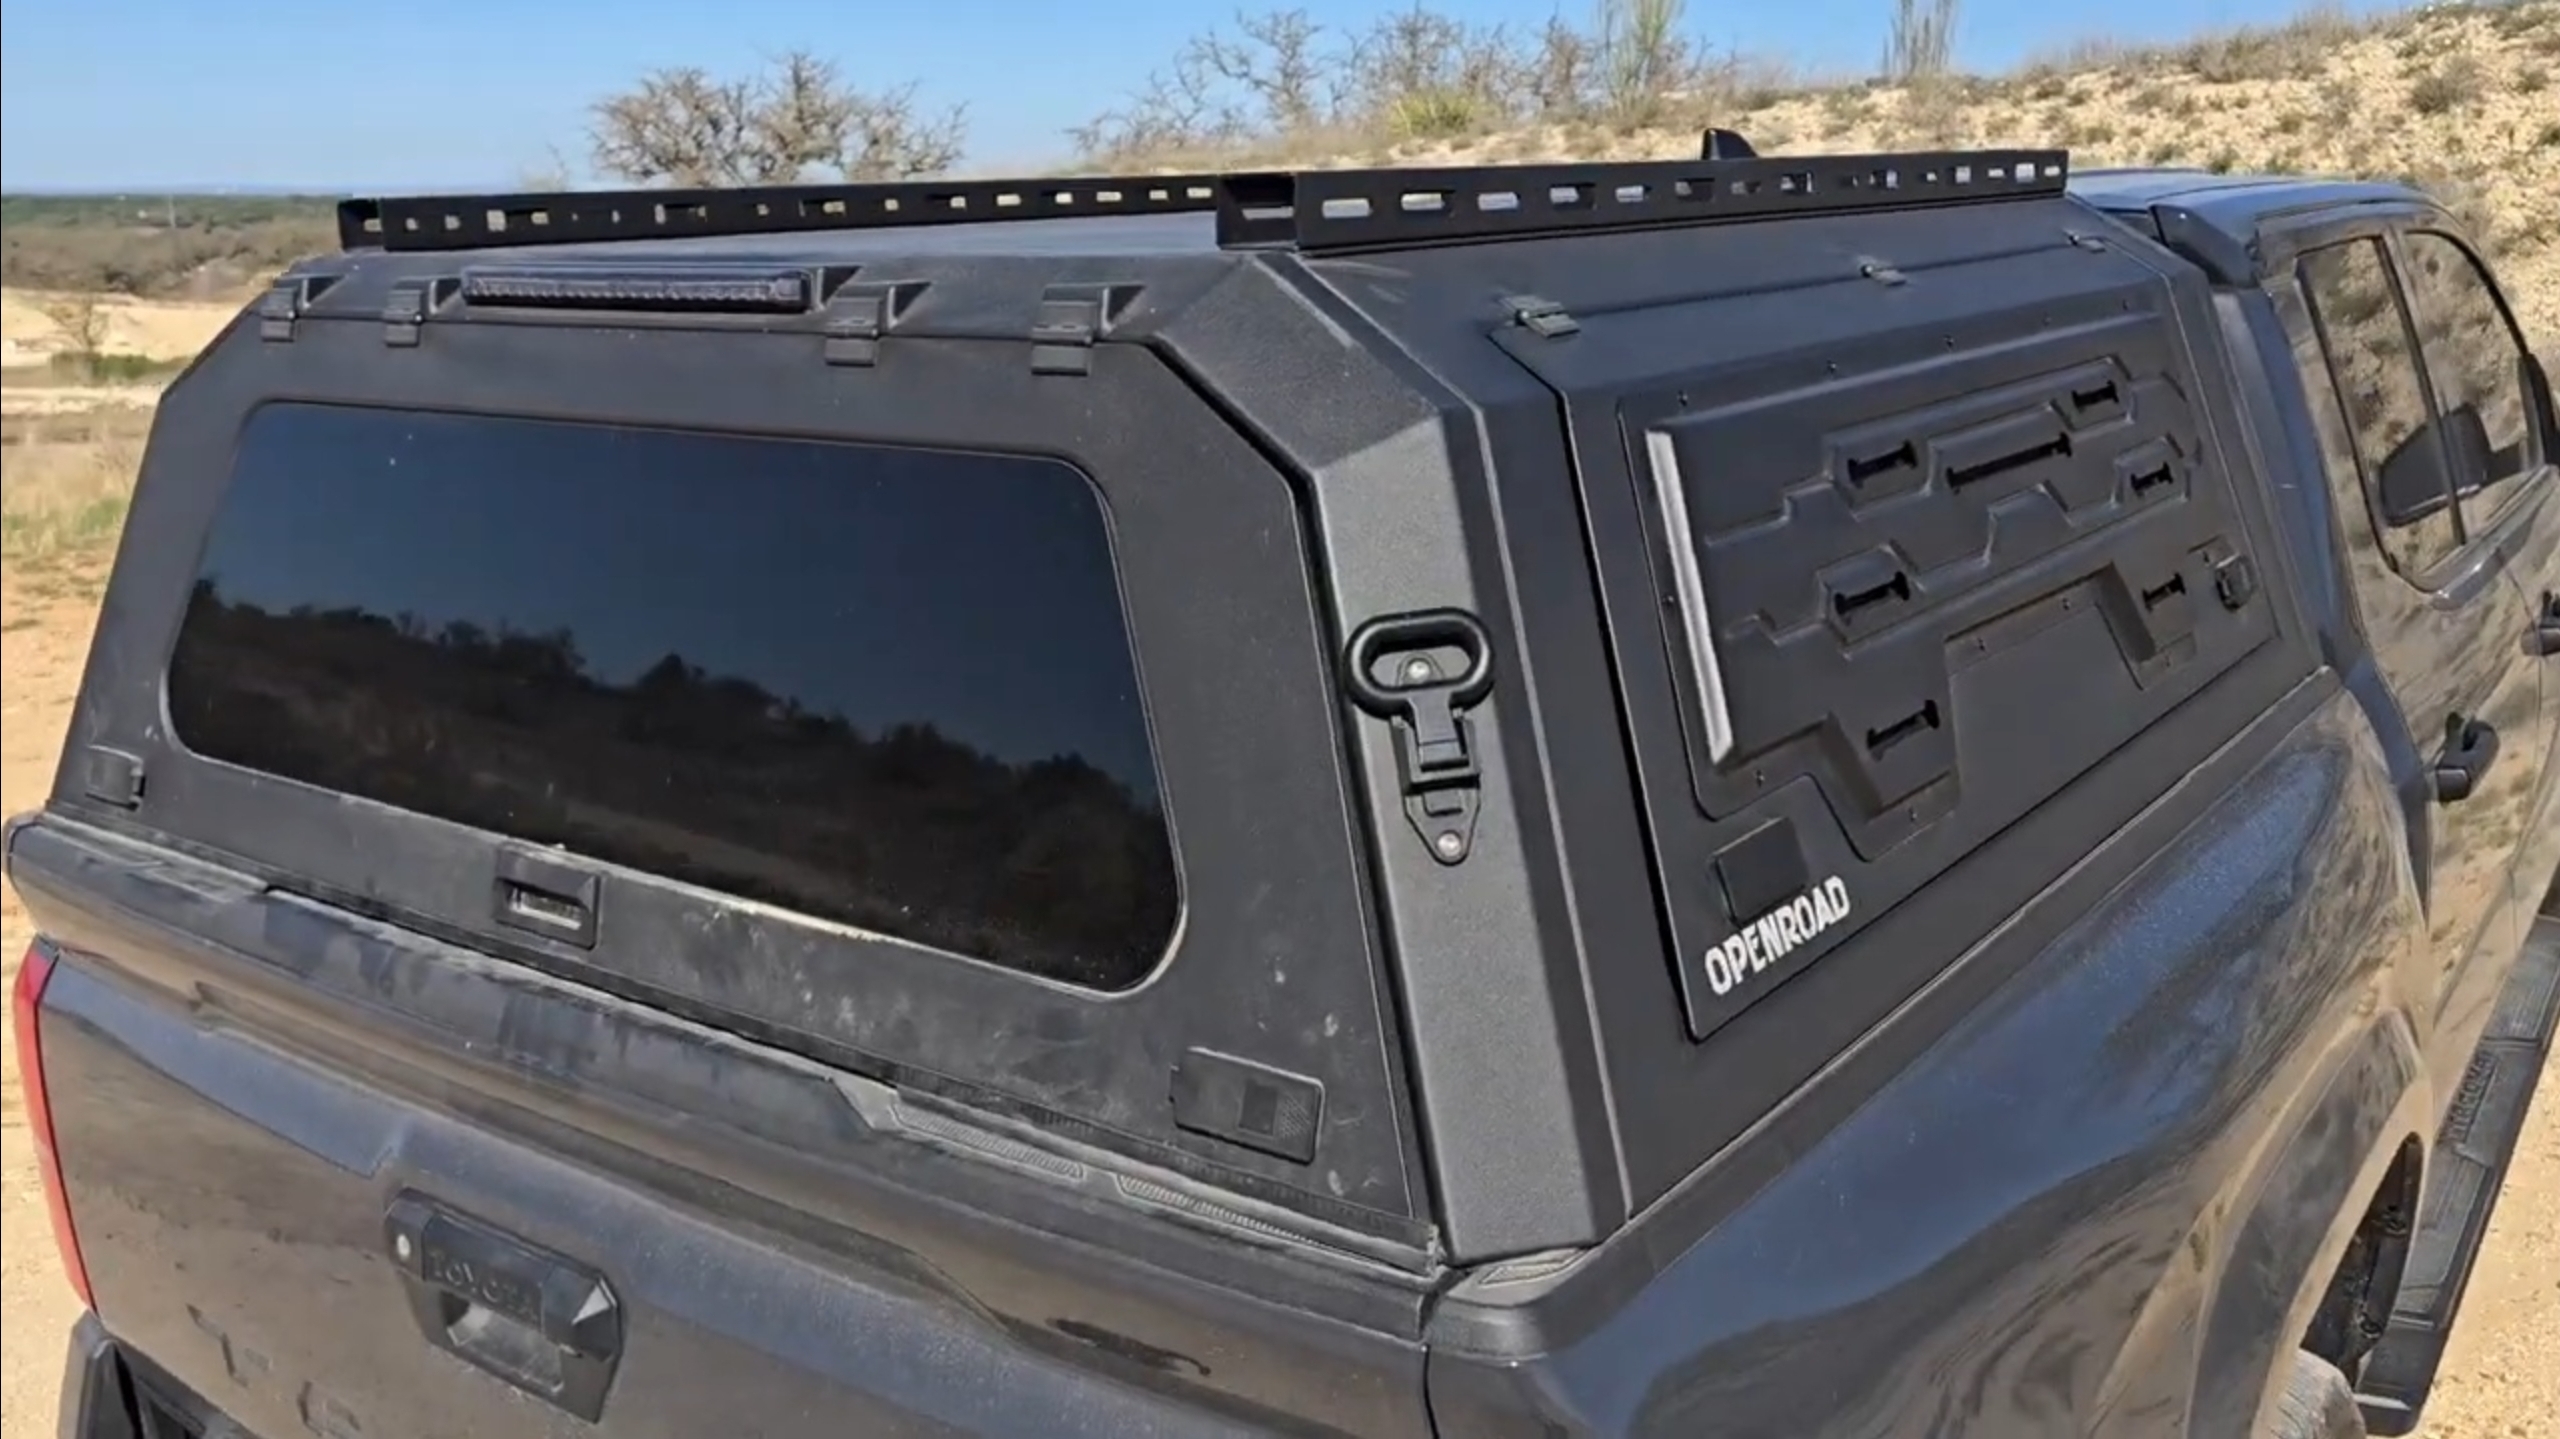
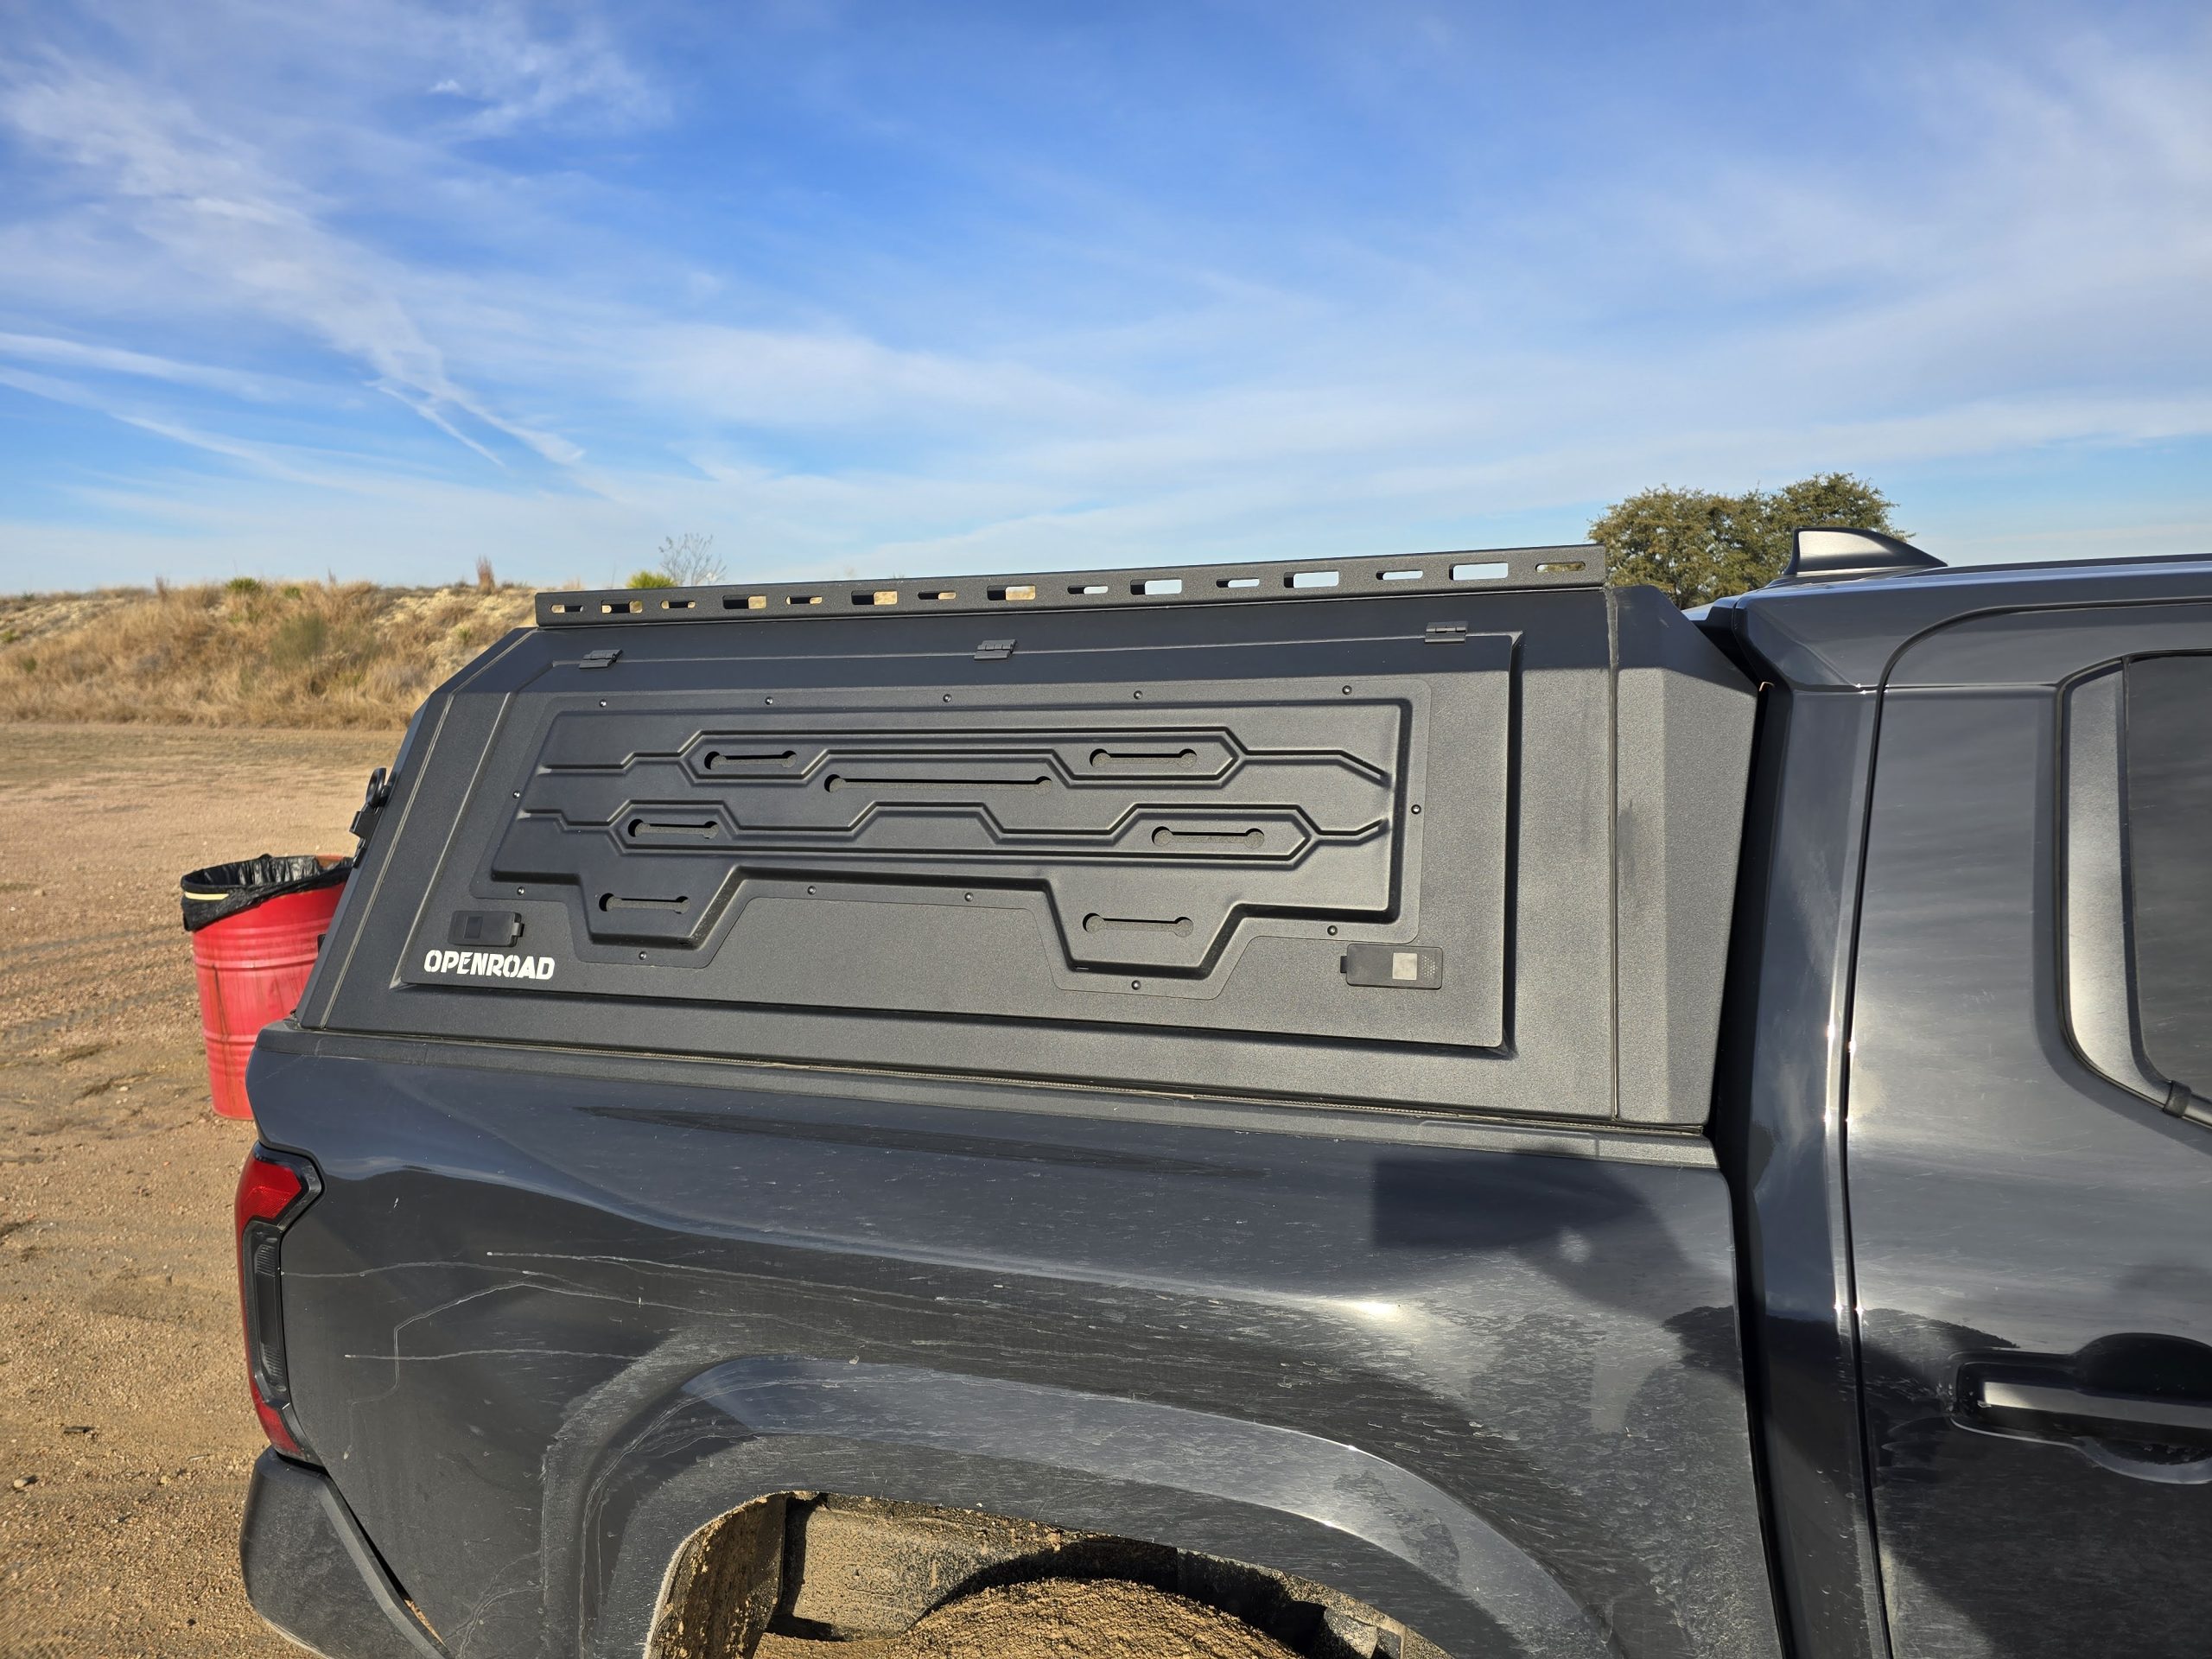
This is exactly as the cap comes from OPENROAD, with none of the many available accessories added. There’s one fold-down step included so you can step onto the bumper or tail gate and up onto the step, then access whatever’s up top. I chose solid aluminum side doors, which include an accessory panel with slots for attaching jerry cans, a high-lift jack, traction boards, etc.
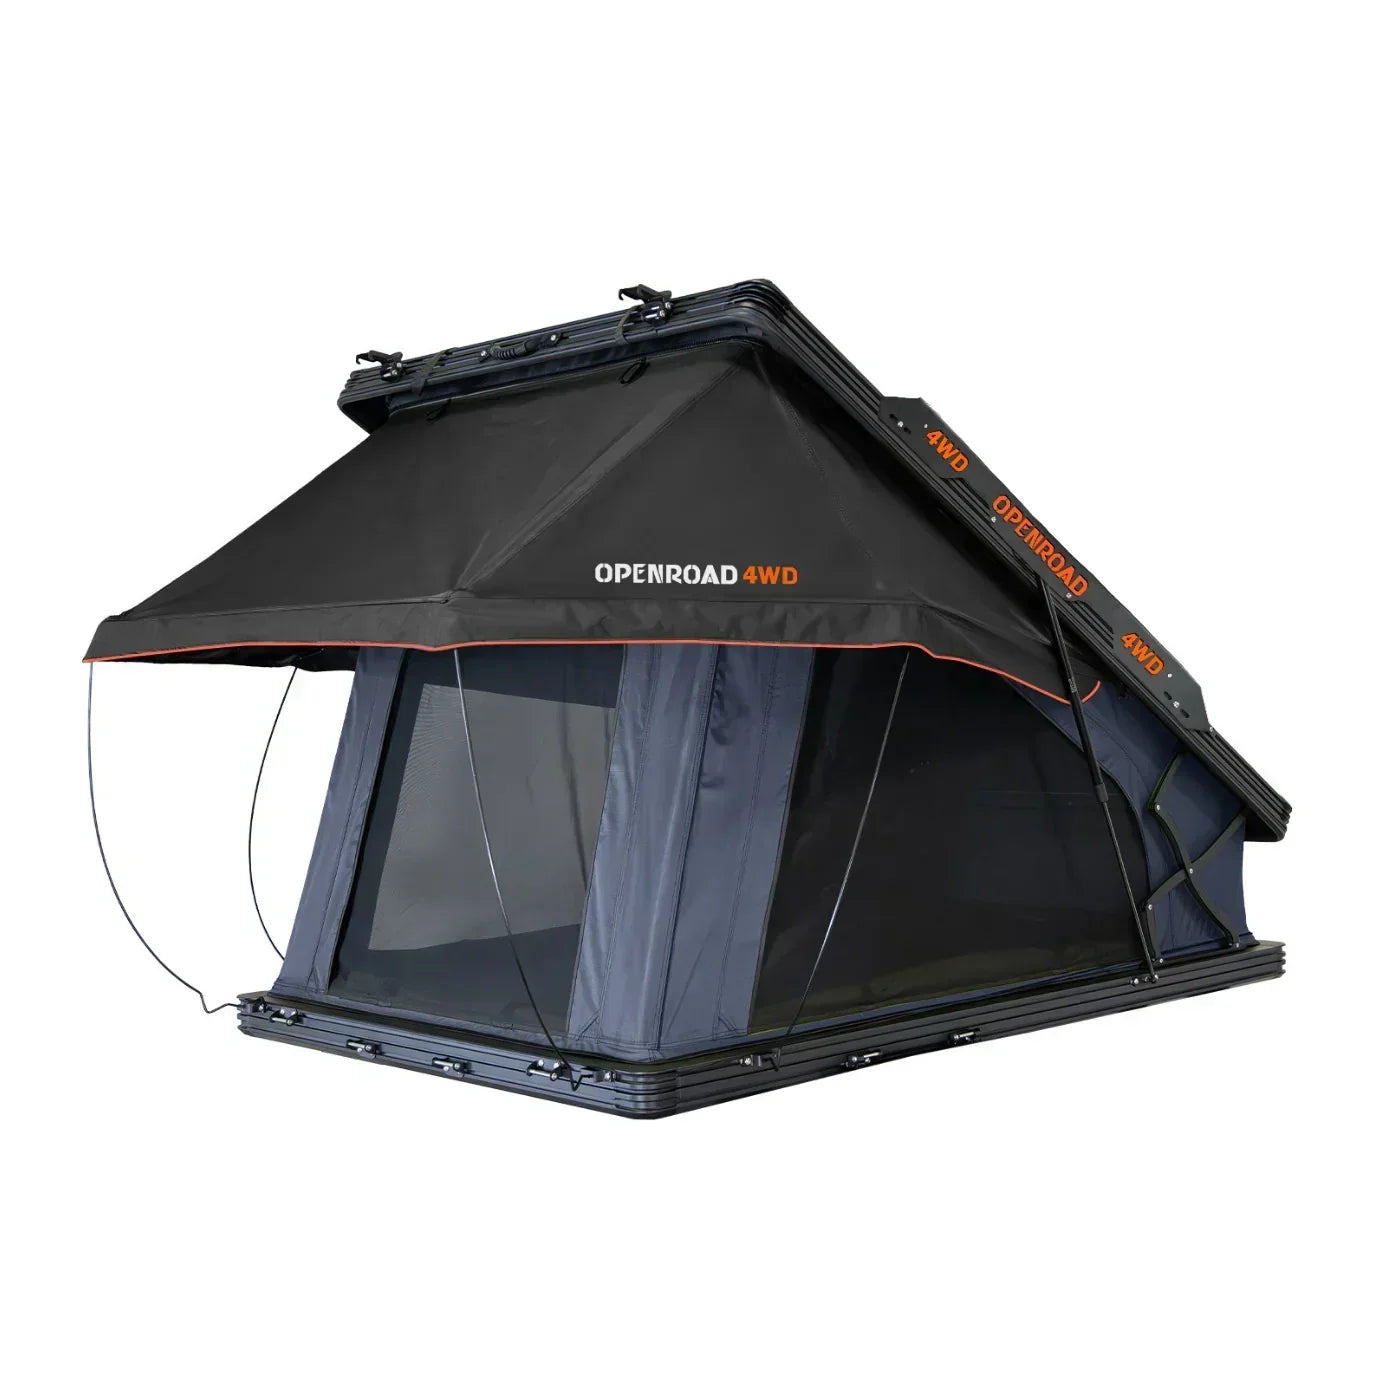
Up top are two rails running front-rear. Cross bars are an optional accessory as are other roof-mounted things like tents and awnings.
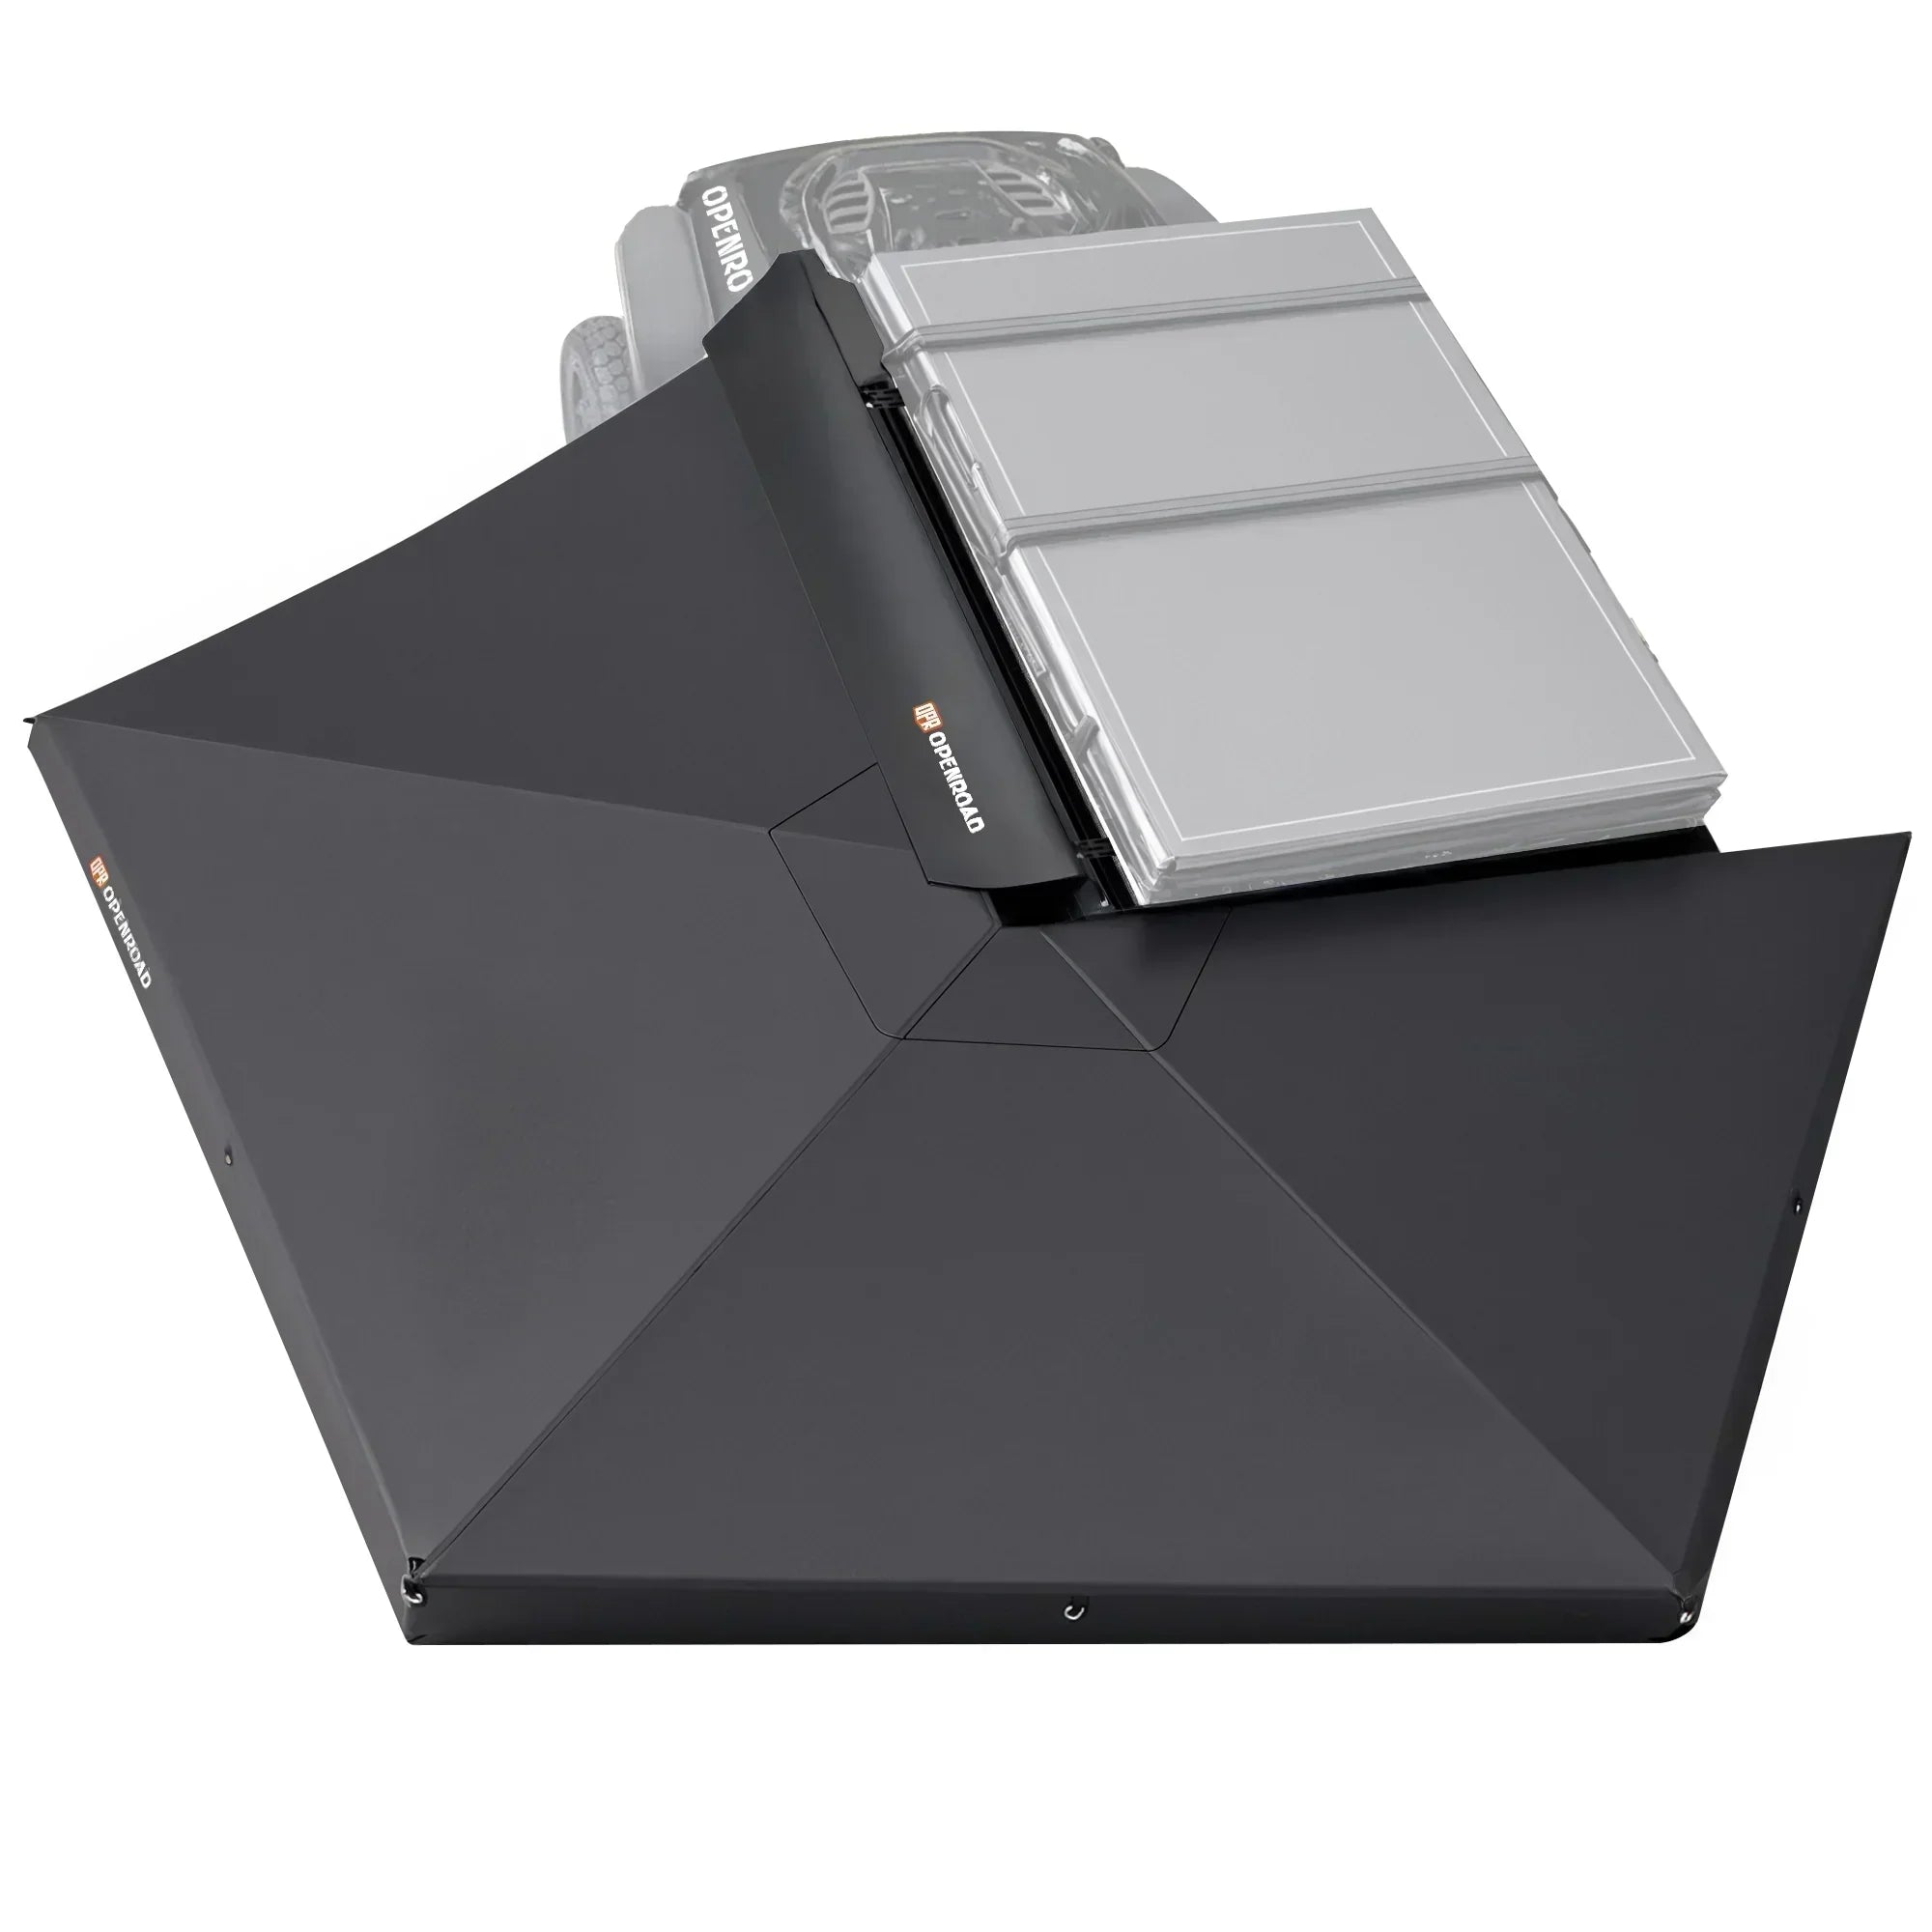 This big ol’ swing-out awning is likely the first accessory I’m going to pick up. When Dan and I are out on the range under the Texas sun, a little shade goes a long way.
I wish I [still] did, but these days I can’t put a tent or awning side walls to use so those are off the list. Cool, though! There’s even a version of the truck cap (here) with a very slick looking pop-up tent built in.
While I very much enjoy being able to access the bed through the side doors, I’ll likely install a storage box in one of them. Driver side, I guess? It seems like a darn handy place to keep certain go-to items.
Anyway!…enough with the wishlist and future plans and back to what I actually own and have used for over half a year.
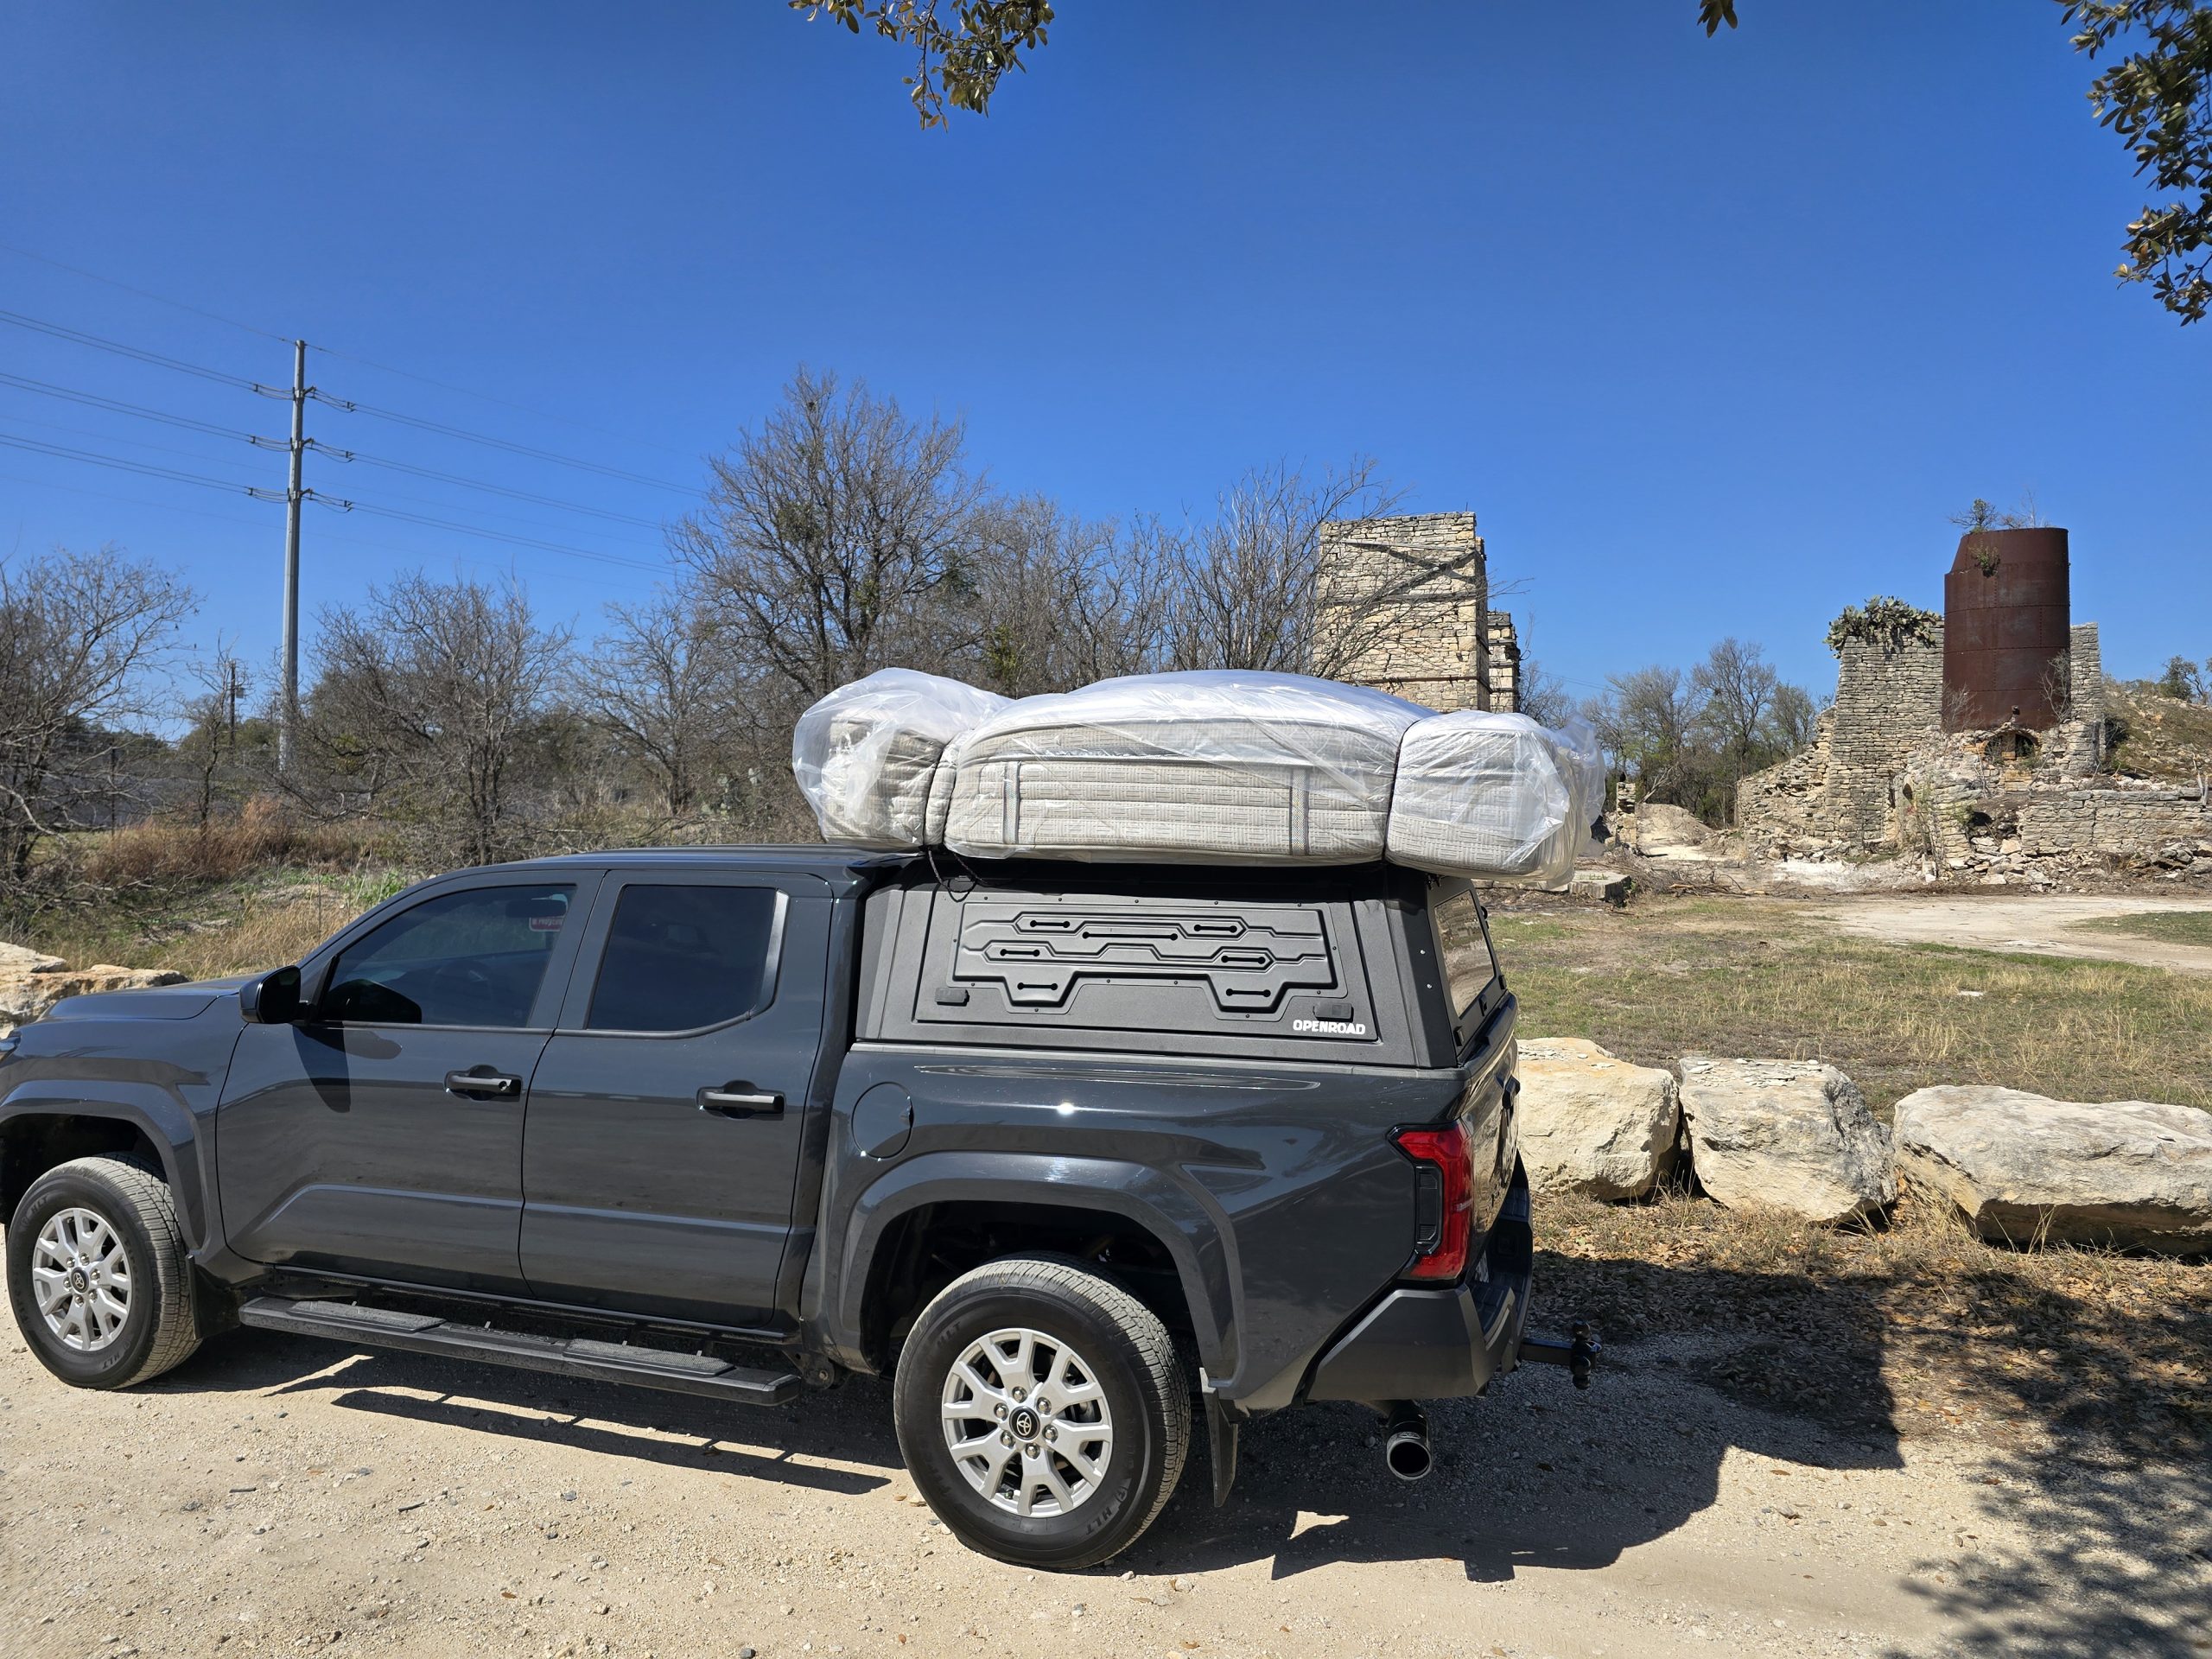
I haven’t yet tested the limits of the OPENROAD truck cap’s load bearing capacity, but I have had a couple of mattresses up there. The side rails made them really easy to tie down.
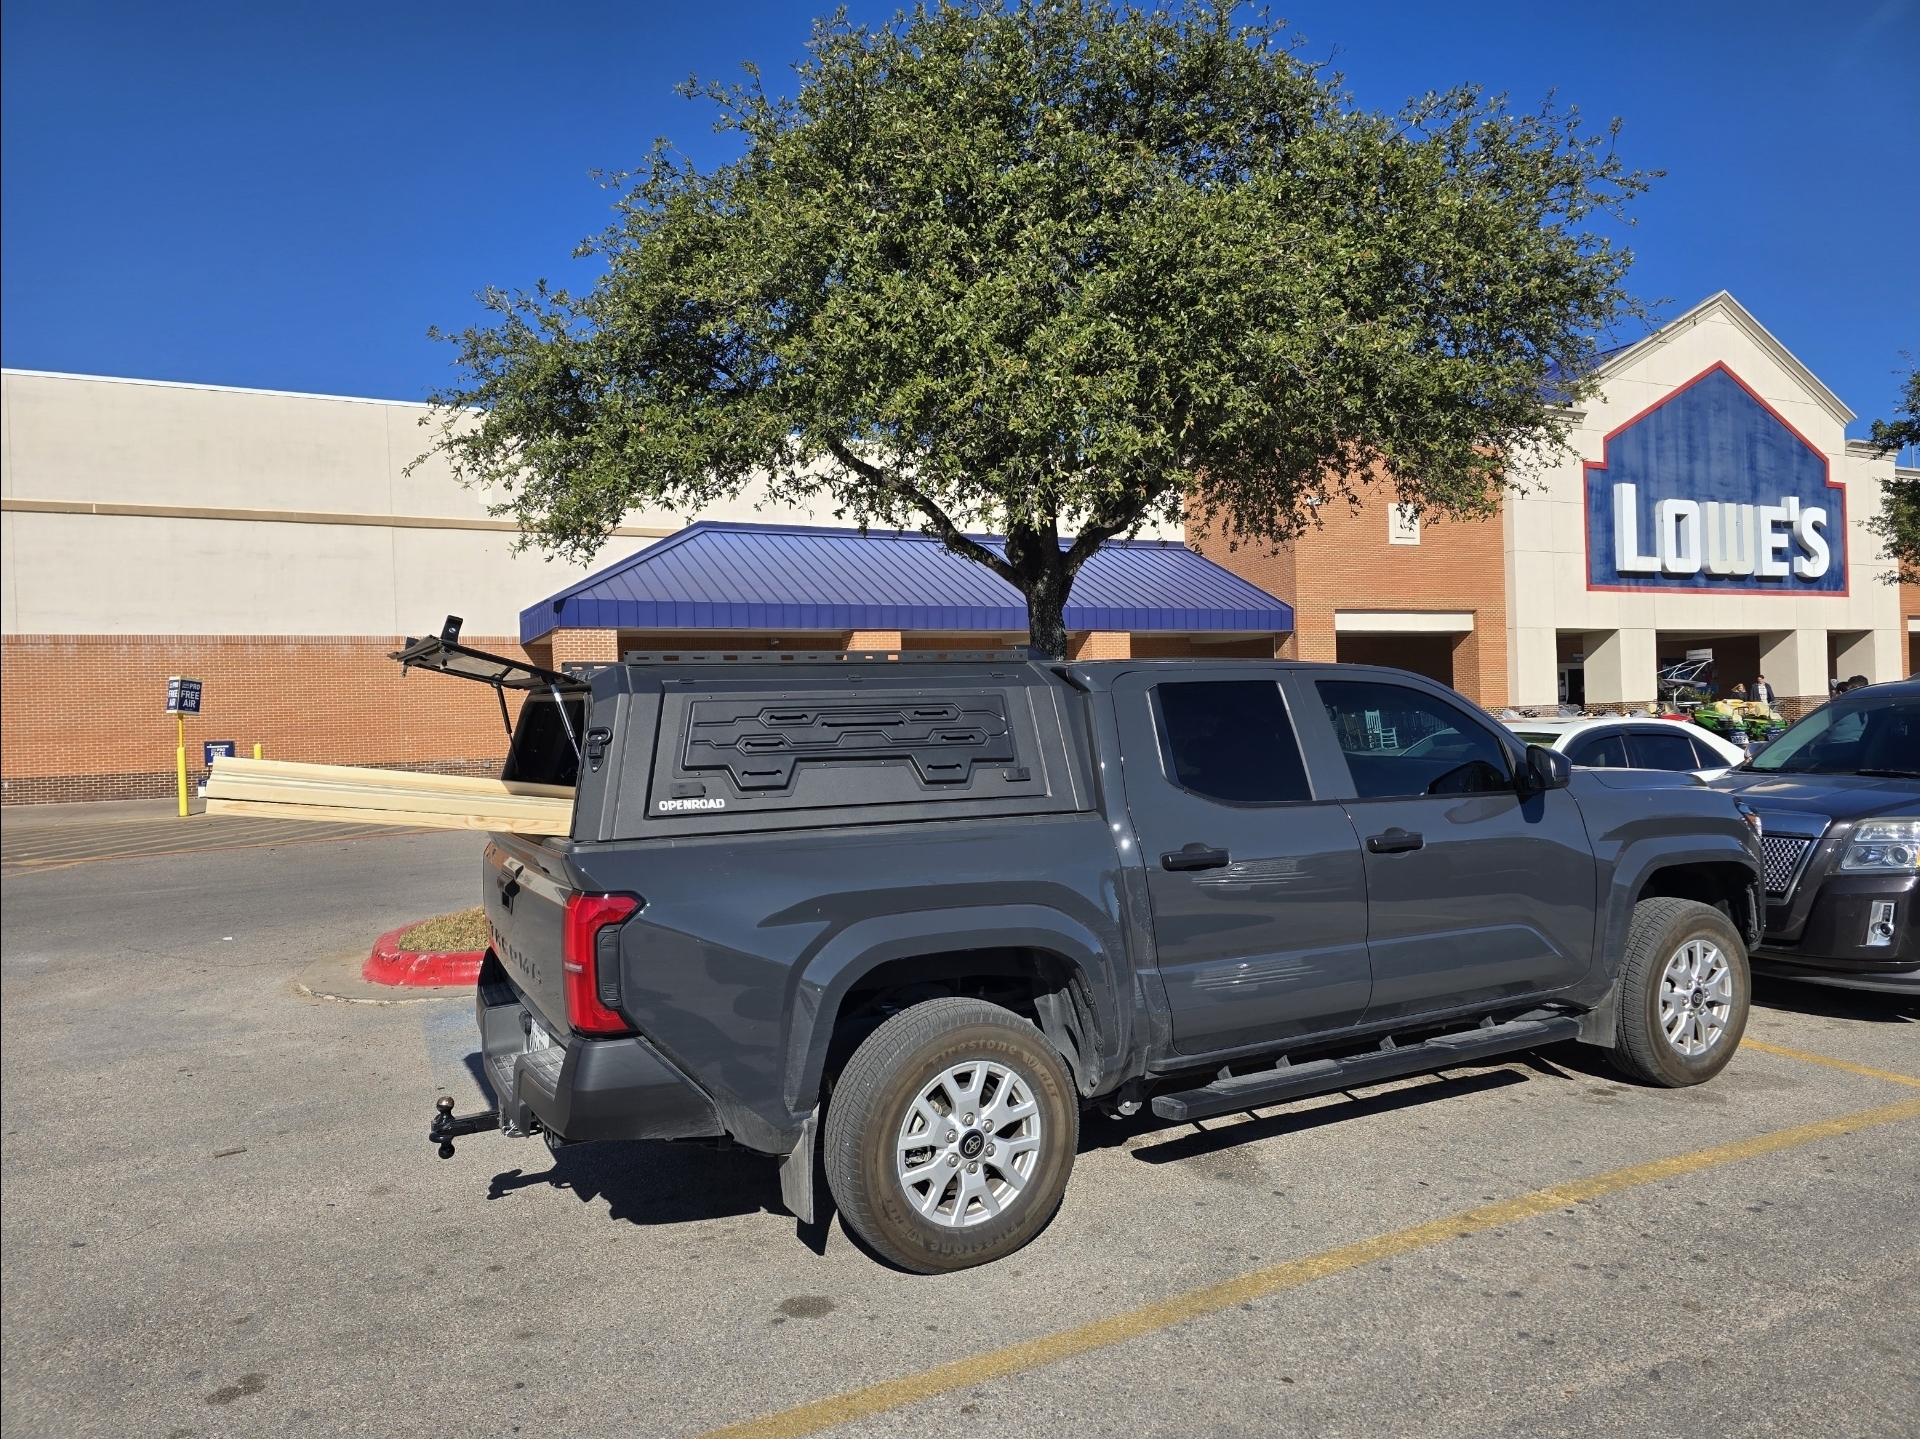
I had some initial concerns about capacity with the DECKED drawers in the bed and the topper over it, but after some house remodeling I’ve now had two shower enclosures, two bath tubs, tons of lumber, bed frames, construction debris, children’s bicycles, and all manner of other crap in there. It fits much more than I expected.

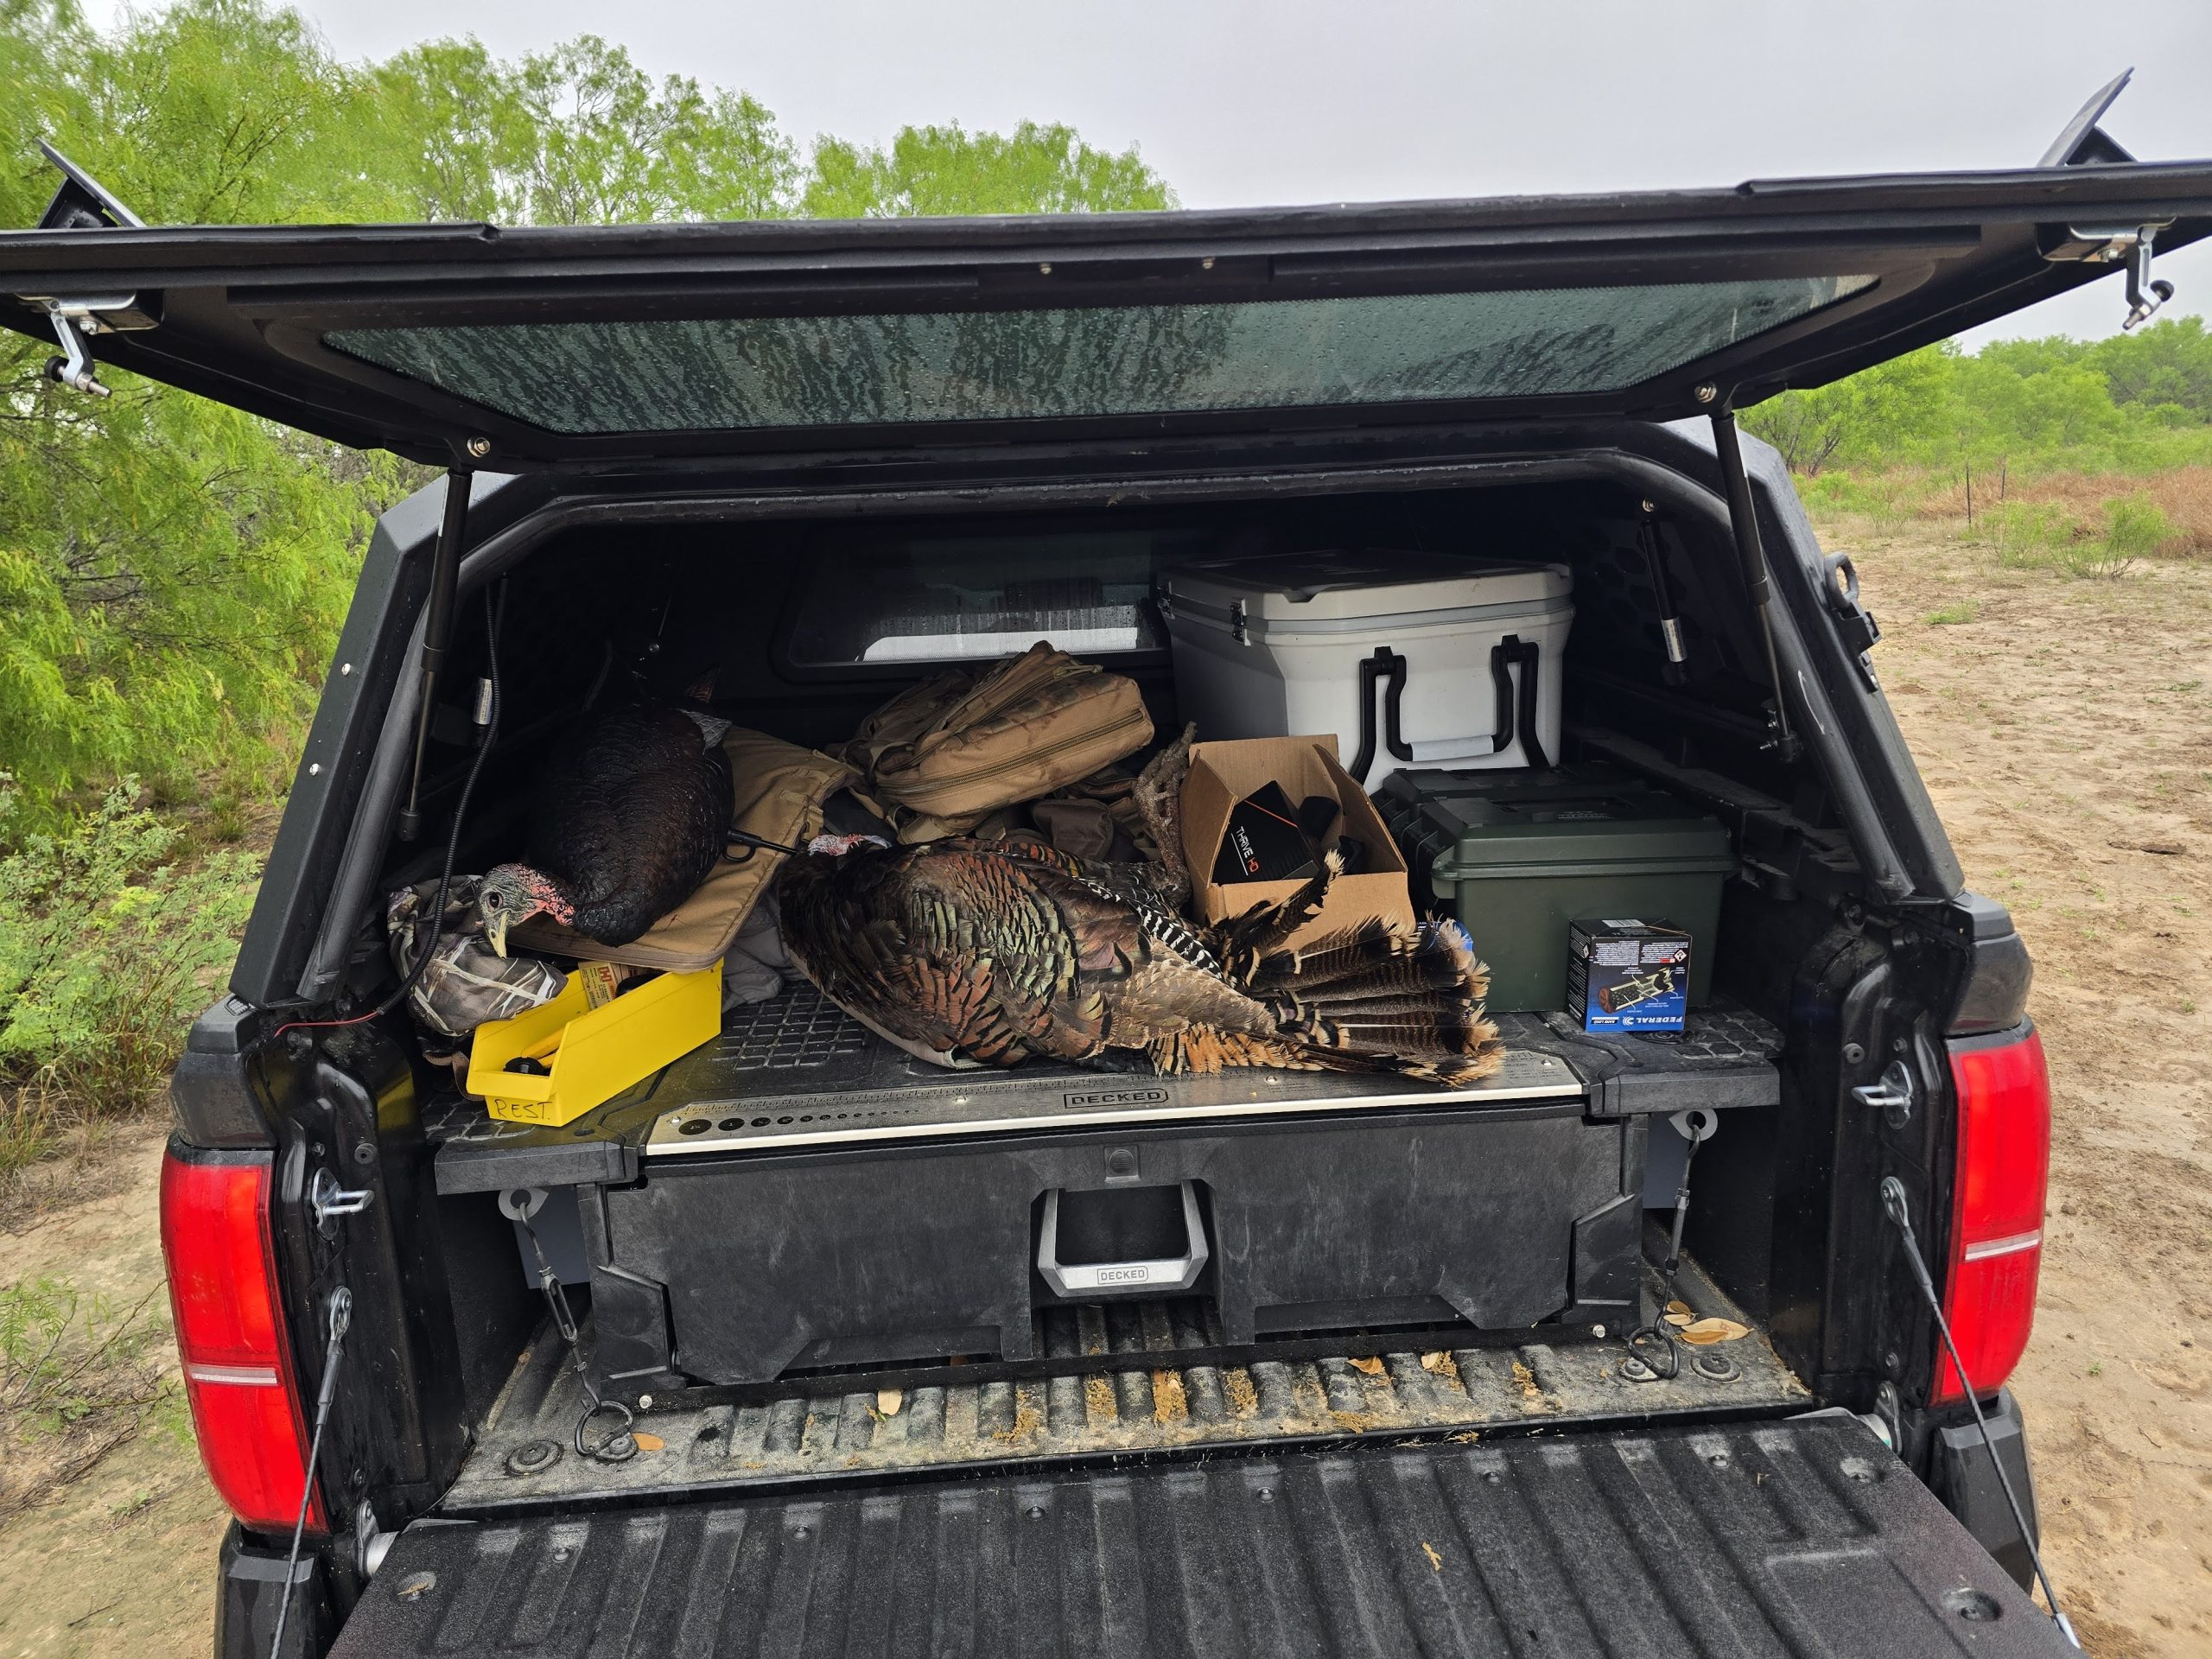
It’s so dang handy to have a mobile, let’s say, “shooting range kit” in the back of my truck at all times. I have a firearm for every use, all the typical gun-related tools (and then some), hunting supplies, targets, staple gun, ammo, chronograph, spotting scope, and more inside of the DECKED drawer. Inside the truck cap there are almost always a couple of camping chairs, a shooting mat, a tripod, and whatever other random crap.
Sometimes there’s more stored in there and I really appreciate the ability to lock each of the doors. Two locks on each; one key operates all six locks. Push the button on the lock to open it, lift up slightly on the door, and the hydraulic struts do the rest.
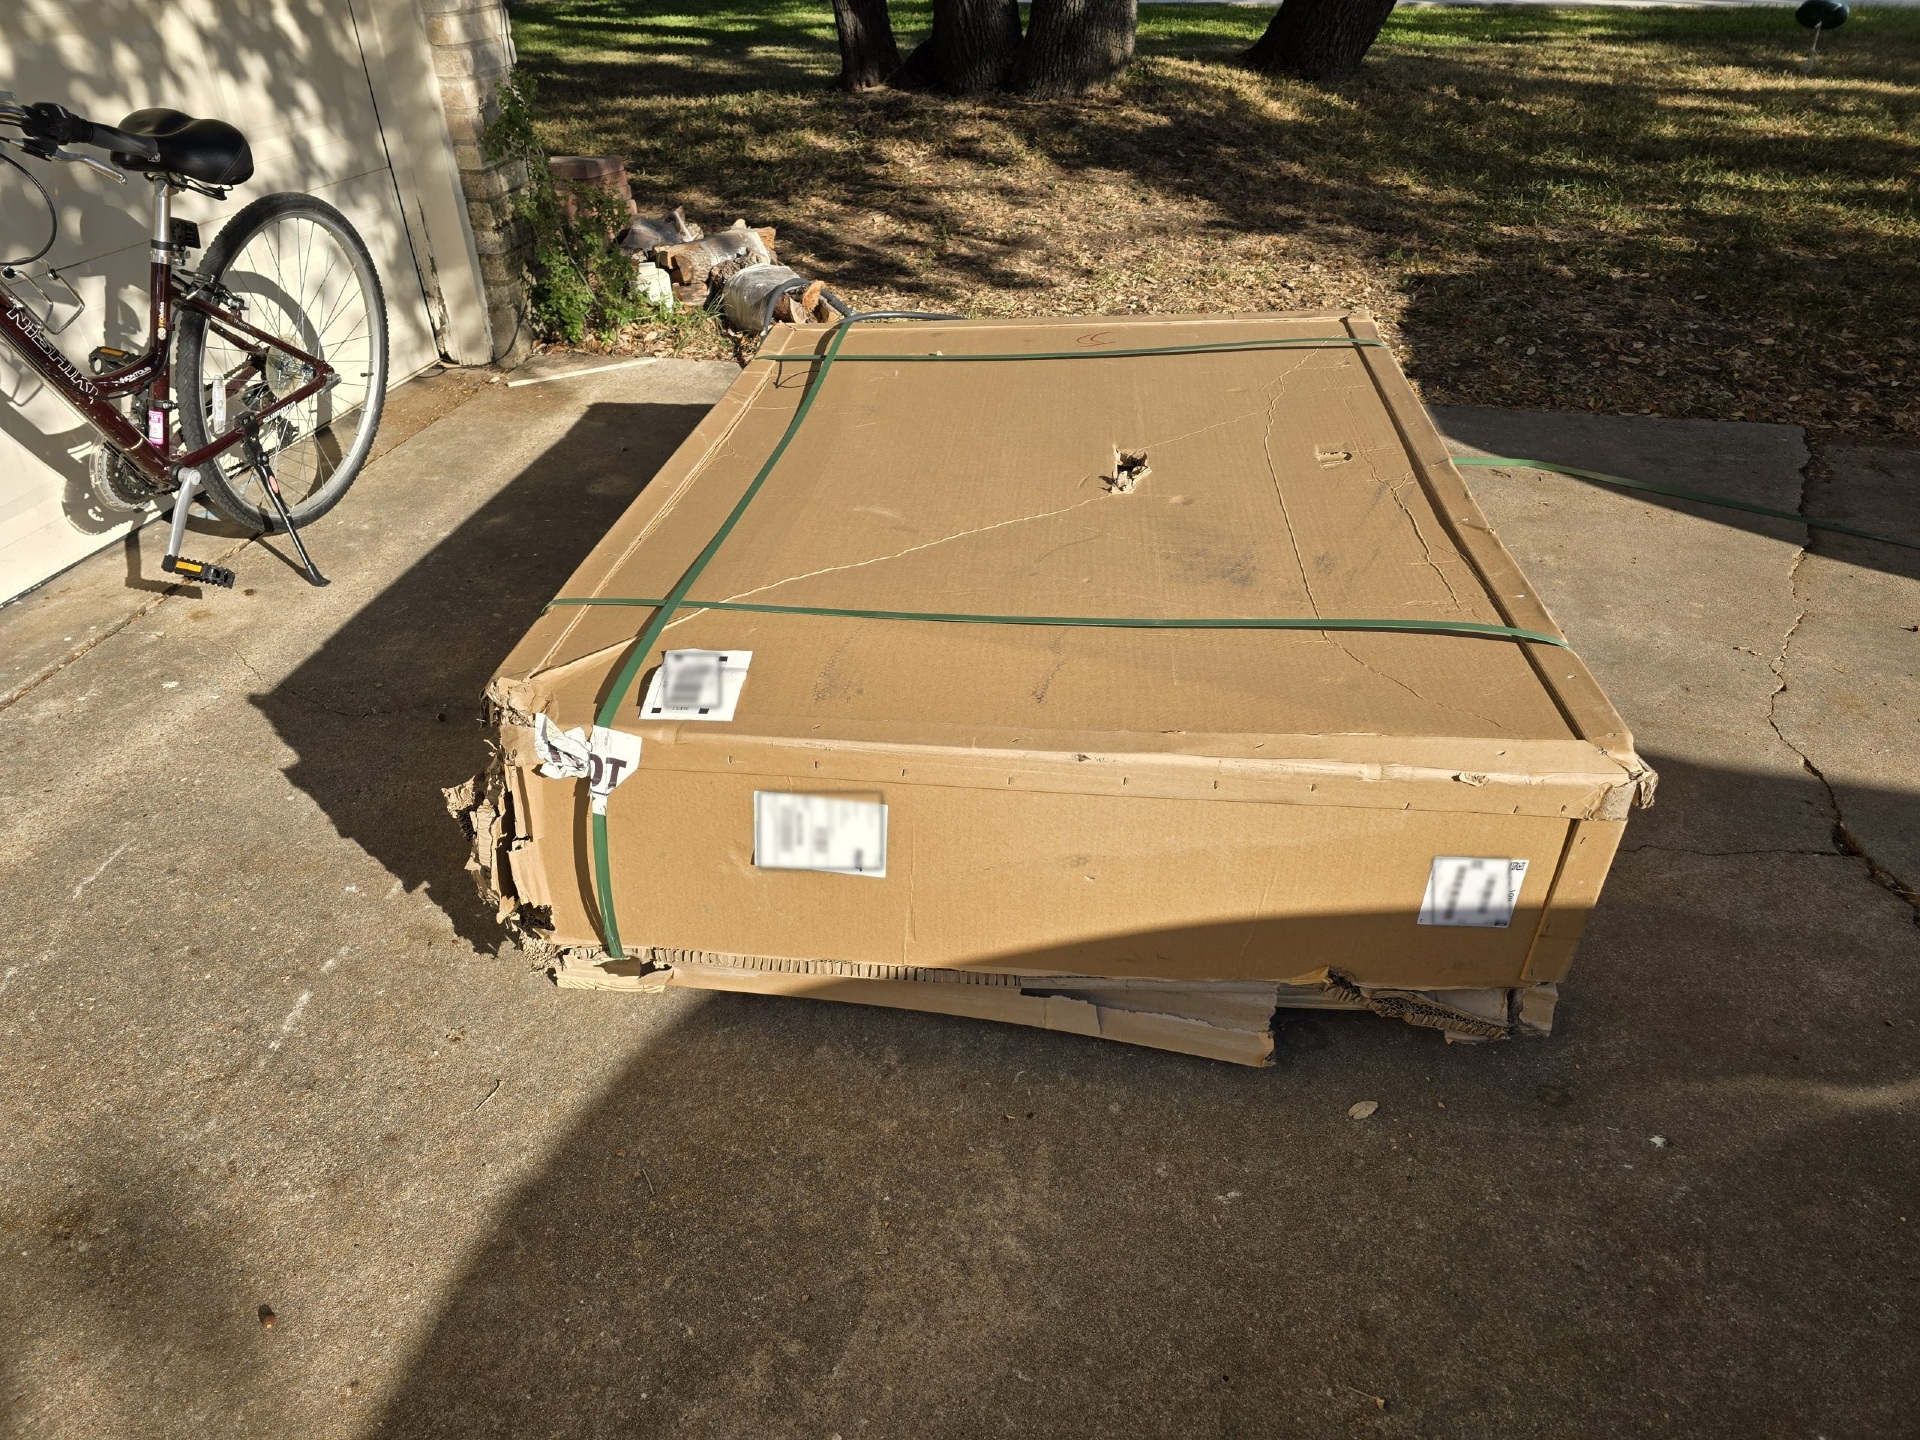
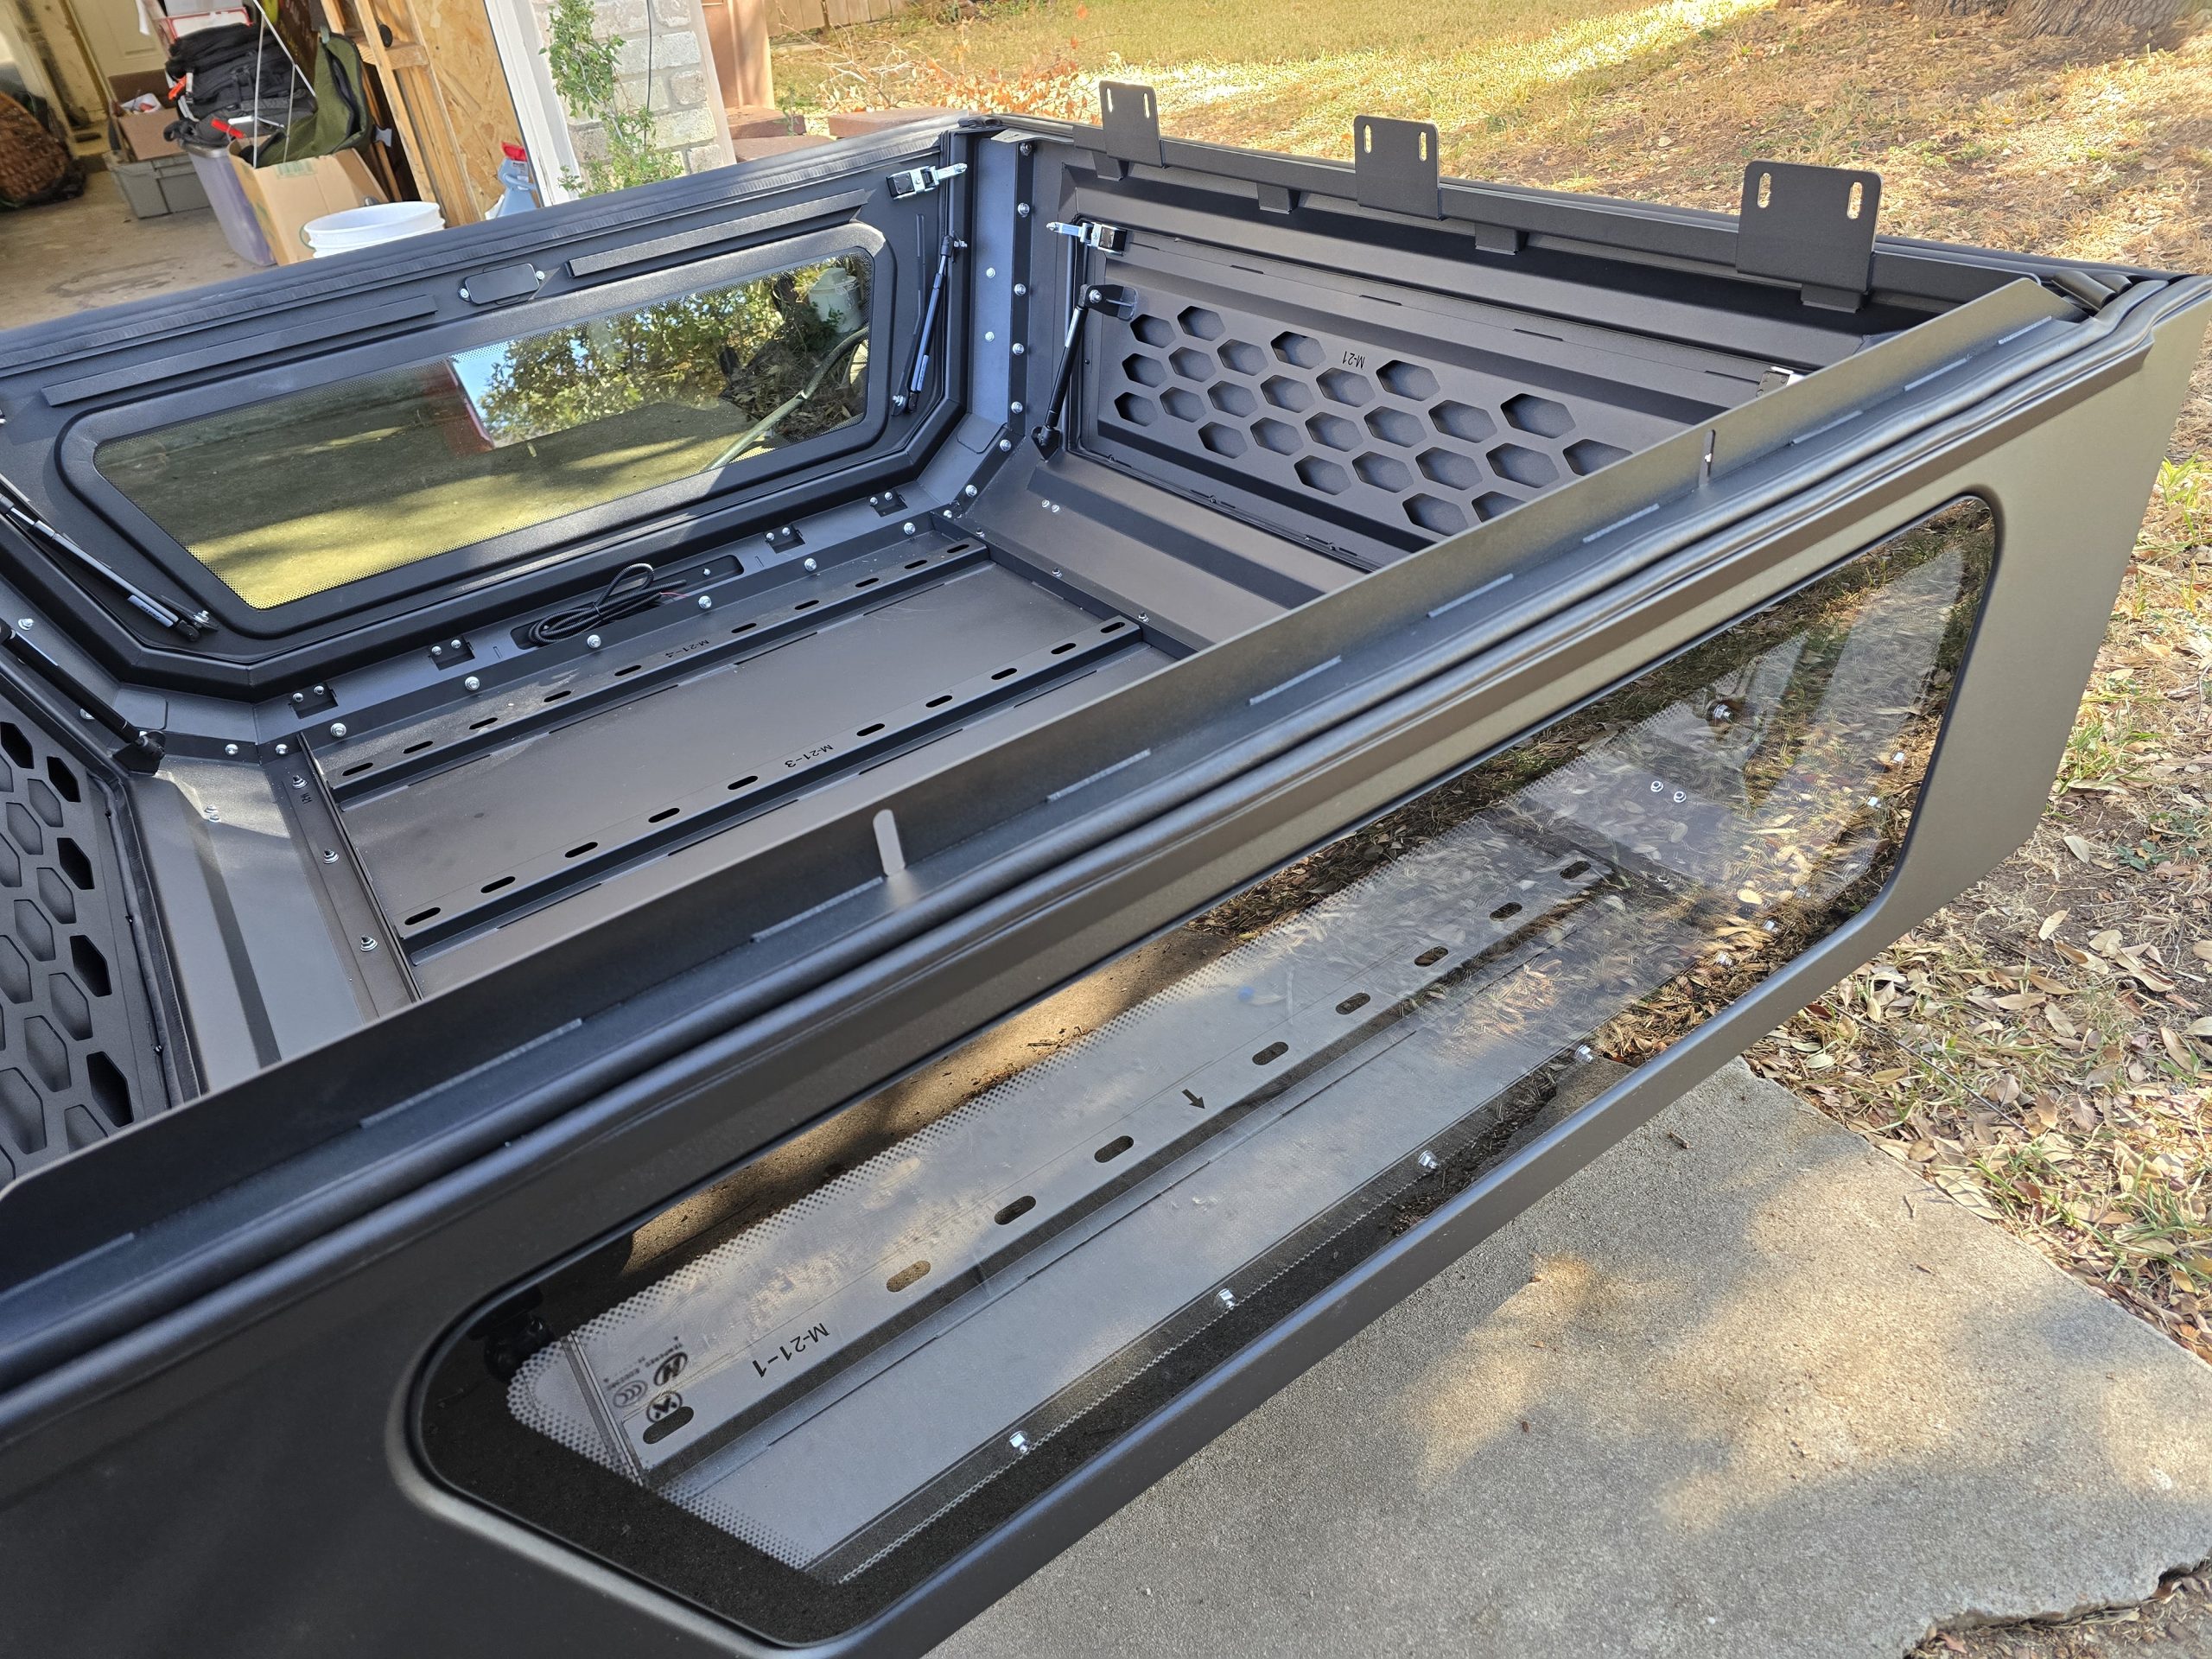
My truck cap showed up flat packed on a pallet. The box was a little worse for wear but thankfully that didn’t extend to the contents.
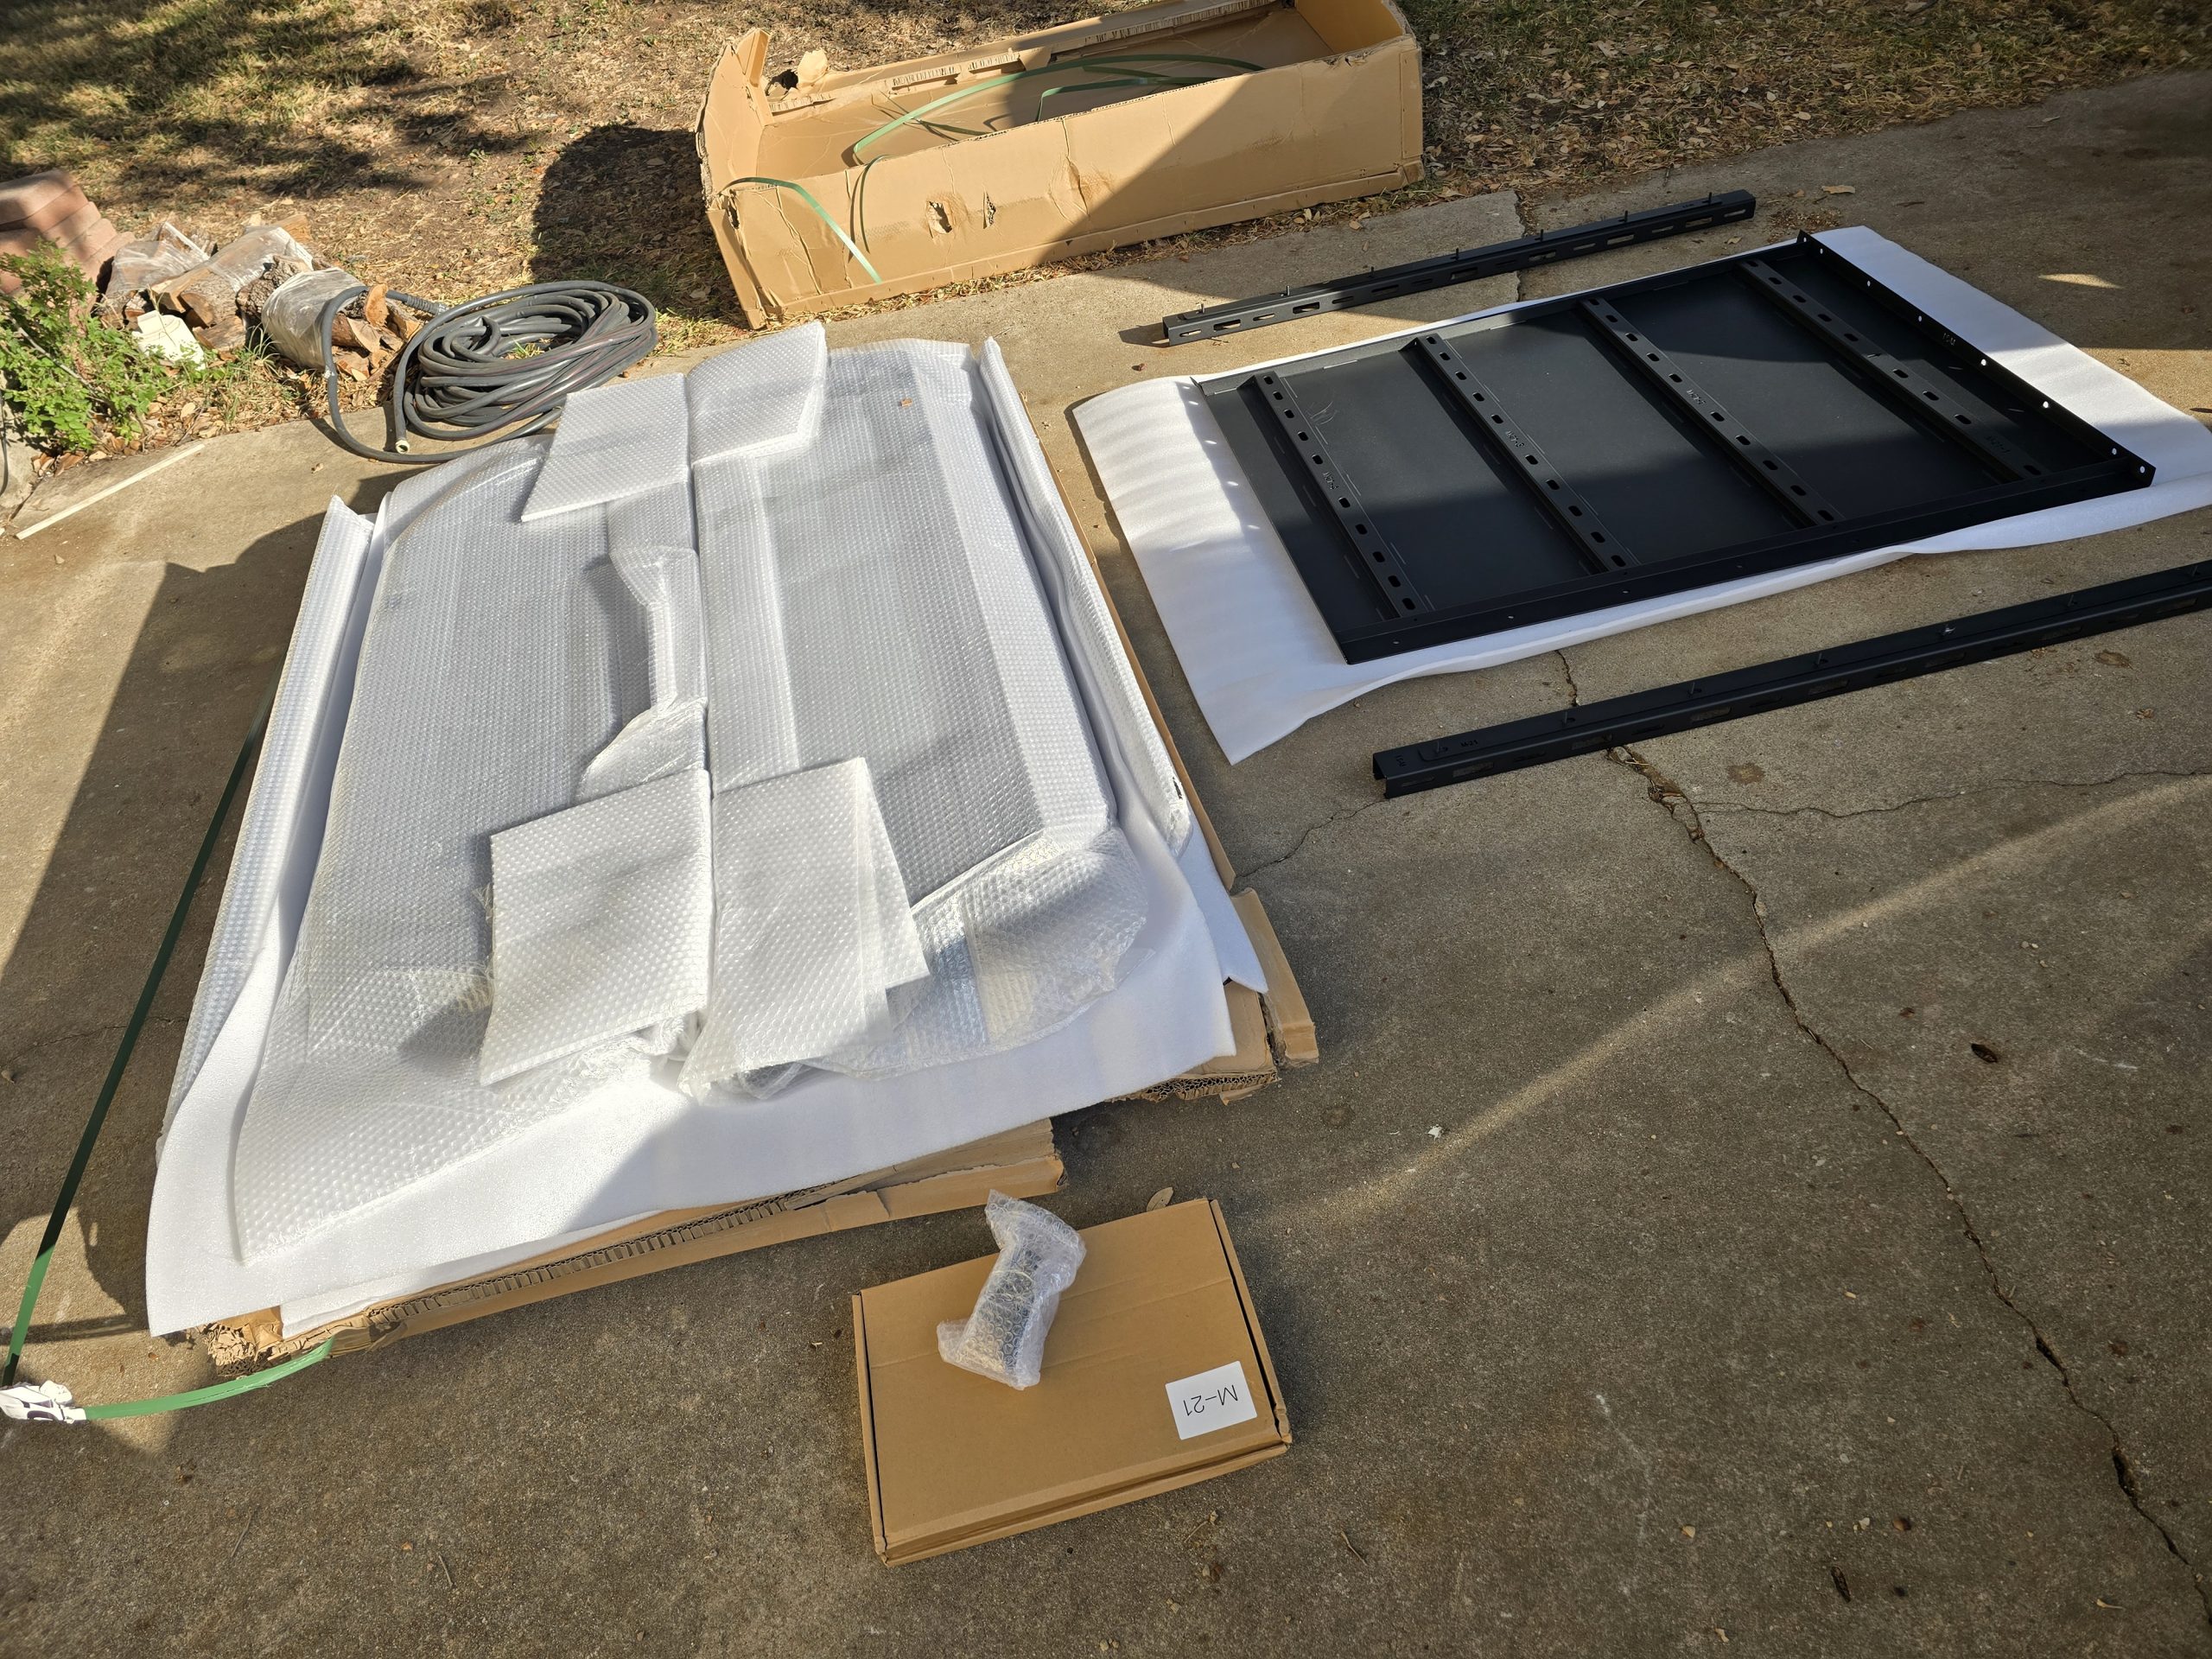
It was about 5:30 PM but I couldn’t wait and I dove right into the assembly process. I started by laying the roof panel upside-down on top of a sheet of foam from inside the box.
It didn’t take long to have an assembled truck topper! There’s more of the process in the video, but it’s basically a clamshell situation with a top, front, rear, left, and right panel, all of which bolt together along mating flanges.
Fit was pretty darn precise and all of the mating flanges met up with each other nicely. My best recommendation for anything like this is to get all of the bolts through all of the holes and all of the nuts lightly threaded onto the bolts before you tighten any of the nuts down. That said, the OPENROAD cap wouldn’t have given me too much trouble had I tightened as I went, since the alignment and fit was fairly impressive.
A tube of heavy-duty silicone caulk with application tool was included (along with a bunch of other tools). I applied it along the seams around the front and rear panels where they meet the roof and side panels. Given how well the flanges clamped against each other I don’t believe the caulk was actually necessary except in two of the corners where the sheet metal bending process leaves a BB-sized gap.
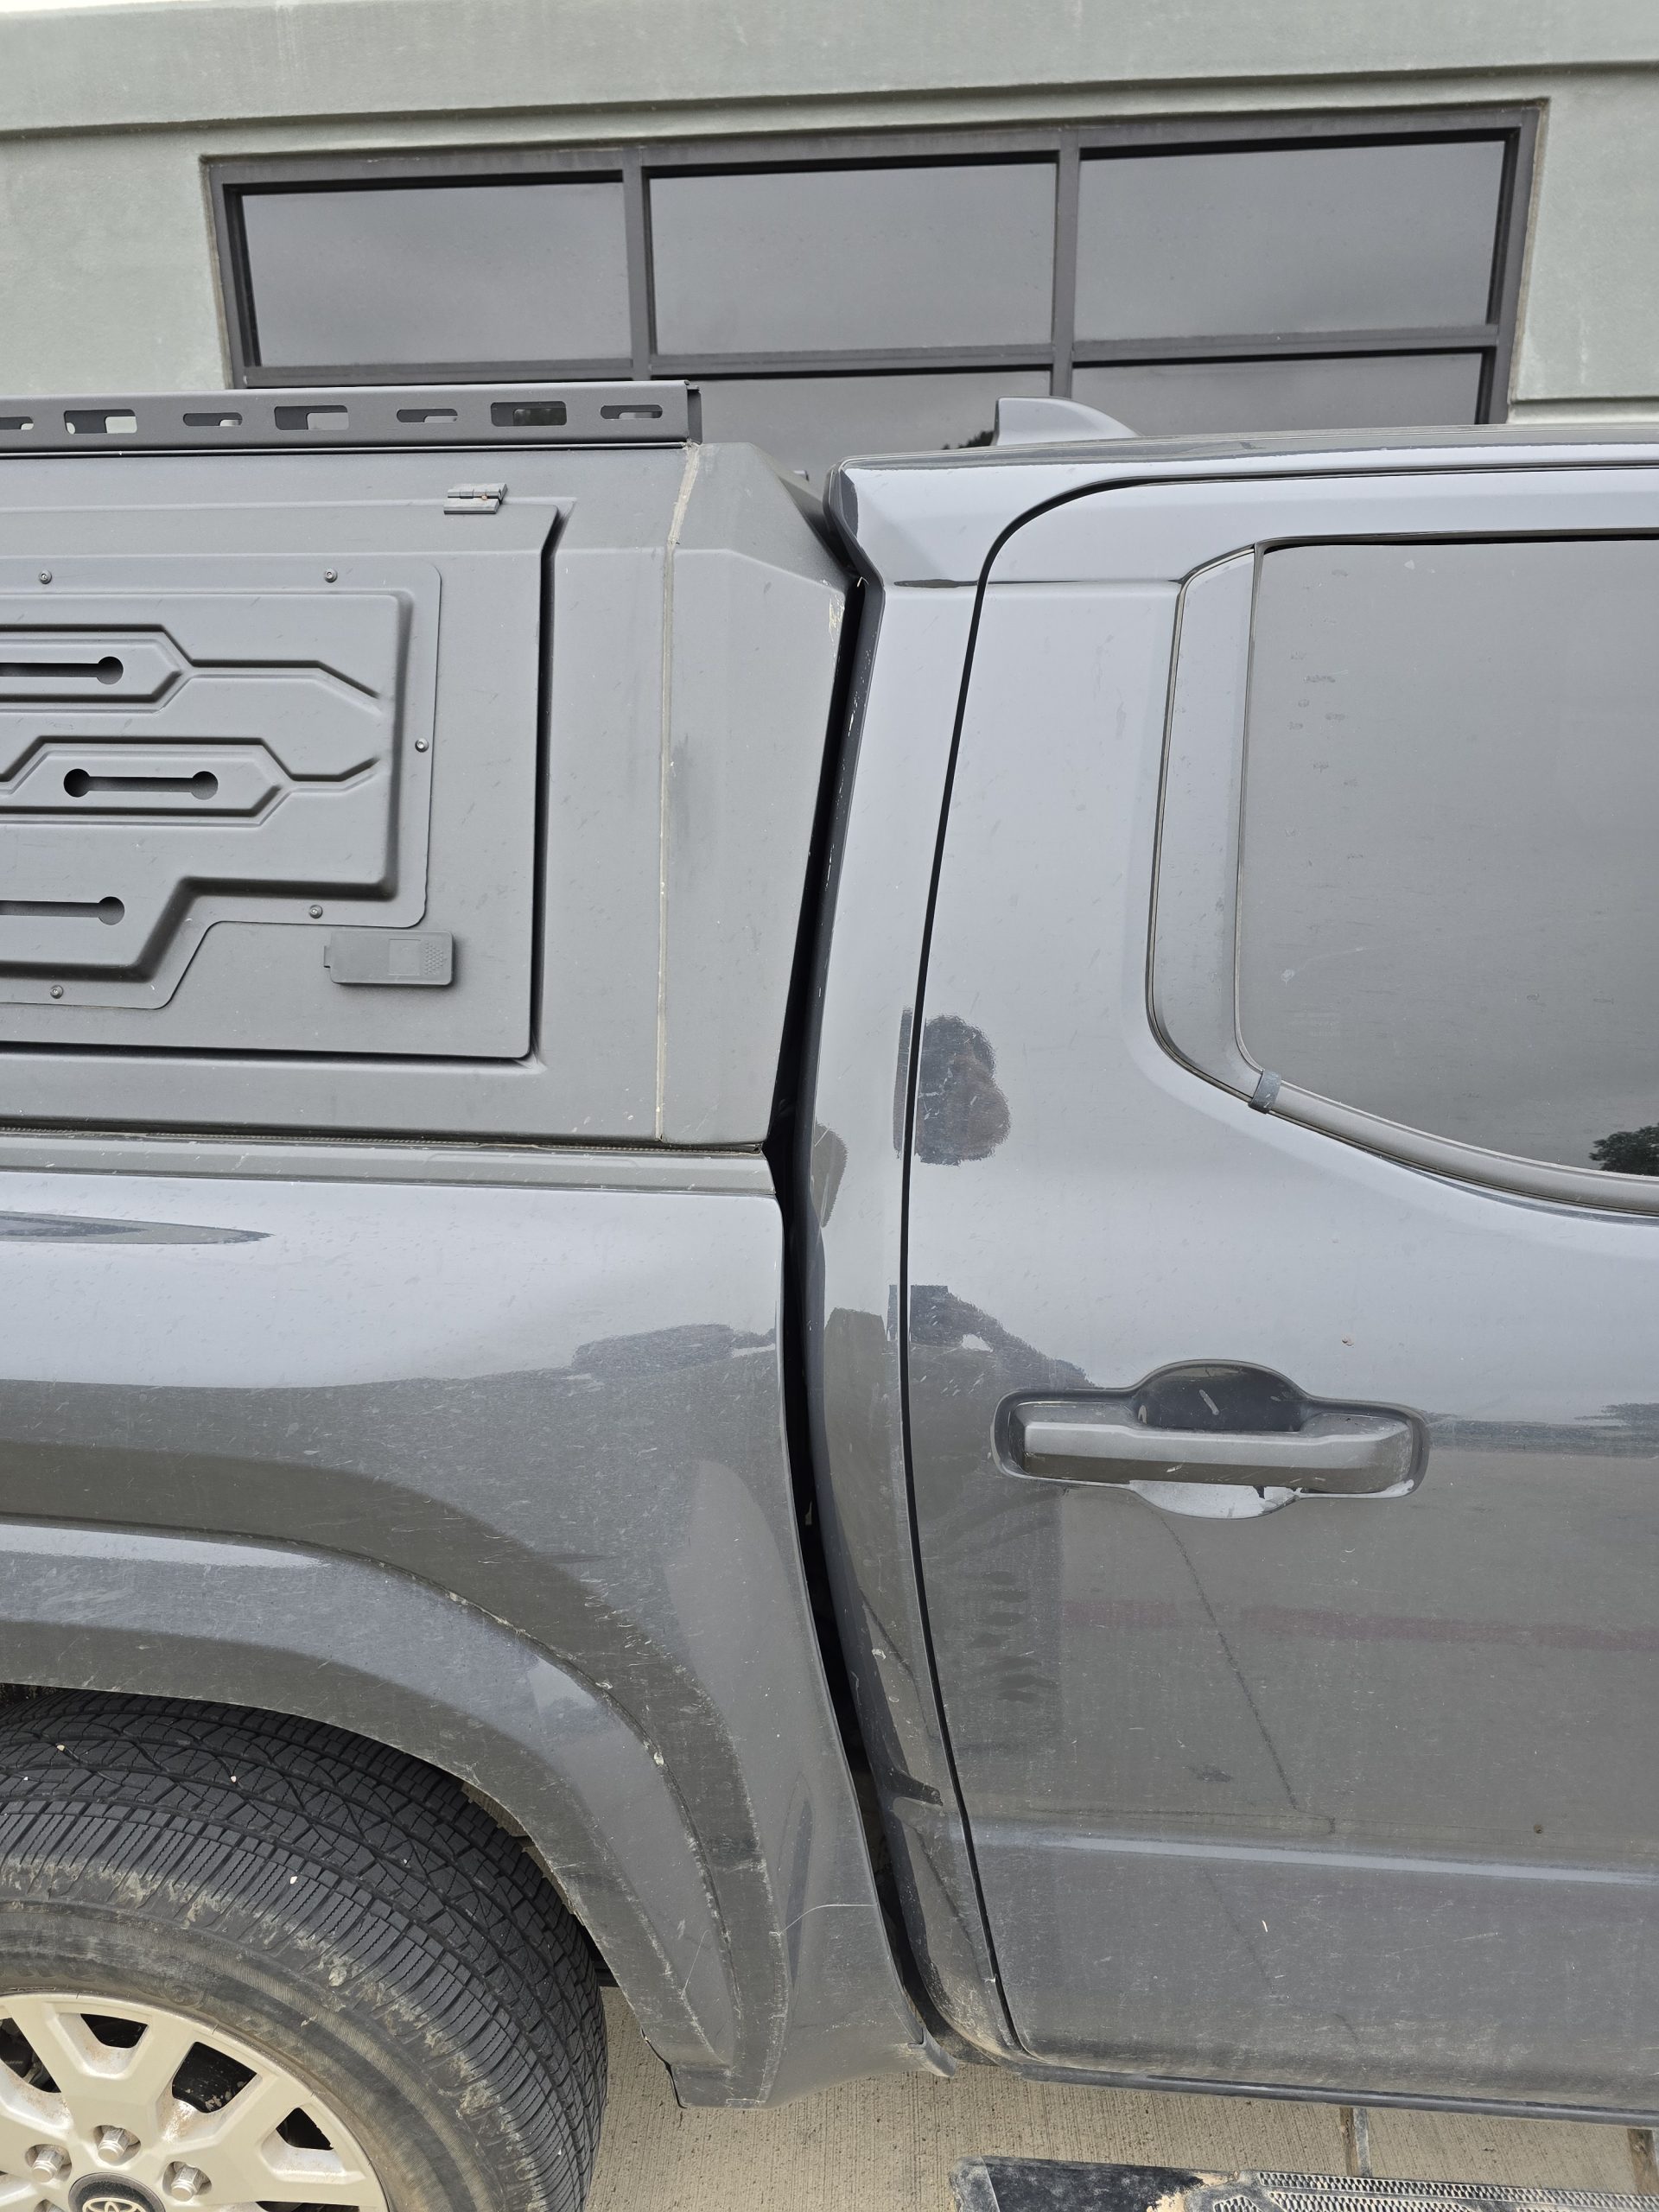
A friend helped me lift the cap onto my Tacoma and we were immediately impressed with the fit at the front, in particular. The tight gap between cap and truck is perfectly even top-to-bottom and the little clearance area for the roof fin thing is dead-on. It looks great!
I also dig the aesthetics of the truck cap itself. It’s modern, has some cool angles, looks a bit tactical in like a high-tech way, if that makes any sense at all? Big fan.
Multiple hardware options were included for securing the OPENROAD truck cap to my rig. I chose to use the aluminum T-Nuts that simply slid down inside the factory Tacoma rails and the truck cap brackets screwed directly into those. It was extremely quick and easy, it’s rock solid, and it’s 100% reversible. Zero modification was needed to the truck whatsoever.
I procrastinated on hooking up the CHMBL (center brake light), but finally did that about a month ago, so that’s good.
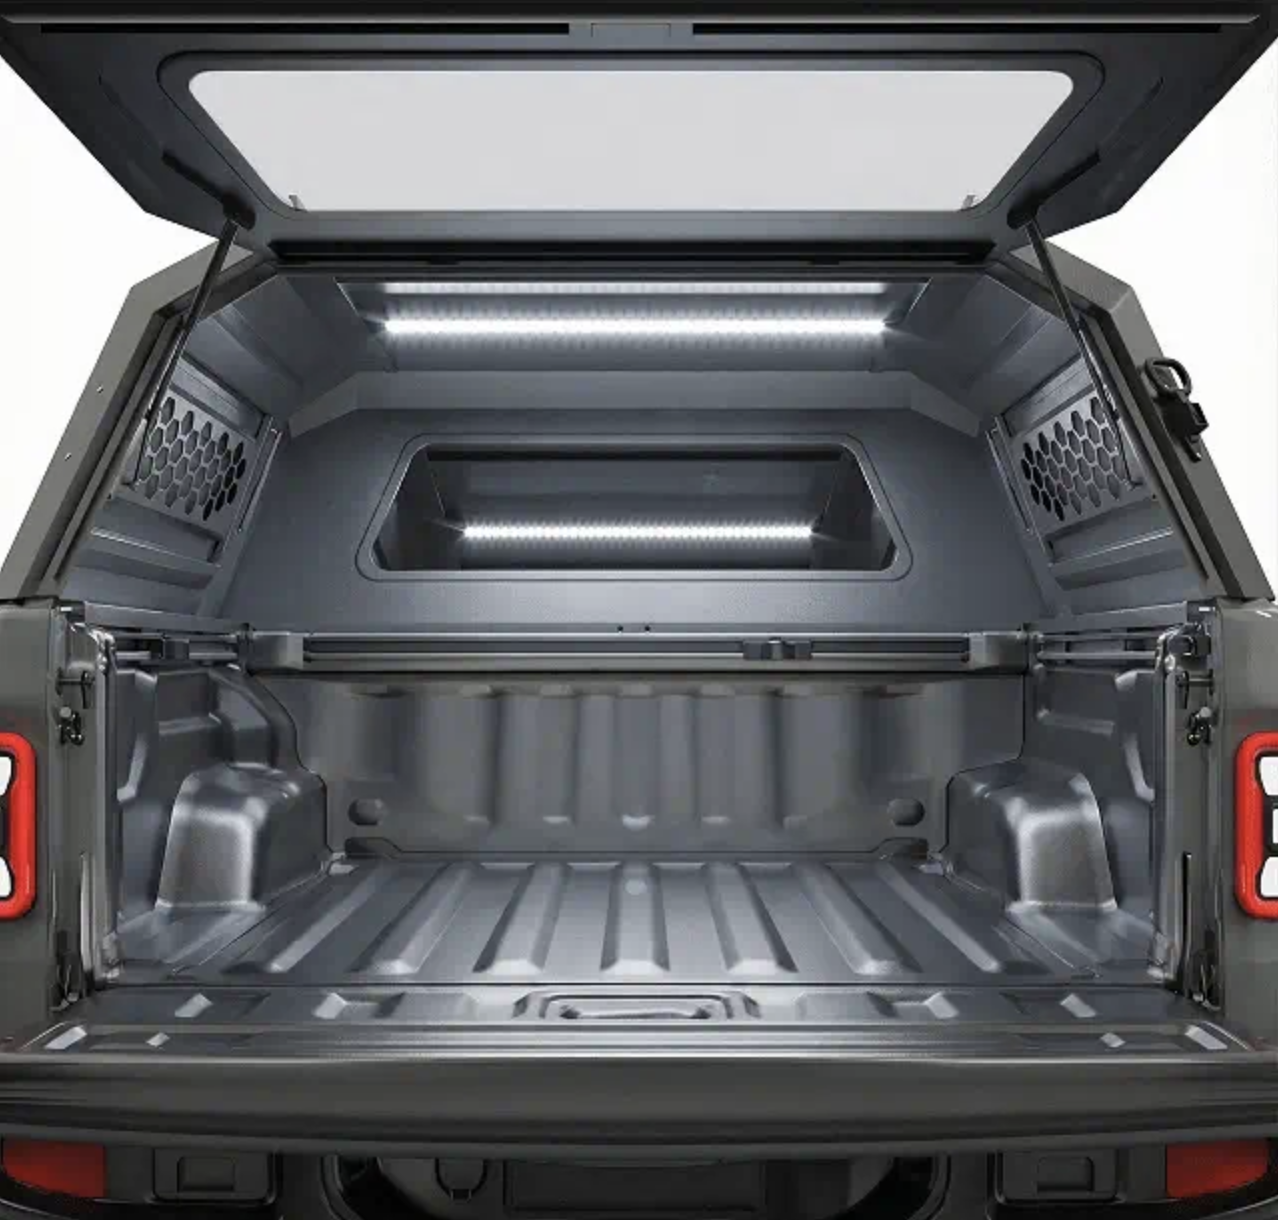
I suppose another thing on my to-do list is the interior lighting kit. New versions of this cap come with a 3-color (white, red, amber) interior lighting kit included, but I got mine before they added this. Seems handy.
After more than six months this thing has gone through a few severe Texas thunderstorms and a handful of drive-through car washes (Buc-ee’s takes the cake). It doesn’t leak. The stuff inside my DECKED drawer stays far cooler. My stuff is secure. The view in the rearview mirror is almost unchanged, believe it or not.
This is a really nice setup and I’m so dang glad I did it!
For a little more info and views of different parts of the topper in action, check out the video embedded at top (and please subscribe to the Shooting News Weekly YouTube channel while you’re there!).
If you’re in the market for a truck cap (or a winch or any of the other stuff they make), use code SNW10 on the OPENROAD 4WD website for 10% off.
Instead of caulking from the outside after assembly, could you run a bead along the flanges before you bolt them together – like a gasket?
This wouldn’t solve the problem of plugging the little holes at the corners, but it would be neater than smoothing the bead after application.
Yeah, I’m sure you could do that.