

In the summer of 1987 I found find myself laying in the grass on the Parris Island rifle range focusing on the black and white “snap in” barrel. For the uninitiated, “snapping in” or means to practice aiming, adjusting and firing a rifle with no ammunition. Most folks call this dry-fire, and it is a critical training technique. The rifle in my hands at that time was the relatively new M16A2. That service rifle had only been adopted four years earlier in 1983 by the Marine Corps.
Our primary marksmanship instructor, unlike our drill instructors, rarely felt the need to raise his voice, never made us “dig” (mountain climber exercises) or do push-ups. Even back then, the Corps understood that recruits needed to put all their mental and physical focus into learning marksmanship principles as they only had two weeks to do so and qualify with their rifles before moving on to phase three of basic training.
For my part, I had good eyesight and dedicated my mental focus 100 percent to the snapping in process that dominated most of our time during “grass week.” “We’ll find out who took snapping in seriously on qual day,” our PMI admonished us more than once.
Even though the Marine Corps officially began issuing the M16A4 — an upgraded version of the M16A2 — in 1997, my reserve unit didn’t see them until after I had left it in late 1999. I decided that for auld lang syne, I’d put together an M16A4 version myself…minus the “happy switch,” of course.
USMC M16A4
The Marine Corps has always prided itself on having the world’s finest marksmen and it was the Corps that pushed through the upgrades that turned the M16A1 into the M16A2. I’ve written about that previously in these pages. By the late 1990s, the Corps was once again looking at their service rifle to consider whether improvements could be made.
It should be noted that it was during this time that Colt was in competition with Fabrique Nationale — FN — for the US military’s service rifle contract. FN produced the M249 SAW and M240B medium machine gun which replaced the Corps’ M60E3, with which I was intimately familiar.
One of the most notable changes for the M16A4 upgrade was the use of an M1913 Picatinny railed upper receiver with a removable carry handle. This carry handle had the carry-over “A2” rear sight configuration, but instead of an 8/3 drum, it used the 6/3 drum of the M4, which became standard on all the removable carrying handle guns.
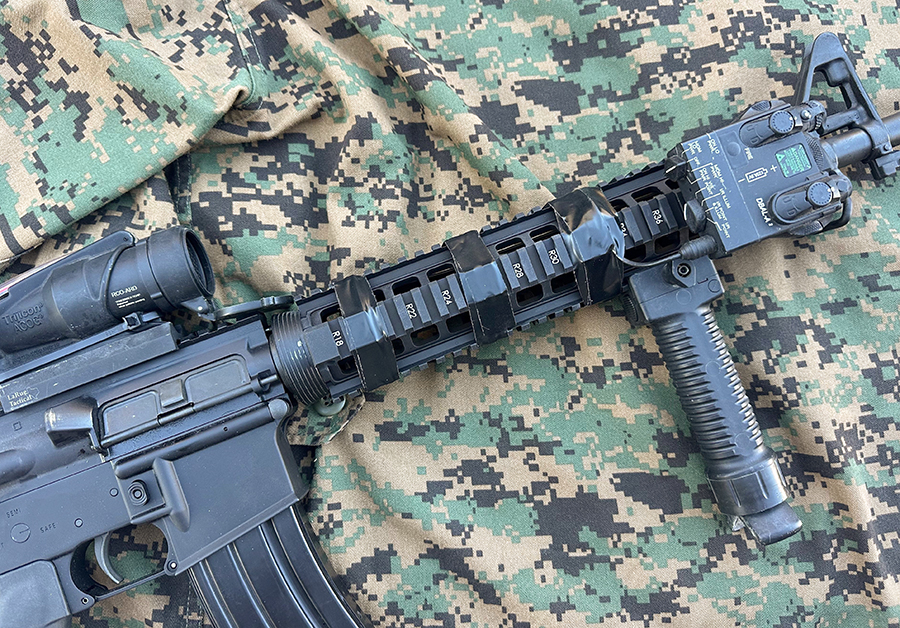
The “A frame” front sight with bayonet lug remained constant as did the A2 stock and pistol grip. Early versions of the “A4” used the A2 handguards, but those were supplanted by an aluminum rail system as the rifle moved into the 21st century and add-ons such as “broomhandle” foregrips, tactical lights and “DBAL” laser target designators became more common.
Colt produced some M16A4 rifles with safe/semi/auto and safe/semi/burst triggers, while FN produced their version of with safe/semi/burst selectors. The three-round burst mode would remain standard for Marine riflemen until the H&K M27 IAR (infantry automatic rifle) was adopted in 2010.
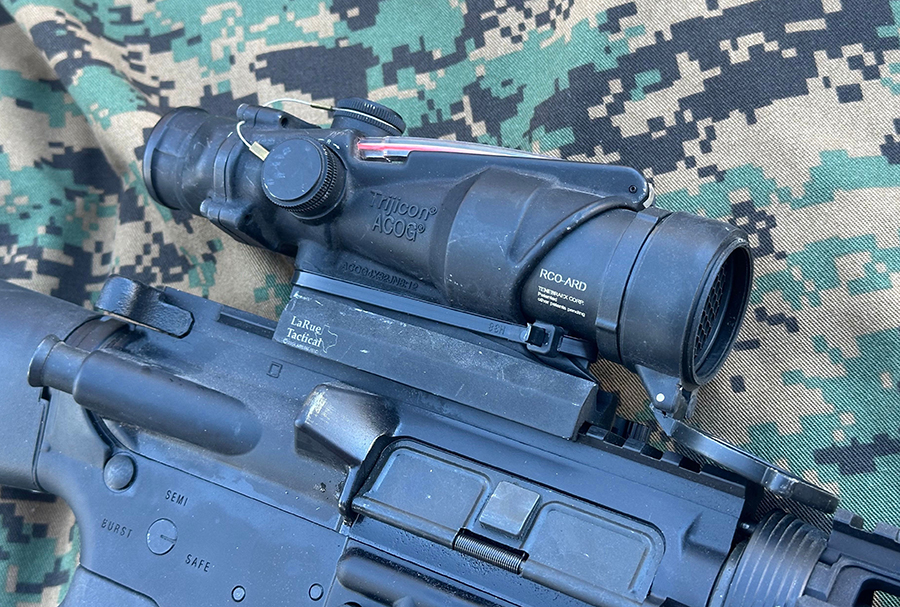
One of the most notable additions to the M16A4 was the swapping of the carrying handle for the Trijicon Advanced Combat Optical Gunsight or ACOG.
After engaging in combat in GWoT for a few years, the Marine Corps formally adopted the 4×32 ACOG or what Marines began to refer to as their “Rifle Combat Optic” (RCO), in 2005. For the geeks in the audience, the official designation for the M16A4 Trijicon Model was “TA31RCO-A4CP”. A similar unit was built for the shorter barreled M4. The original “A4” ACOG reticle design included the now famous red “chevron” with bullet drop compensator crosshairs built to match the standard 5.56mm load when fired from a 20 inch barrel.
According to Trijicon . . .
The Marine ACOG is a fixed 4x optic and it incorporates dual illumination technology using a combination of fiber optics and self-luminous tritium. This allows the aiming point to always be illuminated without the use of batteries. The tritium illuminates the aiming point in total darkness, and the fiber optic self-adjusts reticle brightness during daylight according to ambient light conditions.
If there’s a drawback to using the ACOG, it would be that there’s no option for “same plane, backup sights” although, to be fair, battery life isn’t a concern. While I missed out on being issued an ACOG by the Marines, I got one when I was a military contractor during GWoT. My personal TA31RCO came with an FDE padded carrying case that had MOLLE straps and was made by Eagle Industries, an owner’s manual and a “kill flash” anti-reflection device with a flip up lens cap.
The only change I made to my RCO was to swap the factory base that had twin screw knobs with a LaRue Tactical mount that uses quick-throw levers. Interestingly, the TA31RCO can be mounted to a standard M16 style carrying handle by removing the base altogether and using a single knob thumbscrew. I will admit that I never mounted the RCO to a carry handle.
Assembling the Clone
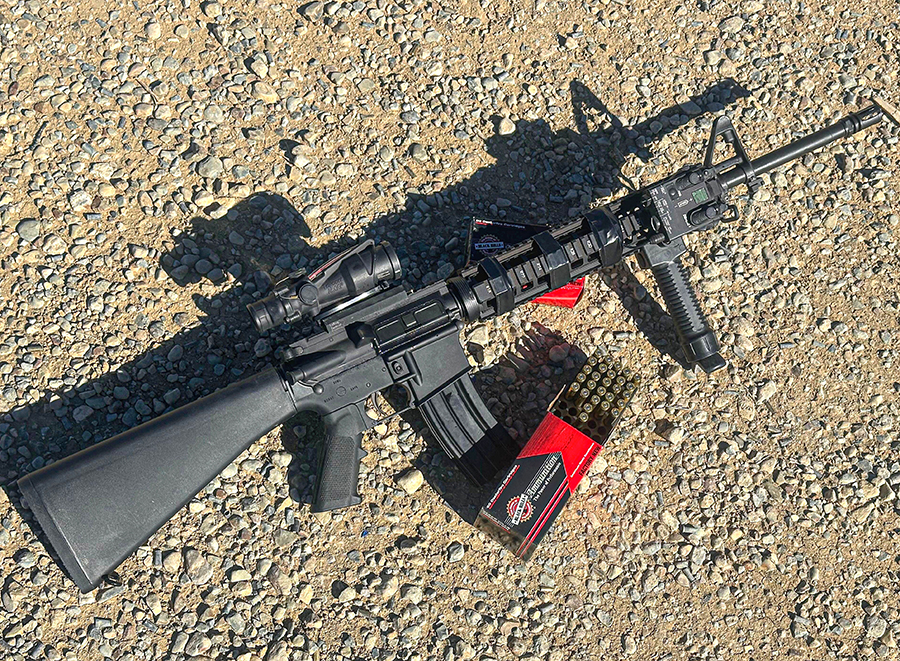
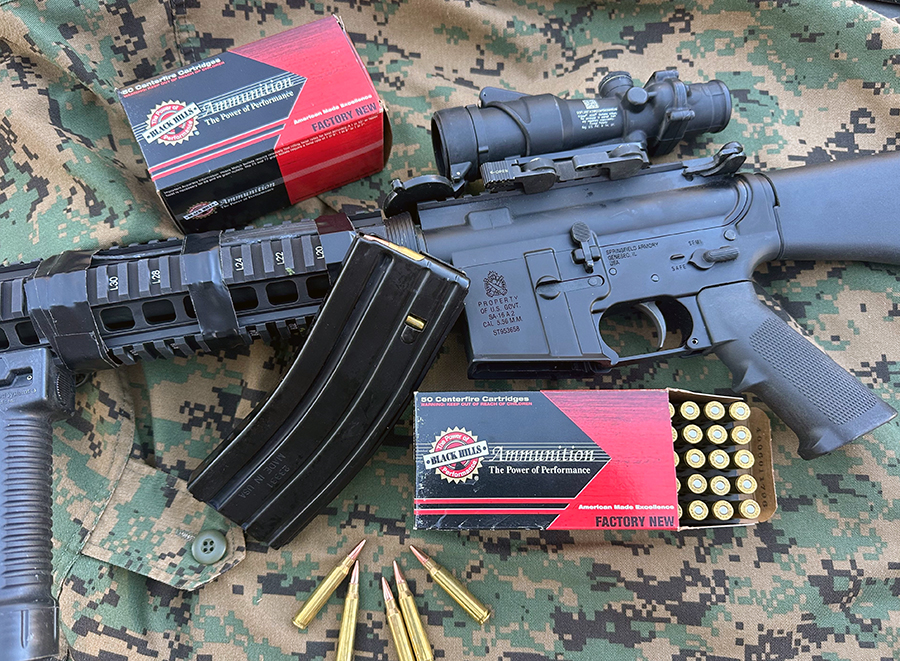
In order to put this thing together, I gathered components from Springfield Armory, Midway USA, and DTI (Del-Ton Inc). Sadly, Del-Ton is currently out of business. From DTI I purchased a 20-inch barrel complete flat-top upper with a BCG. The original polymer A2 handguards were replaced by an aluminum quad rail system purchased from Midway USA. The complete SA16A2 lower came from Springfield Armory. Assembling all those parts was easy enough.
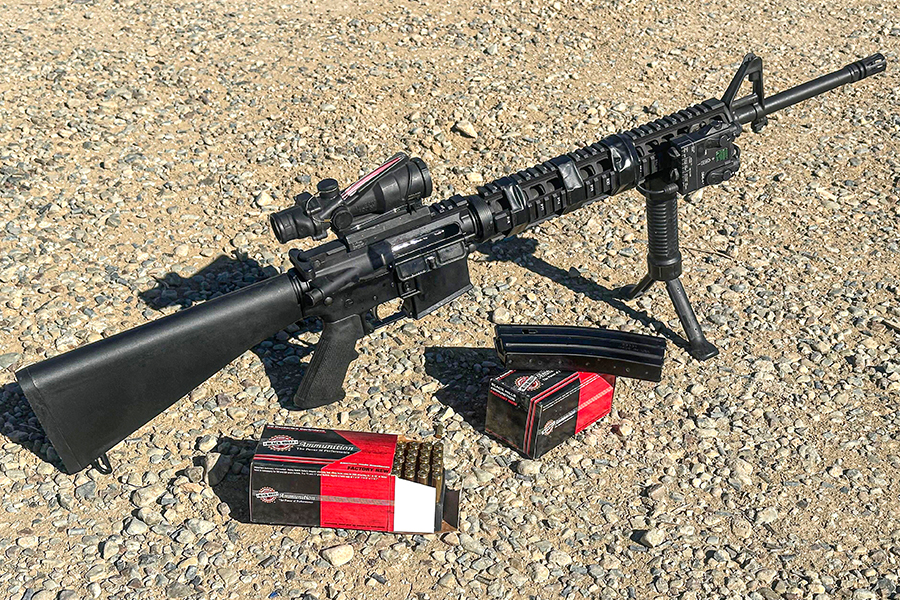
I attached the ACOG using the aforementioned LaRue base to the upper and added one of the most popular foregrips used during GWoT, the Grip Pod.
Note: the popularity of the original Made in the USA Grip Pod spurred a mass of cheap foreign-made knockoffs. The original Grip Pod is rugged and high quality. If you find one for $20 online, it’s a cheap knockoff. I have been using the same original Grip Pod featured here since GWoT, circa ‘09 or ’10.
Range Testing
The barrel on the DTI upper was made with 1/9 rifling, therefore, I decided to test out some heavier weight projectiles. For consistency, I chose to test ammunition from Black Hills in 69, 75, and 77 grain weights.
Twenty-five meter BZO is the standard for military service rifles and I followed the instructions for that provided by Trijicon in their owner’s manual.
Using the aforementioned three loads, I took the time to slow fire three-shot groups. While they were all consistent, posting sub-MOA groups at that range, the 75 grain HP load printed a very tight group with two shots printing one large hole.
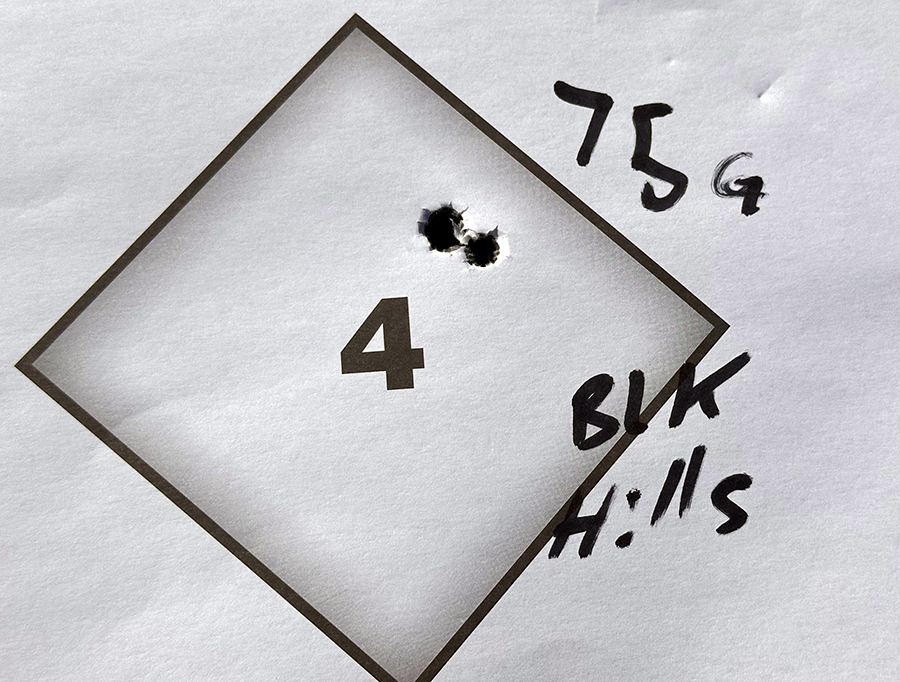
The 75 grain load posted a ¼-inch group and the other two were ⅝-inch. While I’d have been successful with any of them, I stuck with the 75 grain Black Hills load for the remainder of the testing.
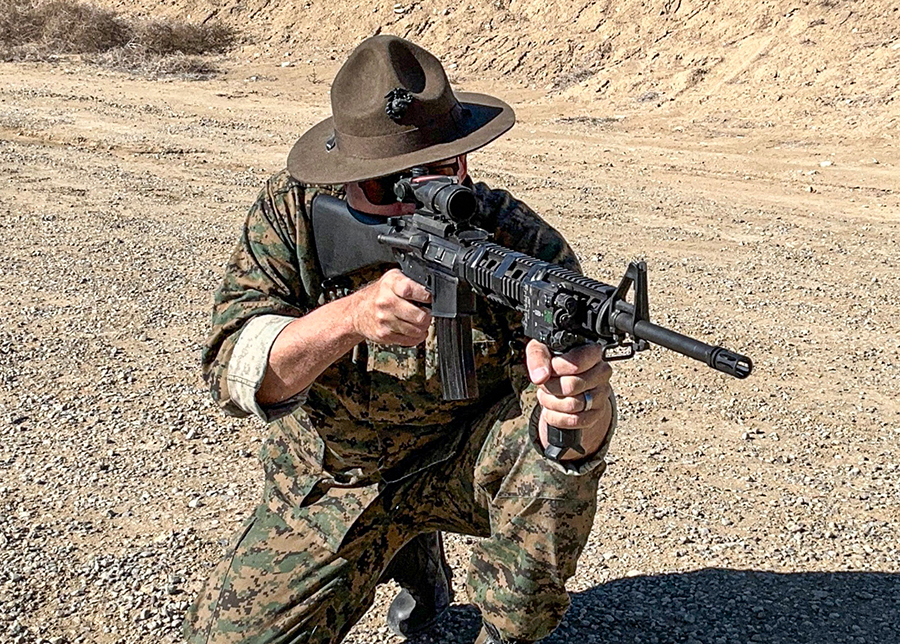
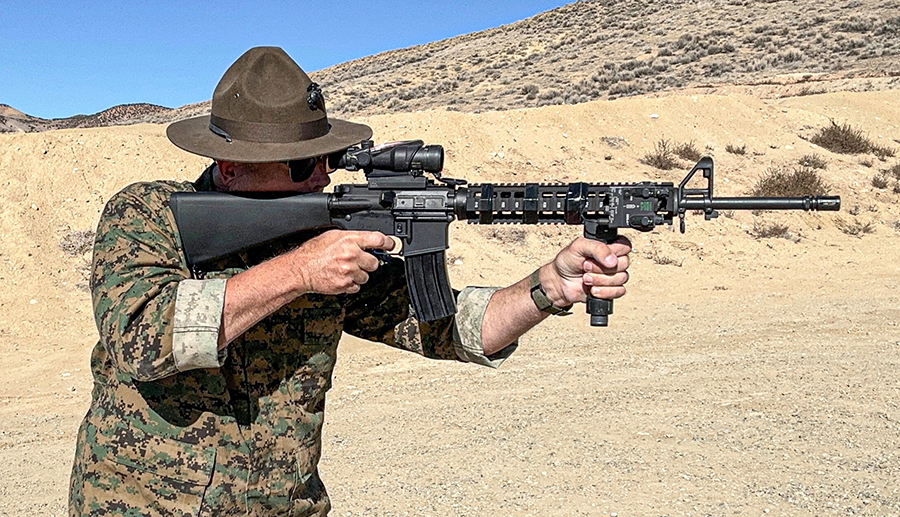
After I was confident that the Trijicon RCO was good on paper, I moved to steel silhouettes at 100, 200, and 300 yards. You probably won’t be surprised to hear that hits on target weren’t difficult when using the 4X ACOG.
Parting Shots
Could I have just ordered a rifle in the configuration listed here? Sure, but how much fun would that have been? Putting it all together and then heading out to the range allowed for some nostalgic feelings of the days when I wore the uniform. Whether you wore a uniform or not, as an American you have the liberty and freedom to engage in just such an exercise.
Specifications
Caliber: 5.56mm (.223 Remington
Action: Direct gas impingement, semi-auto)
Capacity: 30 (others)
Barrel Length: 20 inches
Overall Length: 39.4 inches
Weight: (empty) 8.8 pounds
Stock: Black polymer A2
Finish: Matte black
Sights: Picatinny rail upper
MSRP: Variable
Paul G. Markel is the founder of Student the Gun University and has been teaching Small Arms & Tactics to military personnel, police officers, and citizens for over three decades. He is the author of numerous books and is a combat decorated United States Marine veteran.
All these many decades later, every time I break down an AR for a deep clean or parts replacement, it feels like one of my DI’s at Ft. Ord is looking over my shoulder, making sure I do it right.
you could have just typed larue.
it’s good to know that the slower twist was able to stabilize the heavier projectiles, however what about a 1:9 leads you to greater weight?
I’ve built four of these ‘M16A4’ types. For the hand guard I used the P&S Products manufactured quad rail system (Cage Code) model 4U486 (I had some of these I picked up surplus for $30.00 each with some other stuff – its the Knights Armament M5 Rifle RAS Forend Assembly but manufactured by/through P&S Products that were used to fill the same contract during the GWOT). Oddly enough, its this hand guard that prompted me to want to build the ‘M16A4’ types.