

Fifty years ago the country was in a relatively good mood. The nationwide theme was “The Spirit of ‘76.” Disco was at its zenith. “Philadelphia Freedom” was in the air everywhere you went. Jerry Ford was the President of the United States and nine-year-old me was looking forward to picnics and fireworks and riding my bike around the neighborhood with my pals.
While the 250th anniversary of the founding of the greatest nation ever to exist on the planet should be a joyful occasion with all Americans of all stripes, putting aside differences and celebrating the miracle that is the United States, sadly, that’s not what I’m seeing or hearing from all sectors.
And so I decided that I was going to engage in a personal celebration and commemorate the liberties that Americans living outside of the Blue Wall still enjoy. I decided to build my own AR-15 rifle to celebrate our semiquincentennial.
Pieces and Parts
Like many of you, I’m the kind of gun guy who picks up pieces and parts whenever I find a good deal on them. I found a good deal on a C3 Defense stripped lower and grabbed it several years ago. The lower is 6061-T6 billet aluminum and features an enlarged built-in trigger guard, a type III hard anodized finish, and milspec compatibility.
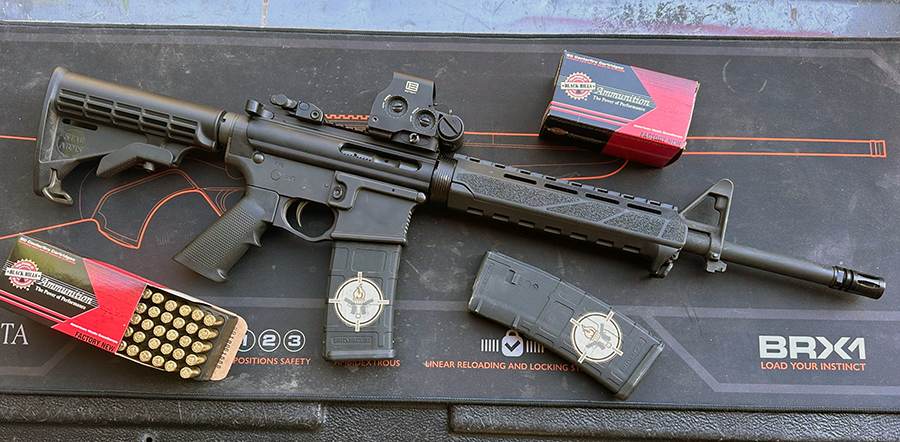
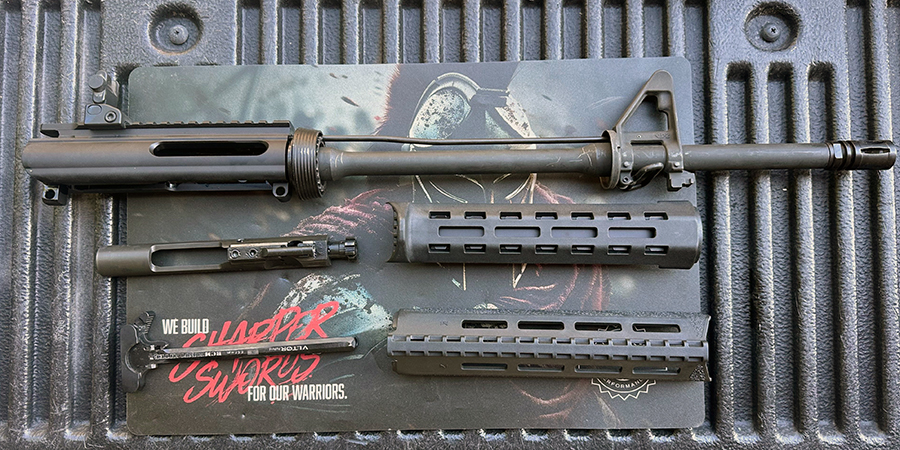
I’ve had the upper receiver for a year or two as well. It came from Luth AR and is their Lo-Drag Upper, as in high speed, lo-drag. The upper is also made from 6061-T6 aluminum. It’s hard coat anodized black with a flat-top Picatinny rail. It’s a minimalist design, without a forward assist or dust cover.
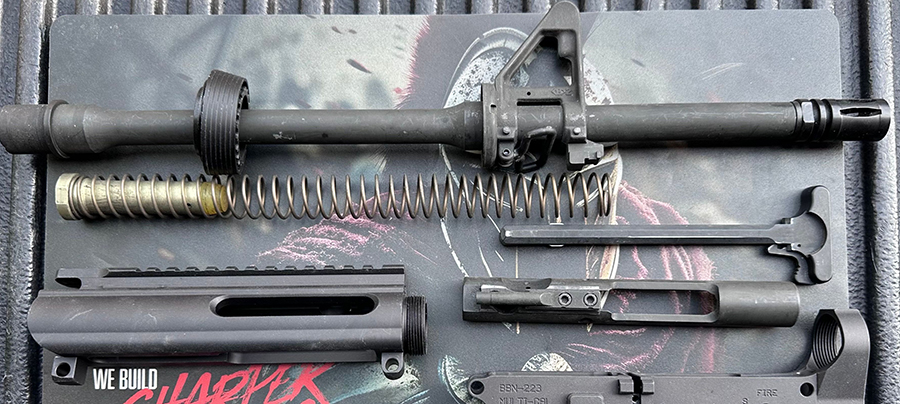
As for the barrel, it was sitting in the display counter in a local pawn shop looking lonely with a price tag on it that I couldn’t pass up. The 16-inch barrel was also set up for a mid-length gas system, yet one more reason to grab it. I should mention that the barrel is marked “5.56 NATO 1:7.”
This wouldn’t be the first AR-15-style rifle that I’ve put together and as such, I have more than one clear plastic tote filled with miscellaneous gun parts. After I made the mental commitment to build a rifle during the week of the 4th of July celebration, my first step was to lay out all of the parts on my work bench.
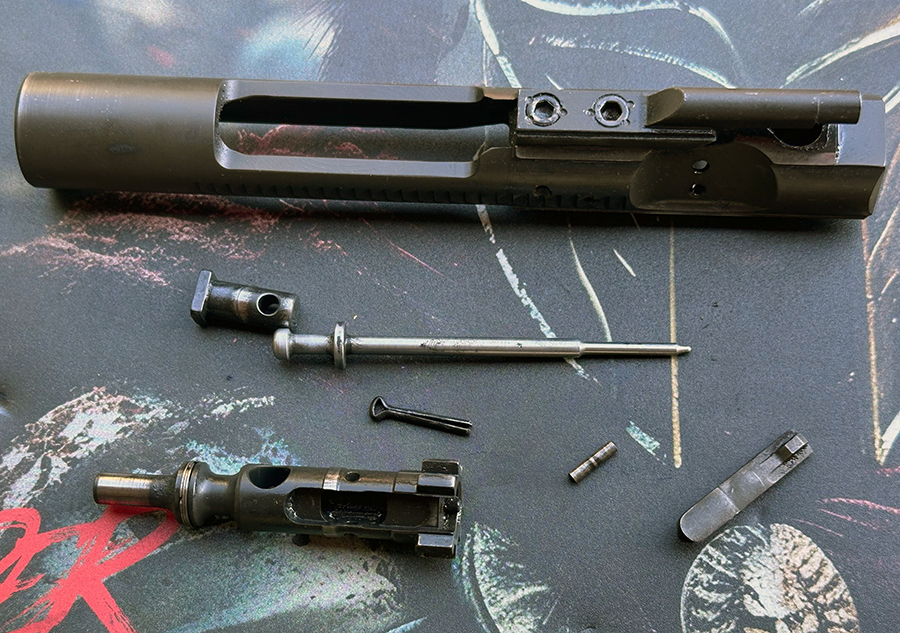
In addition to the aforementioned components, I had an M4-style buffer tube, buffer and buffer spring, a Bravo Company charging handle, bolt carrier, and a ziplock bag containing detent pins, springs; large and small, AR pivot pins and takedown pins.
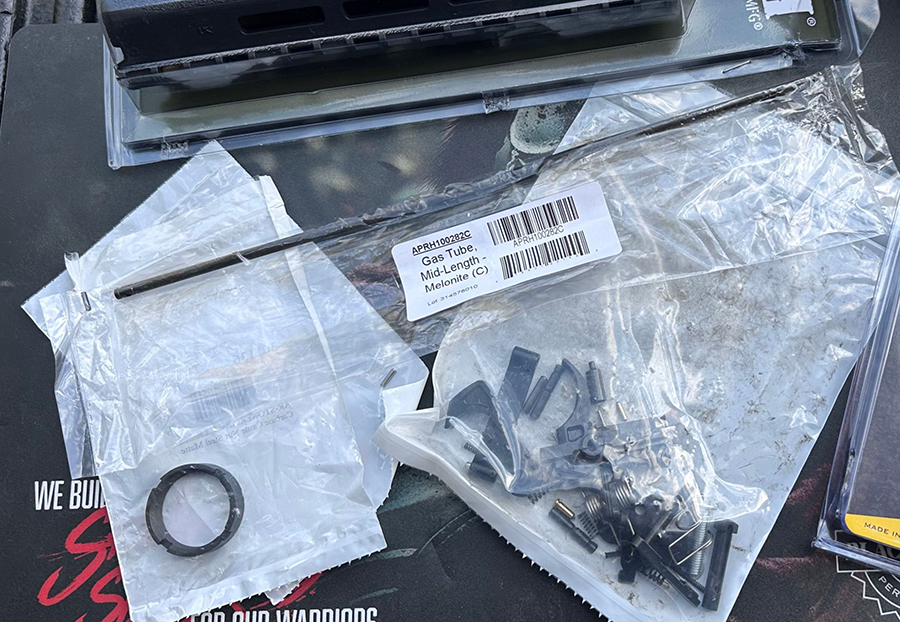
I was a bit surprised at myself to find that I didn’t have every part I needed to complete the build. I knew that I was going to need a mid-length gas tube and the pin to secure it. Additionally, I couldn’t find a spare castle nut, bolt catch or magazine release assembly.
Fortunately, Midway USA happened to be running a sale and I saved money on all of those parts. I had the bolt-carrier, firing pin, FP retaining pin and cam pin, but did not have a bolt. Midway had a milspec bolt on sale and boom! Hat tip to Midway for getting the parts shipped out quickly.
Additionally, I had full length and short handguards, but not a mid-length set. Once more, I found a BCM version on sale also at Midway. Regarding M4 retractable stocks, I have more than one in the aforementioned totes along with innumerable pistol grips.
Tools
If you’ve never assembled your own AR-15 rifle, it’s not difficult. However, there are some specialty tools that you will want to pick up to make your life easier.
Most of my tools came from Brownells and the first one I’m going to recommend is their pivot pin installation kit. I didn’t have that tool for my first build and lost two of the tiny springs. If you’re not a fan of searching for tiny springs or buying a lot of them, grab that tool.
You’ll need an AR armorer’s wrench to seat the barrel nut and the castle nut properly. If you’re using a pre-made upper, you can get away with just the castle nut wrench. Nonetheless, it’s never a bad idea to have a good AR armorer’s wrench on your tool bench. I have two.
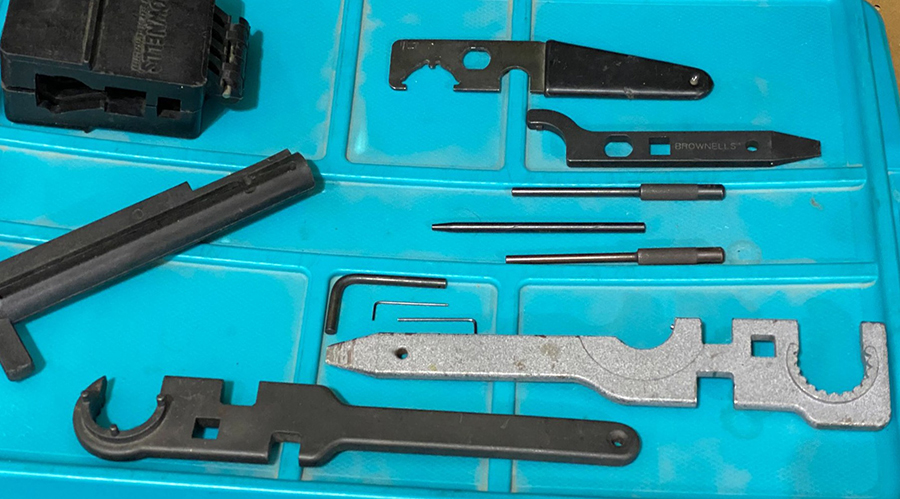
There are a few roll pins that you are going to be required to seat meticulously. Dedicated roll pin punches are another good idea. You can get away with a standard punch, but dedicated tools make life easier. Ditto for the punch to install the gas tube retaining pin. Naturally, a plastic or rubber mallet is a must have as well.
Of course, one of the most valuable resources from the Brownells website is their Trigger Times blog section. Caleb is the man! There you will find dozens of professionally produced tutorial videos. No need to scroll YouTube hoping to find a guy that actually knows what he’s talking about. Also, if you buy parts from Brownells and find yourself stuck, you can call and be connected with an actual gunsmith who can answer your questions.
Assembly
My first task was to affix the barrel to the upper receiver. Regarding the 16-inch barrel, as mentioned, it was used (in good condition) with the barrel nut and delta ring assembly included as well as a milspec A2 front sight housing already pinned in place. I used a Brownells upper receiver vise block kit to hold the upper in place while I used my armorer’s wrench to tighten the barrel nut. I made sure to use threadlocking compound on the receiver threads.
The next step would be installing the gas tube. This isn’t all that difficult if you have the dedicated roll pin punch. The tiny roll pin that holds the gas tube in place in the front sight housing can be a bear to work with if you don’t have said punch. With the punch, it takes about thirty seconds once the holes in the gas tube are lined up with the hole in the gas block / front sight housing.
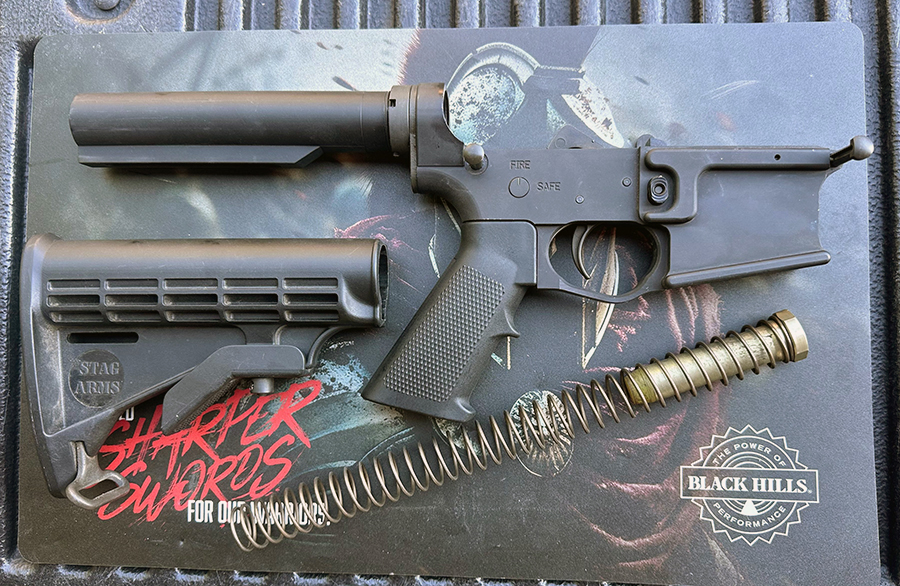
For the lower receiver, the way I was taught to assemble a completely stripped version was to install the magazine release mechanism first, then the bolt catch, then the pivot pin. I didn’t need to install the trigger guard as it was built onto the receiver.
Next you have your trigger assembly with the manual safety. The pistol grip needs to be installed for the safety detent and spring to be held in place. The trigger I used is a rock solid milspec version. Again, if you have never put together a milspec trigger assembly, take the time to watch the tutorial video first. It’s not that hard, but you need to do it correctly.
With all of the parts in your lower, it’s time for the takedown pin with the detent and spring. With the castle nut and back plate on your buffer tube, hand thread it until you reach the hole for the buffer retaining pin and spring. Now drop the spring in the hole and put the buffer retaining pin on it.
Next you will need to depress the retaining pin and one more revolution of the buffer tube should be enough to hold it in place. Now you will rotate the back plate a couple degrees to expose the hole for the take down pin detent and spring.
The takedown pin goes in first, then the detent and the spring. I suggest using a small flathead screwdriver to compress the spring so it is flush with the back of the receiver. *Caution: if you let the screwdriver slip, that spring will launch into outer space. Swiftly pivot the back plate over the compressed spring and hold it down while you thread the castle nut down with your fingers. With the castle nut flush, return to your vise block and use your armorer’s tool to tighten the castle nut. Most AR armorers will then stake the castle nut in place.

With all that completed, I now had to attach the handguards, insert the buffer and spring, slip the retractable stock over the buffer tube and then insert the charging handle and bolt carrier assembly. Finally, I performed a mechanical function check on all of the moving parts and was ready for range testing.
Range Time
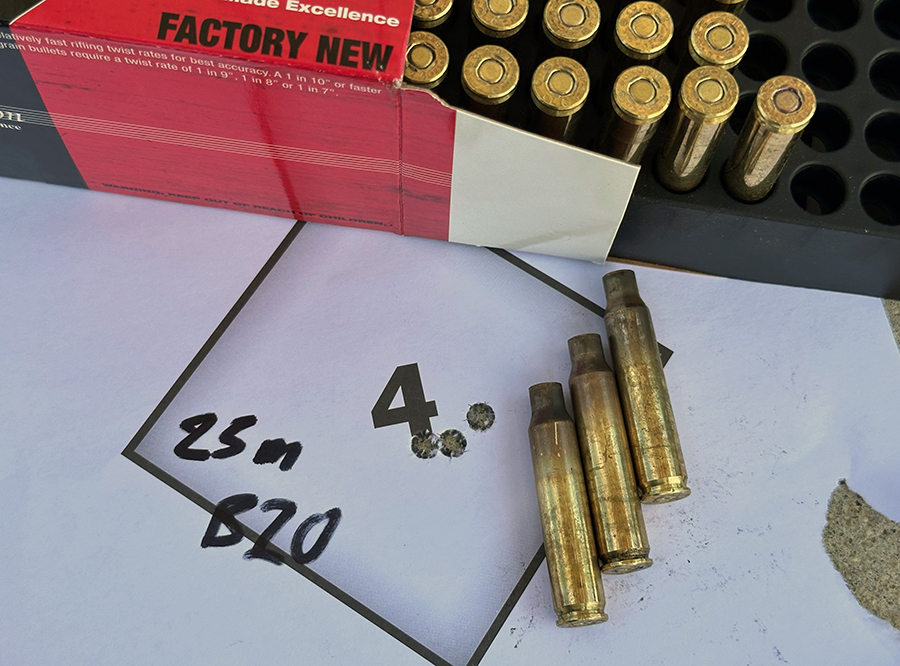
I had a fold-down/flip-up back-up rear sight in my box of parts. The rear sight does not have a company name on it and I don’t recall who made it. The front sight is standard A2, so elevation adjustments would be front sight with windage adjustment on the rear sight. I decided on a 25 meter BZO for the iron sights. The best loads for a 1/7 twist AR barrel are those in the 69 to 77 grain range. I used Black Hills 77 grain Mk262 OTM.
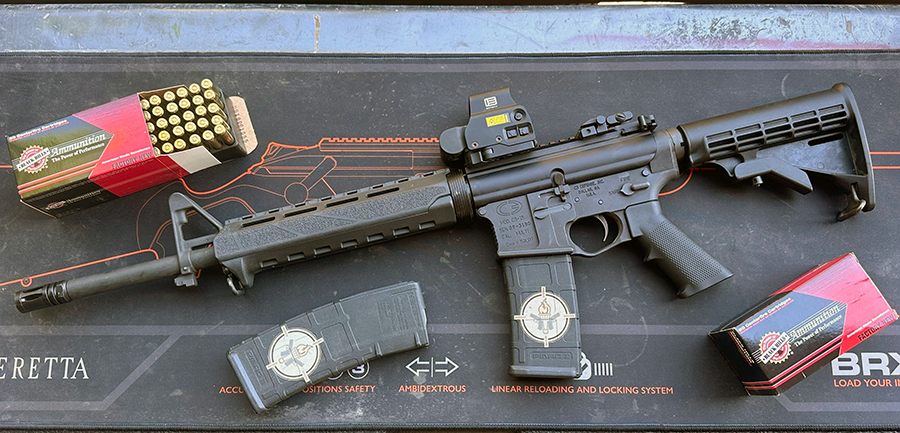
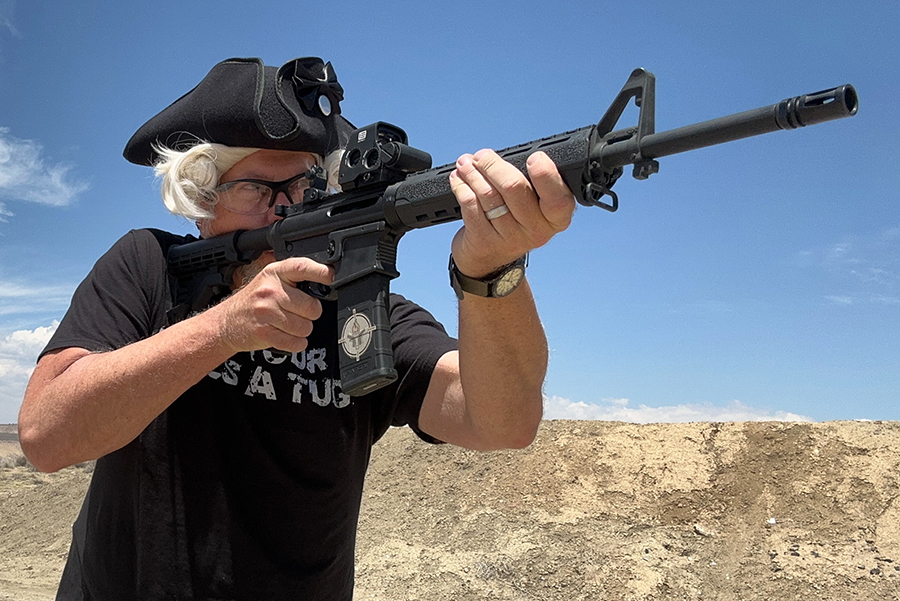
With irons zeroed, I mounted an EOTech, Inc. EXPS3 holographic weaponsight. Rough zeroing was easy as I just put the 1 MOA center reticle dot right over the tip of the front sight post. As with the iron sights, I BZO’d the optic for 25 meters as well. The iron sight BZO took about eight to ten rounds and so did the EOTech optic. My three-shot BZO confirmation posted a nice ½ inch group.
The July sun was cooking up here in the mountains as I tested my new rifle, but I persevered. I am pleased to report that the rifle functioned as well during moving and shooting drills as it did from the bench. While I was just getting started, I needed to return to the typewriter to complete this review before July 4th was over.
I suppose that a rifle built for the 250th Anniversary of the United State of America should have a name. Rather than Charlene, I decided upon Madison…as in James. James Madison didn’t fight in battles during the Revolutionary War due to chronically poor health. Nonetheless, he served the American patriot cause in a vital political capacity.
He helped draft the Virginia Constitution in 1776, served as a key advisor to Governor Thomas Jefferson, and was elected as the youngest delegate to the Second Continental Congress in 1780. The fourth President of the USA, Madison also took enemy fire during the War of 1812. His wife, Dolley, was no slouch herself and is credited with saving the iconic portrait of George Washington when the evil British burned the White House.
Happy Independence Day to you all.
Paul G. Markel is a combat decorated United States Marine veteran. He is also the founder of Student the Gun University and has been teaching Small Arms & Tactics to military personnel, police officers, and citizens for over three decades.
“Most AR armorers will then stake the castle nut in place.”
But remember to torque it to spec first – its 35-40 ft-lbs and not ‘just tighten it till its flush’ or “snug” or “as tight as you can get it.”