
Burning gunpowder is a dirty process. Just as soot and creosote build up inside your chimney, carbon fouling, residue, debris, copper, lead, and other gunk will build up over time inside your suppressor. Yes, even centerfire rifle suppressors will often accumulate buildup over time.
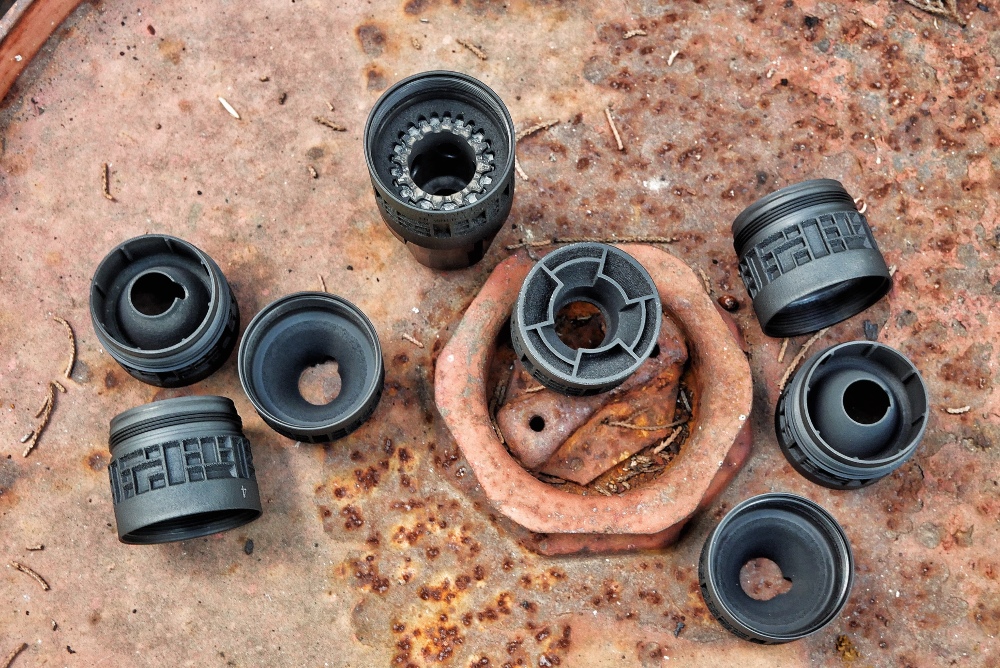
Needless to say, these deposits inside your suppressor baffles will begin to consume more and more of the internal air volume of your silencer. That reduces its efficiency. After a few thousand rounds, not only will your silencer begin to get louder because of this, but it’ll get heavier, too!
Generally speaking, high-temperature, high-pressure rounds like centerfire rifle rounds burn the cleanest and therefore silencers used with them will require the least frequent cleaning. Depending on design and caliber, it’s possible that some centerfire rifle silencers effectively never need internal cleaning. Centerfire pistol rounds are next on the clean<>dirty spectrum, followed by rimfire rounds like .22 LR, which are notoriously dirty.
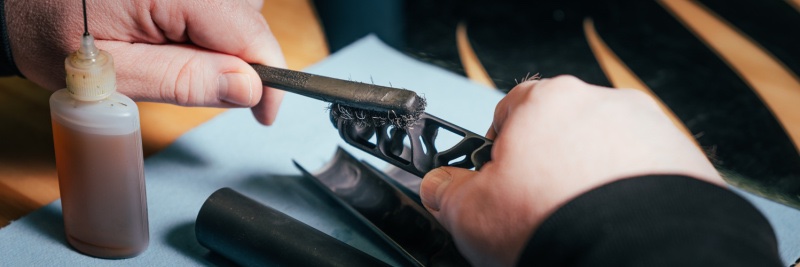
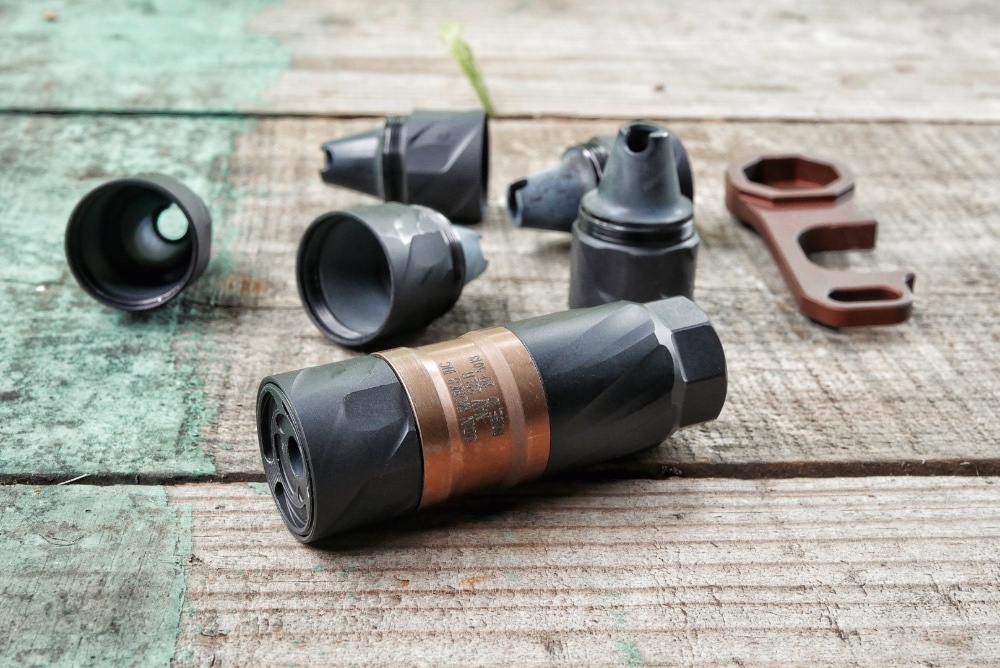
With a modular suppressor it’s quite easy to determine if cleaning is necessary. Simply disassemble a baffle(s) and have a look inside. Dirty is fine, but buildup should be addressed.
With a fully-welded (or otherwise sealed) suppressor, where you have no visual or physical access to the inside of it, weighing it and comparing current weight to as-new weight is often the most reliable indication that there’s excessive buildup inside, as sound suppression degradation due to buildup happens gradually over time and is, for that reason, hard to notice.
So…let’s clean!
First, be careful!
Cleaning firearms, especially barrels and suppressors, is highly likely to expose you to lead, which is toxic. If you dissolve lead into a cleaning solution, it’s even more toxic and can be rapidly absorbed through skin and mucous membranes. Wear nitrile gloves, safety glasses, and other personal protective equipment, and always dispose of used cleaning solutions properly. Seriously, dissolved lead is extremely dangerous to you and to the environment.
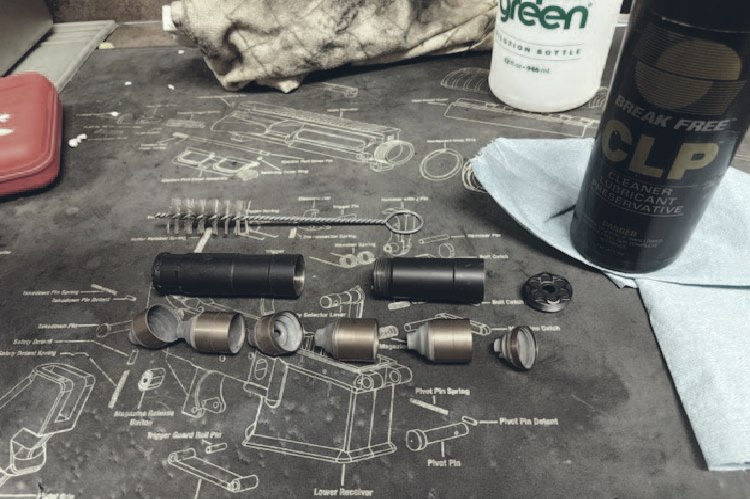
The simplest way to clean your suppressor is by soaking (yes, fully submerged with air purging is the ideal scenario) each of its components in CLP (“clean, lube, protect”) or other cleaner/solvent designed for firearms. In particular, any solution that’s good at cleaning carbon deposits should be at the top of the list. Plus, if it’s capable of cleaning copper and lead fouling, that’s even better. Most CLPs will do this, though many barrel bore cleaning solutions are even better.
Soak at least overnight or for 24+ hours and the majority of carbon and other deposits will dissolve and wipe right off. In the case of a fully-welded rifle silencer, a long soak will allow much of the gunk inside it to pour out. A couple rinse-and-shake water washes can help. The rest will be soft enough that a trip to the range within a day or two of its spa treatment will blast it right out the business end.
Just make sure to get as much of the liquid out of the suppressor as possible before you shoot it, and don’t get it on your skin or in your eyes, either directly or via blowback from shooting.
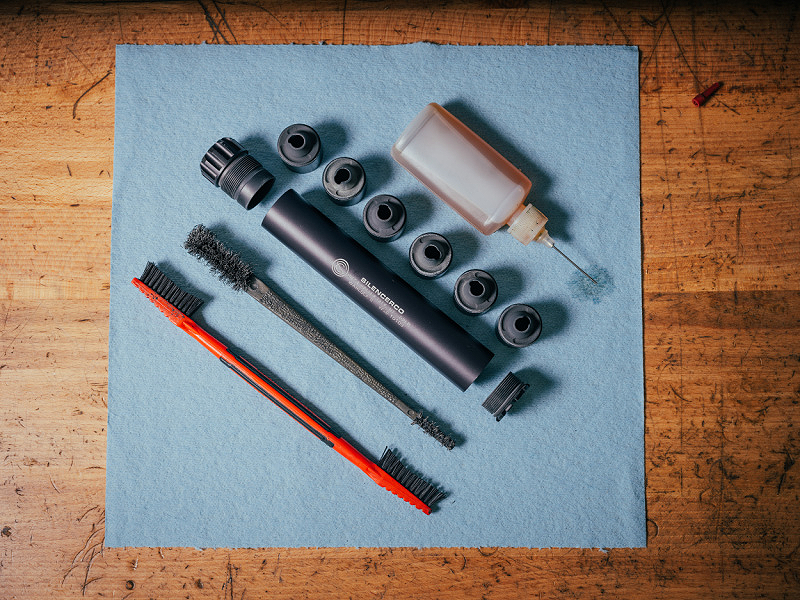
A nylon bristle brush should be used to remove further deposits that don’t wipe off easily.
The above suggestions can be employed on all suppressors and suppressor components, including ones made from aluminum. If your parts are made of titanium, steel, or an exotic alloy such as Inconel, then you can get more aggressive.
One great method is the addition of an ultrasonic cleaner. I used a cheap one from Amazon for a few years with great results. Brownells offers a handful of inexpensive ones plus a few professional grade models. Add the correct amount of ultrasonic cleaning solution to the tank and do the same overnight or longer soak as described above…except do it inside the ultrasonic tank with it running the whole time.
Buildup that would have required extensive scrubbing and elbow grease without the ultrasonic tank washes away cleanly on its own using the tank.
Note that ultrasonic cleaning will eventually remove Cerakote and similar finishes. Anodizing, PVD, nitride, and most other treatments are rarely affected. Ultrasonic cleaning isn’t recommended for aluminum parts as it can degrade the aluminum given sufficient ultrasonic cleaning power and time.
With titanium and steel baffles, manual cleaning can also be a little more aggressive and copper and other soft metal wire bristle brushes can be used as a more serious alternative to a nylon brush. Be mindful of your parts’ finish, though, so you don’t scratch them, and don’t be surprised if a copper/brass bristle brush disappears over time as the solvent you’re using eats away at it…as it’s designed to.
Some pistol caliber suppressors are also rated for use with rifle calibers. In those cases, firing five to 10 rounds of 5.56 through them as rapidly as the manufacturer allows will often burn and blast all of the internal buildup out the front, leaving a deposit-free suppressor behind. Especially if it has already spent a day in the spa.
After cleaning, follow any manufacturer’s suggestions for surface care and lubrication of threads. On most of my suppressors I rinse ’em inside and out a few times with water to remove as much gunk as possible, let them fully dry, then apply a light layer of CLP or dry lube like Hornady One Shot everywhere. Unless the manufacturer says otherwise, I typically also apply a light amount of CLP or oil to any threads before assembly.
Frankly, I think most people clean their suppressors too often. Rimfire silencers can go 500 to 1,000 rounds between internal cleanings, pistol suppressors as many as a few thousand rounds, and rifle suppressors can easily go 5,000, 10,000, or even more without actually requiring internal cleaning of deposits.
The cleaning process itself is fairly simple, of course. Just be sure not to damage your expensive silencer components and treat toxic lead and, especially, lead in solution with the attention and care they deserves.